TL;DR:Struggling with a malfunctioning torch? This comprehensive guide offers fast LED flashlight flickering troubleshooting and a reliable flashlight blinking fix. Learn how to address an Olight blinking red light, perform a physical clean, check connection rings, or discover how to reset flashlight firmware to restore your gear’s optimal performance quickly.
It is a common frustration for outdoor enthusiasts: you are deep into a trail or setting up camp when your reliable light starts to act up. A flickering or blinking beam is not just annoying; in emergency or professional rescue situations, it can be a safety hazard. Whether you are dealing with an LED flashlight flickering troubleshooting scenario or trying to figure out an Olight blinking red light code, most issues stem from basic mechanical or electrical interruptions.
Table of Contents
1. Common Causes of Blinking and Flickering 2. Step-by-Step Troubleshooting 3. When Blinking Is Normal (Not a Problem) 4. When to Seek Professional Repair 5. Conclusion: Most Issues Are Easy to Fix
Common Causes of Blinking and Flickering
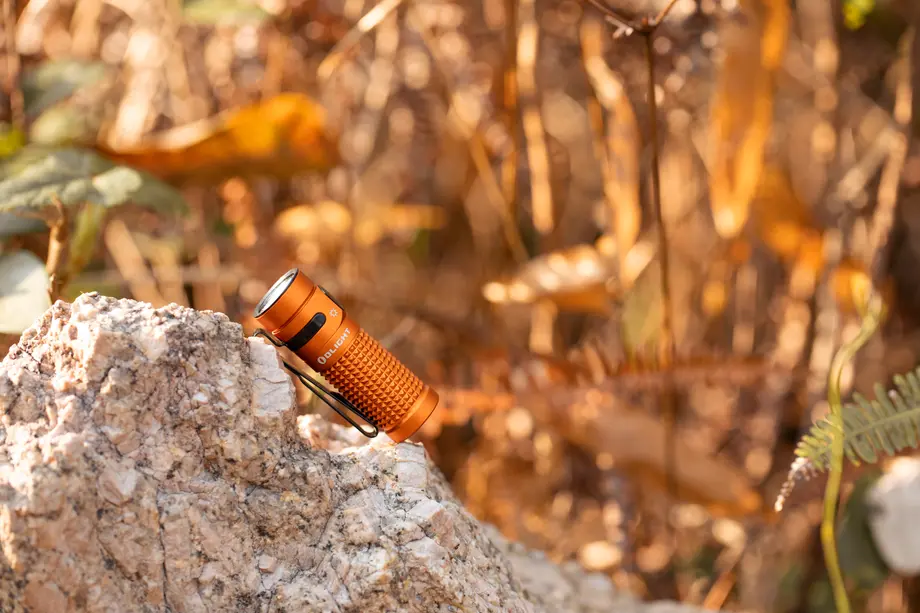
Before picking up tools, it is essential to understand why high-performance lights fail. High-end equipment, such as the Baton 4 Powerful EDC Flashlight , uses sophisticated drivers that react to environmental and internal changes.

Baton 4 Powerful EDC Flashlight
Compact yet powerful EDC flashlight boasting 1,300 lumens max output and 170 meters beam throw. Equipped with metal switch, power & brightness indicators, and optional charging case for ultra-long runtime up to 190 days.
View DetailsLow Battery Warning
Most modern LED drivers include a Low Voltage Protection (LVP) feature. When the battery cell drops below a specific threshold (usually around 2.8V to 3.0V), the light will blink or step down in brightness to alert the user. This is often seen as a rhythmic flash rather than a chaotic flicker.
Poor Battery Contact
Flashlights are subject to vibration and impact. Over time, the contact points between the battery terminals and the flashlight's internal springs can become oxidized or coated in dirt. Even a microscopic layer of debris can increase resistance, leading to an inconsistent current flow that manifests as flickering.
Thermal Step-Down
If you are running a light on "Turbo" mode for extended periods, the internal temperature climbs rapidly. To protect the LED and the circuitry, the light will automatically reduce output. In some models, if the heat is extreme, the light may pulse as a warning before shutting down.
Loose Connection
The internal components of a flashlight are typically held together by threaded retaining rings. The tail cap and the head of the light contain "retaining rings" that keep the switch and the driver in place. If these rings loosen due to daily carry or drops, the electrical circuit is no longer secure.

Mode Memory Issues
Advanced UI (User Interface) systems can occasionally experience "glitches" where the software logic becomes stuck between modes. This can cause the light to flicker as it attempts to access a brightness level it cannot sustain.
Step-by-Step Troubleshooting
If your light is acting up, follow these steps in order. This process moves from the simplest solutions to more technical mechanical fixes.
Step 1: Check and Replace Batteries
Always start with the power source.
- Voltage Check: Use a multimeter to ensure your battery is fully charged. If you are using a protected 16340 or 18650 cell, ensure the protection circuit has not tripped.
- The Swap Test: Replace the current battery with a known-working, high-discharge cell. If the flickering stops, the original battery has reached the end of its life cycle or has high internal resistance.
- Olight Specifics: If you see an Olight blinking red light on the indicator, this is almost always an indication that the battery is below 10% power.
Step 2: Clean Battery Contacts
Electricity requires a clean path.
- Alcohol Cleaning: Use a cotton swab dipped in Isopropyl alcohol (70% or higher).
- Target Areas: Clean both ends of the battery, the positive contact point on the driver (head), and the spring in the tail cap.
- De-oxidation: If you see dark spots on the contacts, use a pencil eraser to gently scrub the oxidation off before wiping with alcohol.
Step 3: Inspect Springs and Connections
A loose tail cap is the most common cause of a flashlight blinking fix.
- Tighten the Body: Ensure the head and tail cap are screwed on tight. High-performance lights often have anodized threads, meaning the electrical connection only happens at the un-anodized "ends" of the tubes. Even a quarter-turn of looseness breaks the circuit.
- Check Retaining Rings: Look inside the tail cap and the head. You will see a brass or silver ring with two small holes or notches. Use a pair of fine-tipped needle-nose pliers or a spanner wrench to ensure these are tightened clockwise. A loose ring in the tail cap is a frequent culprit for flickering during movement.
Step 4: Check for Firmware or UI Issues
Many enthusiasts ask how to reset flashlight firmware when their UI becomes unresponsive. While most EDC lights do not have a "USB flashable" firmware, you can perform a hard reset.
- Mechanical Reset: Unscrew the tail cap, wait for 30 seconds to allow the capacitors on the driver to fully discharge, then screw it back on while holding the power button. (Note: Specific sequences vary by brand).
- Lockout Mode: Ensure the light isn't simply in "Lockout" mode, which often causes the light to blink once or twice when the button is pressed to indicate it is locked.
Step 5: Test for Overheating
If your light only flickers after 2-3 minutes of use, it is a thermal issue.
- Check the environmental conditions. High-output lights like the Baton 4 generate significant heat.
- Ensure the thermal paste between the LED star (MCPCB) and the body hasn't dried out (this is for advanced users only).
When Blinking Is Normal (Not a Problem)
Sometimes, the blinking isn't a bug—it's a feature.
Low Battery Indicators
As mentioned, a rhythmic flash usually means you need to charge your device. For a clip-on running light, this is a safety feature to ensure you aren't left in the dark mid-run.
SOS and Beacon Modes
Ensure you haven't accidentally entered a hidden mode. Many lights use a "Triple Click" or "Click-Click-Hold" to enter strobe, SOS, or beacon modes. If your light is blinking consistently every few seconds, you are likely in Beacon mode.
Charging Status
When using magnetic charging, a blinking light on the charger usually indicates a poor connection or that the tail cap needs to be cleaned to allow the magnet to seat properly.
When to Seek Professional Repair
If you have cleaned the contacts, tightened the retaining rings, and swapped the battery, but the flickering persists, the issue might be internal:
- Damaged Driver: If a component on the circuit board has desoldered due to heat or impact, it requires professional reflowing.
- Water Ingress: Check your light's rating. Understanding IPX4 vs IPX7 vs IPX8 is vital. IPX4 is only splash-proof. If you submerged an IPX4 light, water may have entered the head, causing a short. An IPX8 light, like the Baton 4, is rated for 2 meters of immersion, making it much more resilient.
- LED Failure: If the "phosphor" on the LED looks burnt or brown, the LED itself is failing and needs replacement.
Conclusion: Most Issues Are Easy to Fix
In 90% of cases, LED flashlight flickering troubleshooting concludes with a simple cleaning of the threads and tightening of the tail cap. High-performance tools require basic maintenance to function under the pressures of outdoor adventure.
If you are looking for a reliable EDC light that minimizes these issues through superior build quality, consider a robust option like the Baton 4 Powerful EDC Flashlight. It features a new metal switch designed for durability and microperforated indicators that remove the guesswork from battery levels. By keeping your contacts clean and your batteries charged, your light will remain a dependable partner in the wild.