


⚡ TL;DR
A lantern for a power outage should support the place where people are staying while another light remains available for moving around. A compatible diffuser can give an existing flashlight a shared-light role. Keep access to its controls, choose a published mode for the task, and arrange a separate light for the person who leaves the table.
📋 Table of Contents
- 1. What is the best source of light during a power outage?
- 2. Match the Diffuser to the Exact Flashlight
- 3. Use Ceiling Bounce With a Clear Light Path
- 4. Keep Shared Table Lighting Separate From Moving Light
- 5. Choose a Clip or Hanging Position for a Specific Task
- 6. Read Output and Runtime Together
- 7. Prepare the Controls Before the Room Goes Dark
- 8. What are the top five items you should have if you lose power?
- 9. Keep Charging Plans Tied to the Actual Connection
- 10. When Does a Separate Lantern Add Something Useful?
- 11. What Can I Use for Light in a Power Outage?
- 12. FAQ
What is the best source of light during a power outage?
For people staying around a table, choose a stable shared light that leaves the working surface and its controls accessible. Keep a separate portable light for walking to another room. A diffuser-equipped flashlight can serve the first role, while a pocket or clip light serves the second. The useful combination depends on who needs to move and what must remain illuminated.
| Household job | A documented option | What to check before assigning it |
|---|---|---|
| Shared table or stationary gathering place | Marauder Mini 2 with the compatible Marauder Mini Series Lampshade | The lampshade is a separate accessory. Leave room for the complete light and access to its controls. |
| A light that can leave the table with one person | Standard ArkPro | Select the appropriate white-light output and keep the light available to its user. |
| Close work with both hands occupied | Oclip Ultra | Check the clip, hanging point, or magnetic contact in the actual working position. |
Start with the job that stays in one place. If everyone is eating together, moving that light every time someone opens a cabinet interrupts the whole group. If one person is gathering supplies, a light attached to that person's clothing follows a different route from a light serving the table. Those are separate requirements even in a small home.
The broader choice between handheld, stationary, and head-worn formats is covered in emergency flashlight vs lantern vs headlamp. For this setup, the next decisions concern the diffuser, the supporting surface, and the route each person will take.
Match the Diffuser to the Exact Flashlight
The Marauder Mini Series Lampshade is specifically listed for Marauder Mini 2 and the original Marauder Mini. Its published dimensions are 63 millimeters in diameter and 115 millimeters high, and its material is white polypropylene board. The product listing supplies a concrete compatibility boundary. A similar-looking head or a smaller light body does not establish another fit.
The accessory package contains the lampshade only. The flashlight shown with it is sold separately. If a household already owns the compatible light, the accessory adds a different way to arrange that equipment. If neither item is owned, compare the complete purchase and the intended use of the light outside an outage before choosing the combination.
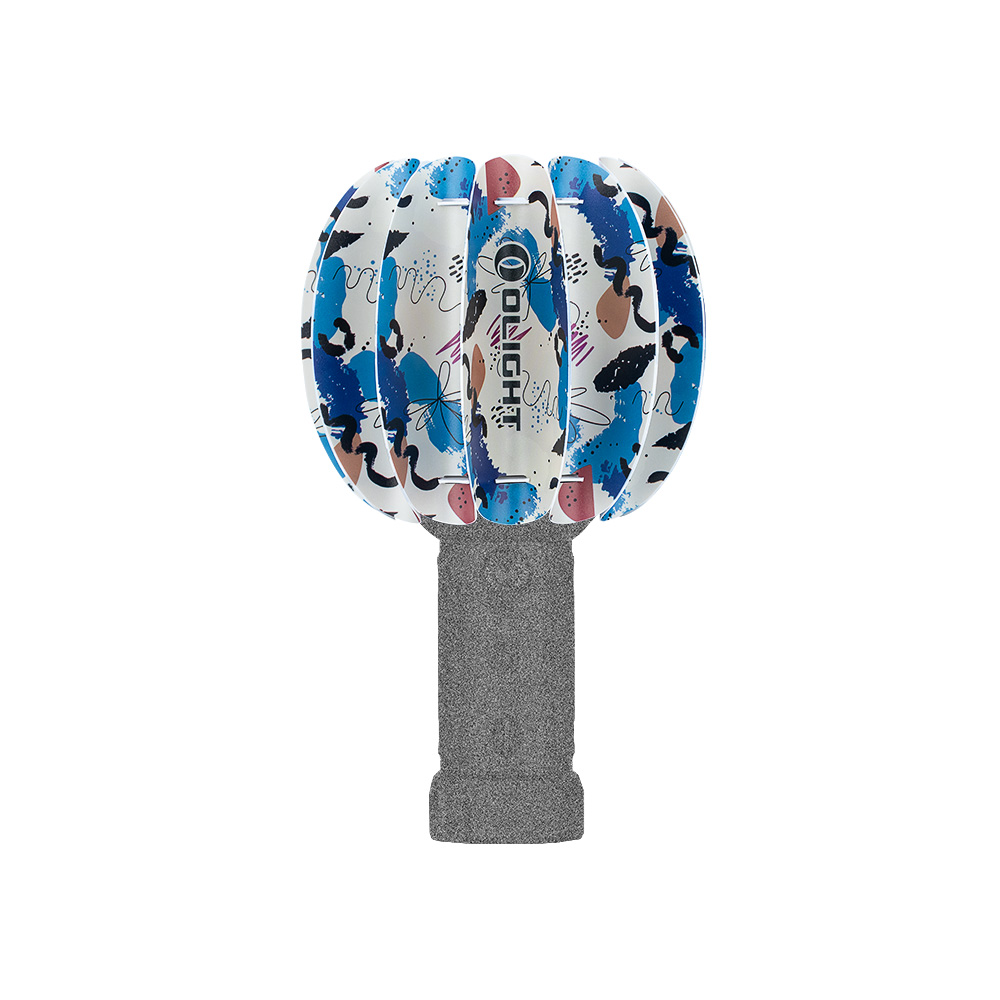
Official lampshade listing image. The accessory package includes the shade only.
Give the complete assembly a place before clearing space for food, a radio, or a phone. Marauder Mini 2 weighs 465 grams including its battery. Its body and the additional shade require a different footprint from a small clip light. A narrow shelf edge or a crowded corner of a table may leave the controls awkward to reach even when the assembly appears to fit.
Keep the light outlet clear according to the applicable instructions. The published compatibility of this accessory does not extend to a bottle, a fabric cover, or a different piece of plastic placed over another light. ArkPro's manual specifically warns against covering the light outlet at close range and against putting a hot light in a fabric bag or fusible plastic container.
For a shared gathering place, select a location where one person can change the output without leaning across plates or moving the whole assembly. If a phone, pitcher, or supply box is placed between the light and a task, move that obstruction or reconsider the position. Increasing output leaves the physical obstruction in the same place.
Use Ceiling Bounce With a Clear Light Path
Ceiling bounce directs the beam toward an overhead surface so reflected light can reach the occupied area. It gives an existing light another placement option when a direct beam points into people's normal view. The ceiling, the direction of the beam, and the location of the people all become part of the arrangement.
Check the view from the seat or standing position where the light will be used. A beam aimed overhead may still be visible directly to someone across the table. A low shelf, hanging decoration, or open cabinet door can intercept it. Choose a position that leaves the light outlet unobstructed and lets a person reach the controls without putting a hand in front of the beam.
Try the intended task at the position where it matters. Reading a label at one end of a table and finding a dropped object near the floor present different views. If an object remains hard to see, a separate task light may be easier to place than a shared source that must serve everyone. Avoid treating one successful view as a promise about the entire room.
Ceiling bounce also consumes the same light that someone might otherwise carry away. If the overhead beam is providing shared illumination, designate another device for a trip to the hallway or storage area. Keep the supporting surface clear of items that will be moved repeatedly, such as a bag that doubles as the place where supplies are collected.
Keep Shared Table Lighting Separate From Moving Light
Arrange the table around the activity that will continue there. During a meal, the serving area and the places where people set cups are the immediate priorities. During a board game or paperwork, the relevant view is the actual playing or reading surface. Place the light where its body, cable, and controls can remain outside those repeated hand movements.
A portable flashlight can then remain with the person who is moving. Standard ArkPro offers separate Pure Flood and Spot white-light selections. Its specified maximum Pure Flood output is 1,500 lumens, while the spotlight maximum is 800 lumens. These are different beam options within the standard model, and the shared ArkPro family page also contains other models with different specifications.
For a nearby cabinet or a broad section of a shelf, consider the extent of the task before choosing the white-light selection. A small label at the back of a compartment may call for a different direction from the front surfaces of several containers. Move your hand and the light together as access changes, keeping the beam away from the faces of people still at the table.
Decide where the portable light returns when its user comes back. Put it within that person's reach while leaving the shared light in place. If two people will move independently, a single portable device still requires a handover. That may be acceptable for occasional trips, but it should be a deliberate choice rather than a surprise after the second person has already left.
In a bathroom or other room where water is present, choose a dry place for the light and its charging equipment. Leave room to operate the faucet, open the door, and reach the needed supplies. Oclip Ultra's manual instructs users not to immerse the product in water or other liquid. A water-resistance rating should be read with those handling instructions.
Choose a Clip or Hanging Position for a Specific Task
Oclip Ultra provides a clip, a magnetic attachment option, and a hanging loop. These give a small light several possible supporting points. They also make the support part of the lighting decision. A clip on clothing moves with the person, while a hanging point on a fixed support leaves the light in the room when that person steps away.
Use a clothing position where the beam can reach the object without being covered by a sleeve or the edge of a bag. When you bend to reach a lower shelf, the light changes direction with the garment. Check that position as well as the upright one. If the beam moves off the task, changing the attachment point may help more than changing brightness.
For magnetic placement, check the actual contact and the route of the hands doing the work. An open door, a moving metal panel, or an object that someone will pick up introduces movement into the support. Keep a separate plan for the light if that supporting object needs to change position. The published attachment feature supplies no universal holding guarantee for every household surface.
A hanging position needs a suitable support and a clear path below it. Keep the device accessible for switching and retrieval. Avoid making a walking route or a frequently opened storage area depend on a loose cord that people must step around. The hanging loop on a clip light is a different arrangement from suspending a much heavier flashlight-and-shade assembly.
If the task involves reaching around objects or opening a compartment, the task light placement guide develops those changing working positions in more detail. Check the light from the position your hands will actually occupy before settling on a support.
Oclip Ultra's clip is magnetic, and its manual calls for cleaning metal powder from the clip surface because that material can affect its function. A light kept near household tools may need this check before attachment. The same manual notes that strong nearby magnets can affect the magnetically sensitive switch. Assess the support and the controls together.
Read Output and Runtime Together
Published output levels help narrow the choice after the light has a defined job. A close task, a stationary shared position, and a brief search do not automatically need the same setting. Read the exact beam and mode alongside its runtime. On lights with several white-light configurations, the level number alone may not identify the output you intend to use.
| Model and exact published selection | Output | Published runtime |
|---|---|---|
| Standard ArkPro, Pure Flood Medium | 100 lumens | 13 hours |
| Standard ArkPro, Pure Flood Low | 15 lumens | 72 hours |
| Marauder Mini 2, floodlight L1-2 | 150 lumens | 27 hours |
| Marauder Mini 2, side light L1 | 5 lumens | 10 days |
| Oclip Ultra, white floodlight Low | 10 lumens | 27 hours |
These entries describe the named settings in Olight's published specifications. They do not give the illuminance at a particular seat or tell you which output will make a printed label readable in your home. Choose the position first, then increase output only as the actual task requires. Leave access to a higher level for a task that genuinely needs it.
Read stepped output as a sequence. Standard ArkPro's Pure Flood Turbo is listed at 1,500 lumens followed by 520 lumens, with corresponding stages of 4 and 140 minutes. That row does not describe 144 minutes at 1,500 lumens. For a prolonged stationary activity, a lower setting with a simpler published duration can be easier to compare with the expected length of the activity.
Marauder Mini 2's manual describes its reference tests as performed indoors at 25 degrees Celsius in windless conditions under the stated FL 1 standard. It also notes that external temperature and ventilation can affect runtime. Keep those conditions with the reference figures, particularly when comparing a light brought in from a cold storage area with one already at room temperature.
Prepare the Controls Before the Room Goes Dark
Choose the intended white-light selection while the controls can be seen clearly. On ArkPro, rotating the selector chooses the lighting function. With the appropriate white-light selection active, a single press of the center button turns the light on or off, and holding that button while the light is on changes brightness. The separate laser control has no role in the household arrangements described here.
Marauder Mini 2 has separate selections for white light, red light, and side light, plus a white-light mode selection for flood, spot, or their combination. Switching from red or white to side light defaults to side-light L1. After switching side light off, restarting within ten seconds restores its previous brightness, while a longer interval resets it to the default level.
That starting behavior matters when the device is shared. A person expecting the earlier side-light setting may get the default after a longer pause. Give the next user the mode name and the control needed to adjust it. A short explanation tied to the device is more practical than asking someone to remember every available lighting configuration.
Marauder Mini 2 also automatically locks after it has been off for ten seconds without operation. Its default unlocking method uses a rotation of more than 60 degrees. Confirm the actual unlocking method configured on the household's light before assigning it to someone else, since the manual also describes an alternative press-and-hold method.
For Oclip Ultra, select white flood or spot with its selector and use the button for on and off. Holding the button while white light is on cycles Low, Medium, and High. Its manual describes memory for Moonlight, Low, Medium, and High, with Turbo remembered as High. Keeping the selected function consistent makes a brief task easier to resume.
What are the top five items you should have if you lose power?
Five useful groups to prepare are drinking water, food that does not depend on powered cooking, battery lighting with its spare power, a battery or hand-crank radio, and personal essentials such as first-aid supplies and necessary medication. These groups organize a longer emergency list around an outage. Adjust the contents for the household and the expected interruption.
The American Red Cross emergency kit checklist includes water, nonperishable food, a flashlight, extra batteries, a battery or hand-crank radio, first-aid supplies, medication, and phone charging supplies. Keep the items people will actually need accessible together. A light left inside an inaccessible box cannot help locate the rest of that box's contents.
Separate powered supplies by their connections when preparing the lighting portion. A USB-C cable, a magnetic charging cable, and spare batteries for a radio are different items. Place the correct cable or battery type with the device it supports. Check that a planned backup power source has the connection needed for that device before relying on it during an outage.
Keep Charging Plans Tied to the Actual Connection
Standard ArkPro supports USB-C and magnetic charging. Its shared manual lists a full-charge time of 1.5 hours through USB-C and 3 hours through MCC for ArkPro. It also instructs users not to use the product while charging. If that light is assigned a moving or shared-light job, another light needs to cover the job while it charges.
Marauder Mini 2 includes a USB-C charging cable that also serves as a wrist strap. Its manual lists USB-C input at 5 volts and 2.5 amps and about 3.5 hours to a full charge. The optional MCC3 cable is a separate purchase. Having magnetic-charging support on the light does not mean that magnetic cable is included with the standard package.
Oclip Ultra uses USB-C charging. Its manual lists a 5-volt, 1-amp input and approximately 1.5 hours to charge. During charging, High brightness and higher levels are unavailable. That leaves a different operating boundary from ArkPro's instruction against use while charging. Follow the condition for the specific device being used.
Prepare a place for charging that keeps the port, cable, and device accessible. ArkPro's manual calls for a clean, dry charging port, and Oclip Ultra's instructions call for closing its dust cover when the port is unused. Leave enough room to unplug the cable without moving the shared table light or pulling a nearby item off the surface.
If the same power source must also charge a phone, decide which device needs charging first and which light will remain available during that interval. The phone's remaining charge and the available lighting jobs can lead to different priorities. Keep the charging queue separate from the arrangement of lights currently serving people.
After power returns, restore the lights before putting the supplies away for a long interval. Both ArkPro and Oclip Ultra specify a full charge before long-term storage. Oclip Ultra also calls for locking the product during carrying or transport. Make the storage location accessible for that recharge and lockout sequence. A device returned to a closed supply pouch immediately after use may miss the preparation needed for its next assignment.
When Does a Separate Lantern Add Something Useful?
A separate camping lantern becomes worth considering when the fixed-light job would otherwise prevent an existing flashlight from doing another necessary job. A household that regularly keeps a light at a table while someone works elsewhere has a recurring need for two independently available sources. A household that already has both may only need the compatible accessory or a better placement.
Compare the complete setup you will handle. A flashlight plus a separate shade involves two items to bring out and put away. A dedicated stationary light may simplify that process, but its actual controls, power requirements, and carrying arrangement still need checking. Use the features of the specific product under consideration instead of assuming that every lantern has the same base, hanger, charging input, or light distribution.
The frequency of use also changes the purchase decision. A light that already serves other household tasks may justify a compatible shade without needing another complete device. If one person takes that same light away regularly, a separate stationary source preserves the shared position. Include the light's ordinary role between outages when choosing which device should remain available to whom.
What Can I Use for Light in a Power Outage?
Use the battery-powered lights already available according to their documented functions. A compatible shade gives Marauder Mini 2 a stationary option, standard ArkPro supplies portable white flood or spot light, and Oclip Ultra can support a close task from a suitable clip, magnet, or hanging point. Assign each device to a place or person before adding another accessory.
If only one light is available, choose where its light is needed at that moment and plan how it will move with the user. Clear the route and keep essential supplies within reach before leaving the shared position. If several people need light in different rooms at the same time, an additional independent device answers a requirement that a second accessory on the same light cannot meet.
FAQ
Changelog
- November 7, 2026: Product information and buying guidance reviewed.




