


⚡ TL;DR
An Olight charging check starts at the connection on the particular light. Baton 4 Pro offers a concealed USB-C port and magnetic charging. Perun 3 uses an MCC3 cable at its tail. A Baton 4 inside its Premium Edition charging case adds another battery and another set of indicators. Identify the component receiving power before interpreting a red light, a green light, or a percentage on a display.
Our model instructions distinguish the power source, the charging connection and the indicator that describes the process. Following that sequence helps with an apparently unresponsive magnetic cable and with a light that has finished charging but remains locked. The examples below cover these three charging arrangements, including the different jobs performed by the cable indicator, the flashlight's battery indicator and the charging case display.
📋 Table of Contents
- 1. Match the Olight Charging Connection to the Actual Light
- 2. Charge Baton 4 Pro Through the Port Beneath Its Ring
- 3. Read Charging Input at the Correct End of the Cable
- 4. How Can You Tell Whether Perun 3 Is Charging?
- 5. Separate Perun 3 Charging Colors from Its Battery Gauge
- 6. Read the Two Charging Processes Inside Baton 4 Premium Edition
- 7. Select the Named MCC Variant Before Buying a Replacement
- 8. Use Full-Charge Times as Model References
- 9. Why Is My Olight Not Showing a Charging Indication?
- 10. Check the Operating State After Charging Completes
- 11. Keep Charging-While-Lit Instructions Attached to the Model
- 12. Apply Baton 4 Pro's Charging and Temperature Conditions
- 13. FAQ
Match the Olight Charging Connection to the Actual Light
Read the model marking on the flashlight before selecting a cable. Baton 4, Baton 4 Pro and Baton Ultra have separate identities. The charging case supplied with Baton 4 Premium Edition belongs to that system. A similar product name does not establish that a larger flashlight will fit the case or share its controls.
For a first charging session, put the rechargeable flashlight and the appropriate instructions beside the power source. Find the charging port in the product diagram, then locate the cable or case that connects to it. This is especially helpful after receiving a light as a gift, when the cable in a household drawer may have arrived with a different model.
| Model or component | Charging location | Useful starting reference |
|---|---|---|
| Baton 4 Pro | USB-C port beneath the rotating tailcap ring, or magnetic tail connection | Its manual lists separate USB-C and MCC3 inputs and charge times |
| Perun 3 | Magnetic connection at the tail | Its MCC3 cable has a USB-A source end and a charging indicator at the magnetic end |
| Baton 4 Premium Edition case | USB-C port on the case | The display button reports case charging and remaining case energy |
| Baton 4 seated in that case | Internal charging connection | A separate internal indicator reports the flashlight's charging progress |
The location also determines what must remain accessible. A USB-C cable needs room to enter the exposed socket. A magnetic cable needs an unobstructed tail contact. The case needs space for its USB-C lead and, when observing the internal indicator, an open lid. Arrange these connections where a bag edge or nearby object will not press against them.
Charge Baton 4 Pro Through the Port Beneath Its Ring
Our Baton 4 Pro description identifies a rotating, textured tailcap ring that reveals and conceals the USB-C port. Rotate the ring to expose that port before connecting the cable. The ring settles at each end of its travel, providing a defined covered position and a defined open position.
This charging access is separate from the flashlight's side and tail switches. Looking for a rubber flap or pressing the tail switch will not expose the socket. Once the port is visible, connect the USB-C lead to the light and a suitable power source. Keep the cable free of sideways pressure while it is connected, then disconnect it before returning the ring to its covered position.
The shared Baton 4 Pro and Baton Ultra manual lists USB-C input as 5 V, 1.5 A, with a full-charge reference of 3.5 hours. It separately lists MCC3 charging as 4.2 V, 1.5 A at the light, with a 4.5-hour reference. These entries support two charging routes for Baton 4 Pro. They do not make the USB-C socket and magnetic contact interchangeable connection points for the same cable end.
Choose between those routes according to the equipment available at the charging location. USB-C can suit a desk where an appropriate cable is already accessible. MCC3 can suit a position where attaching the magnetic head to the tail is convenient. The stated times differ by one hour, so a short charging opportunity and an overnight return to a home base may lead to different choices even for the same flashlight.
Read Charging Input at the Correct End of the Cable
The voltage printed for a flashlight's charging input may describe a different point in the system from the input printed for its USB cable. On Baton 4 Pro, the manual's MCC3 entry is 4.2 V, 1.5 A. That figure belongs to the magnetic charging route at the light. Choose the USB wall adapter using the charging cable's source-side specification.
Perun 3 makes this distinction explicit in its MCC3 cable table. The source side is USB Type-A, DC 5 V, 2 A. The output side uses constant-current and constant-voltage charging at 4.2 V, with a stated tolerance of 0.05 V and a 2 A rating. Read the source requirement when choosing where to plug in the USB end. Read the output specification when identifying what the charging cable delivers to its intended light.
For a phone adapter, inspect the adapter's printed output ratings and the connector it actually provides. A plug that physically fits is only one part of the check. Compare the available output with the model's documented charging requirements. An adapter described only by a large advertised wattage still needs an appropriate output for the charging system being used.
Keep the cable between those two ends in the comparison. A direct USB-C connection to Baton 4 Pro and a USB-A connection feeding Perun 3's MCC3 lead use different equipment. Our broader flashlight charging and care guide explains the connector families. For a specific charging problem, the model's input figures and connection diagram provide the next level of detail.
How Can You Tell Whether Perun 3 Is Charging?
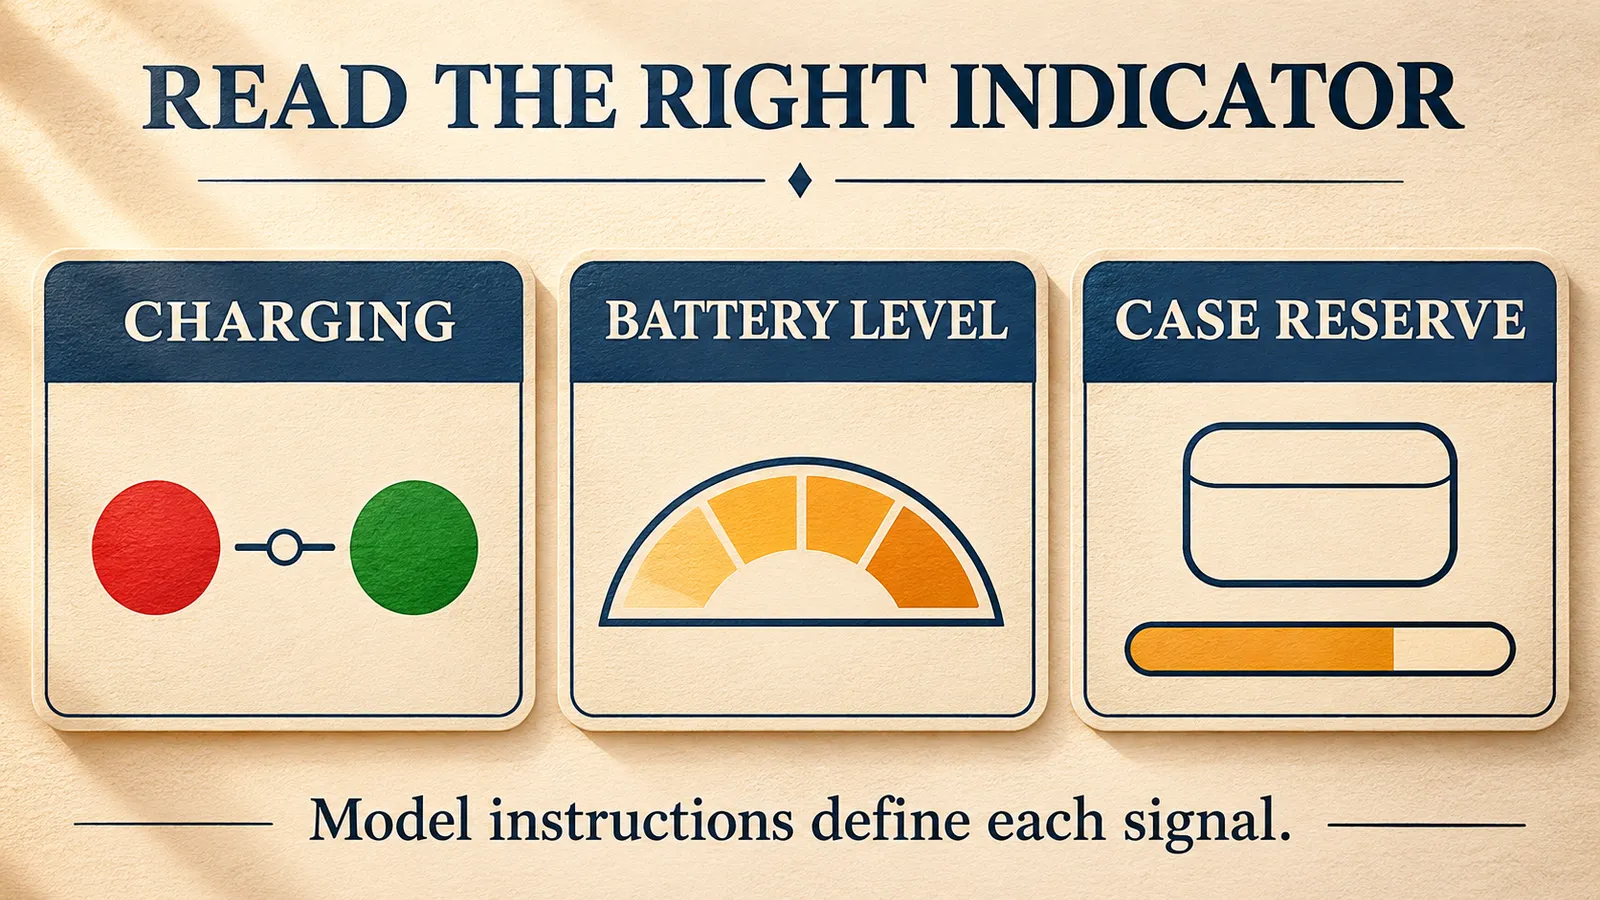
Check the indicator on Perun 3's connected MCC3 magnetic head. Figure 2 identifies red as charging and green as charging completed. This observation belongs to the connected cable and flashlight arrangement. Keep that indicator visible enough to check it without pulling the magnetic head away from the tail.
The charging diagram for this headlamp shows the MCC3 magnetic head attached to the tail of the light. The USB-A plug connects to the power source. The manual specifies a 0.5-meter cable and a USB Type-A DC 5 V, 2 A input. Those details help determine whether an existing desktop charging position is within reach.
If the connection appears unresponsive, first check the physical arrangement shown in the diagram. Confirm that the USB end is connected to a suitable source, that the correct magnetic head is seated at the tail, and that the contact area is clean and dry. Disconnect power before dealing with visible debris. Avoid scraping contacts with metal or improvising a conductive bridge between them.
A magnet attaching to a metal surface does not identify a compatible charging circuit. A magnetic head can be close to the right place without establishing the documented connection. Return to the model and cable names when the attachment looks plausible but the charging behavior does not match the instructions.
Separate Perun 3 Charging Colors from Its Battery Gauge
Perun 3's body-mounted battery indicator has a different job from the red and green charging indicator on its MCC3 head. In the ordinary battery-indicator diagram, green represents more than 60 percent, orange represents 10 to 60 percent, red represents 5 to 10 percent, and blinking red represents less than 5 percent remaining. Those are battery-level bands on the flashlight.
An orange indication at the flashlight therefore calls for reading the battery gauge. It does not add an orange stage to the cable's red-to-green charging sequence. If someone reports that the light is orange, ask where the color appears and whether the charging lead is connected. Those two observations determine which diagram applies.
Moonlight has its own battery-indicator behavior. The manual shows the body indicator off above 5 percent and blinking red below 5 percent in that mode. A dark battery indicator while Moonlight is operating can therefore be consistent with the documented display behavior. Moving directly from a brighter mode to Moonlight changes the relevant battery-indicator diagram.
The percentages are bands, so an orange indicator cannot distinguish a battery near 10 percent from one near 60 percent. Use it to decide whether a charging opportunity is desirable for the next task. It cannot supply a precise countdown to full charge or an exact remaining runtime for an unspecified brightness setting.
Read the Two Charging Processes Inside Baton 4 Premium Edition
The Baton 4 Premium Edition system contains a flashlight battery and a battery in its charging case. Charging the case through USB-C and charging the flashlight inside the case are separate processes. Their indicators are in different places, and each answers a different question about the equipment you will take away.
When the case itself is charging, the lightning sign on its display button blinks. When case charging is complete, that lightning sign remains on. The case's remaining battery level appears when you press the display button or open or close the lid. A visible number on that display describes the case's reserve.
The internal indicator describes charging the flashlight. It is red during charging. After flashlight charging is complete, it turns green before turning off. The later absence of a green internal light can therefore follow the documented completion sequence. Repeatedly removing and reinserting the flashlight simply to keep a green light visible is unnecessary.
Read the two signals separately before packing. A full flashlight can be sitting in a case that still needs energy for later top-ups. Conversely, case energy and a connected USB-C lead do not tell you whether the flashlight is correctly seated and following its own charging sequence. Check the internal indicator for the flashlight and the display button for the case.
The case also provides a specific low-reserve display condition. If the case battery level is below 10 percent while charging the flashlight, the remaining level stays displayed. A persistent number in that situation is the case's low-battery indication. Recharging the case addresses that reserve, while the internal red or green indicator continues to describe the flashlight's separate charging process.
For first use, the Premium Edition instructions identify two insulating films. One sits between the case and flashlight, and another sits inside the flashlight. Follow that model's illustrated removal instructions before expecting charging or normal operation. This first-use preparation is specific to the supplied system and should be checked before treating a new, apparently inactive kit as faulty.
Select the Named MCC Variant Before Buying a Replacement
Our MCC Magnetic USB Charging Cable page separates compatibility groups. MCC3 and MCC3 Black have one published list, MCC Special has another, and MCC 1A and NEW MCC 1A have another. The product selector matters when ordering a replacement, even when several choices share one page title.
Perun 3 appears in the current MCC3 and MCC3 Black compatibility list. Its own manual also identifies MCC3. Those two references provide a direct match for this example. Baton 4 Pro's own instructions separately specify MCC3, so use that model-specific reference when selecting its magnetic charging route.
Do not shorten the name of a selected accessory to a family label before checking it. MCC3-C is a separate named choice on the accessory page. A description of its USB-C source connection should stay attached to that choice. It cannot establish that the USB-A lead illustrated in the Perun 3 instructions has changed connector type.
If replacing an existing cable, compare the accessory name on the order or instructions with the light's model. A household can own several magnetic charging leads with similar heads. Keeping each lead's model information available prevents a later replacement purchase from depending entirely on its color or the fact that it attaches magnetically.
Use Full-Charge Times as Model References
The published charging times describe particular routes and components. Baton 4 Pro lists 3.5 hours through USB-C and 4.5 hours through MCC3. Perun 3's MCC3 cable table lists less than four hours to fully charge. These are useful planning references when a light returns depleted, but they do not report the charge remaining when you connect your own light.
Baton 4 Premium Edition adds a second timing question. Its manual lists one hour to charge Baton 4 in the case and 2.5 hours to charge the case using a 5 V, 2 A, 10 W source. The case instructions expressly say that an insufficient power-source capacity makes charging take longer. A source change can therefore affect the case's expected completion time.
The case specifications also distinguish battery capacity from rated output capacity. They list 5,000 mAh at 3.6 V, equivalent to 18 Wh, and a rated capacity of 2,650 mAh at 5 V and 2.4 A. These figures refer to different electrical conditions. Read the accompanying voltage when comparing capacity labels, and avoid treating either number as a count of complete flashlight recharges. For an immediate departure, the display's remaining case level provides the relevant observation about the reserve currently available.
Avoid adding the case and flashlight figures together and presenting the sum as a guaranteed time for every depleted kit. The two figures concern different batteries and charging paths. A case that already holds energy can charge its flashlight without first completing a new USB-C charging session. The starting state determines which reference is relevant.
For a partially used light, observe the specified completion indication instead of running an invented fraction of the full-charge time. An operating battery band and an elapsed hour do not establish the exact amount of energy added. Record the actual starting indication if you need to explain a charging concern to support.
Why Is My Olight Not Showing a Charging Indication?
If the expected charging indicator is absent, start with the specified cable, a suitable USB source and the connection shown for your model. A red charging indicator, a completed charge followed by no beam and a dark case display are different observations. Match the observed state to the relevant component before changing equipment.
| Observation | First check | Information worth retaining |
|---|---|---|
| Perun 3 has no expected charging indication | Correct MCC3 head, seated tail connection and USB source | Cable name, adapter output label and indicator location |
| Perun 3 body indicator is orange | Its operating battery-gauge diagram | Operating mode and whether the charging cable was attached |
| Baton 4 case charges but the flashlight appears inactive | Flashlight seating and first-use insulating films | External case display and separate internal indicator behavior |
| Baton 4 internal green indicator later goes dark | The documented green-then-off completion sequence | Whether green appeared before the indicator turned off |
| Baton 4 Pro USB-C lead cannot enter the port | The ring's exposed-port position | Whether the ring has reached its open position and the socket is unobstructed |
Change one part of a charging arrangement at a time. For example, after confirming the correct cable and clean contact, compare the existing source with another appropriate source while keeping the light and charging lead the same. If the symptom changes, you have a more specific observation than a report that several different cables and adapters were swapped together.
Stop using visibly damaged charging equipment. For a persistent fault, retain the model name, charging route, adapter output label, and the observed sequence. A short description such as red appearing at the magnetic head and remaining there gives support a clearer starting point than a color description with no location or connection details.
Check the Operating State After Charging Completes
A completed charging sequence and an enabled light switch are separate conditions. Baton 4's manual provides a useful example. While its switch is electronically locked, a single button press displays remaining battery level without turning on the beam. That response can demonstrate a locked operating state even after the battery has been charged.
Use the lock and unlock instructions for the particular flashlight before diagnosing a completed charge as a failed battery. Keep a flashlight's switch instructions separate from the display-button instructions on its case. The two buttons can control different functions in the same kit, and a charging indication does not identify which button was pressed afterward.
Brightness behavior also affects what you expect to see. Our flashlight modes guide explains the purpose of ordinary output modes. For a return-to-use check, confirm that the light operates at a suitable low setting, then switch it off before carrying or storing it according to its instructions. Repeated Turbo activation adds heat while contributing little to diagnosing whether charging completed.
Keep Charging-While-Lit Instructions Attached to the Model
The Baton 4 Premium Edition manual explicitly allows its flashlight to stay lit during charging in the case with the lid open. This is a documented use of that particular arrangement. The open lid, seated flashlight and charging case are part of the condition described in the instructions.
That statement does not specify a universal high-output level for every Olight while charging. It also does not give a full-charge time for every combination of simultaneous illumination and charging. If the immediate purpose is to replenish the flashlight, switching it off removes the need to interpret a charging session while it is also providing light.
For a task that still needs illumination, use another suitable light while checking a charging problem. This lets you inspect the connector and indicators without depending on the same flashlight to illuminate its own tail or socket. Keep the charging equipment on a stable, accessible surface where the connection can remain undisturbed.
Apply Baton 4 Pro's Charging and Temperature Conditions
Baton 4 Pro's manual specifies charging between 0 and 45 degrees Celsius. It also says to keep the tail charging port clean and dry. Those conditions apply before connecting equipment, including after the flashlight has been used outdoors. Leave the contact area visible for inspection when choosing a charging location.
The same manual warns against storing, charging or using the flashlight in a car where the temperature may exceed 60 degrees Celsius, or in a similar environment. The car warning and the charging-temperature range describe different limits. Being outside a hot car does not by itself establish that the charging environment is within the stated 0-to-45-degree range.
Keep a hot flashlight out of a fabric bag or fusible plastic container. The manual advises switching to low brightness or temporarily turning the light off if its surface becomes too hot. Make those decisions before packing or setting up a charging session.
For ordinary charging, the manual says to leave its proprietary battery in the light. It separately instructs battery removal for long-term storage. Follow those instructions in their respective situations.
NFPA's lithium-ion battery safety guidance identifies warning signs that call for stopping use, including an unusual odor, excessive heat, popping sounds, swelling or a change in color. Its advice covers devices such as phones, tools and other battery-powered equipment. If one of these signs appears during charging, stop the charging session and use of the device, and contact a qualified service professional. Continuing to swap cables or adapters is inappropriate once the concern involves an abnormal battery.
NFPA also recommends using only compatible charging equipment and, for safety, the equipment supplied with the device. Stop charging once the battery is full, using the model-specific completion indication described above. A fault observation can help you explain the problem to service, but it does not establish which internal part needs repair.
FAQ
Changelog
- November 7, 2026: Product information and buying guidance reviewed.




