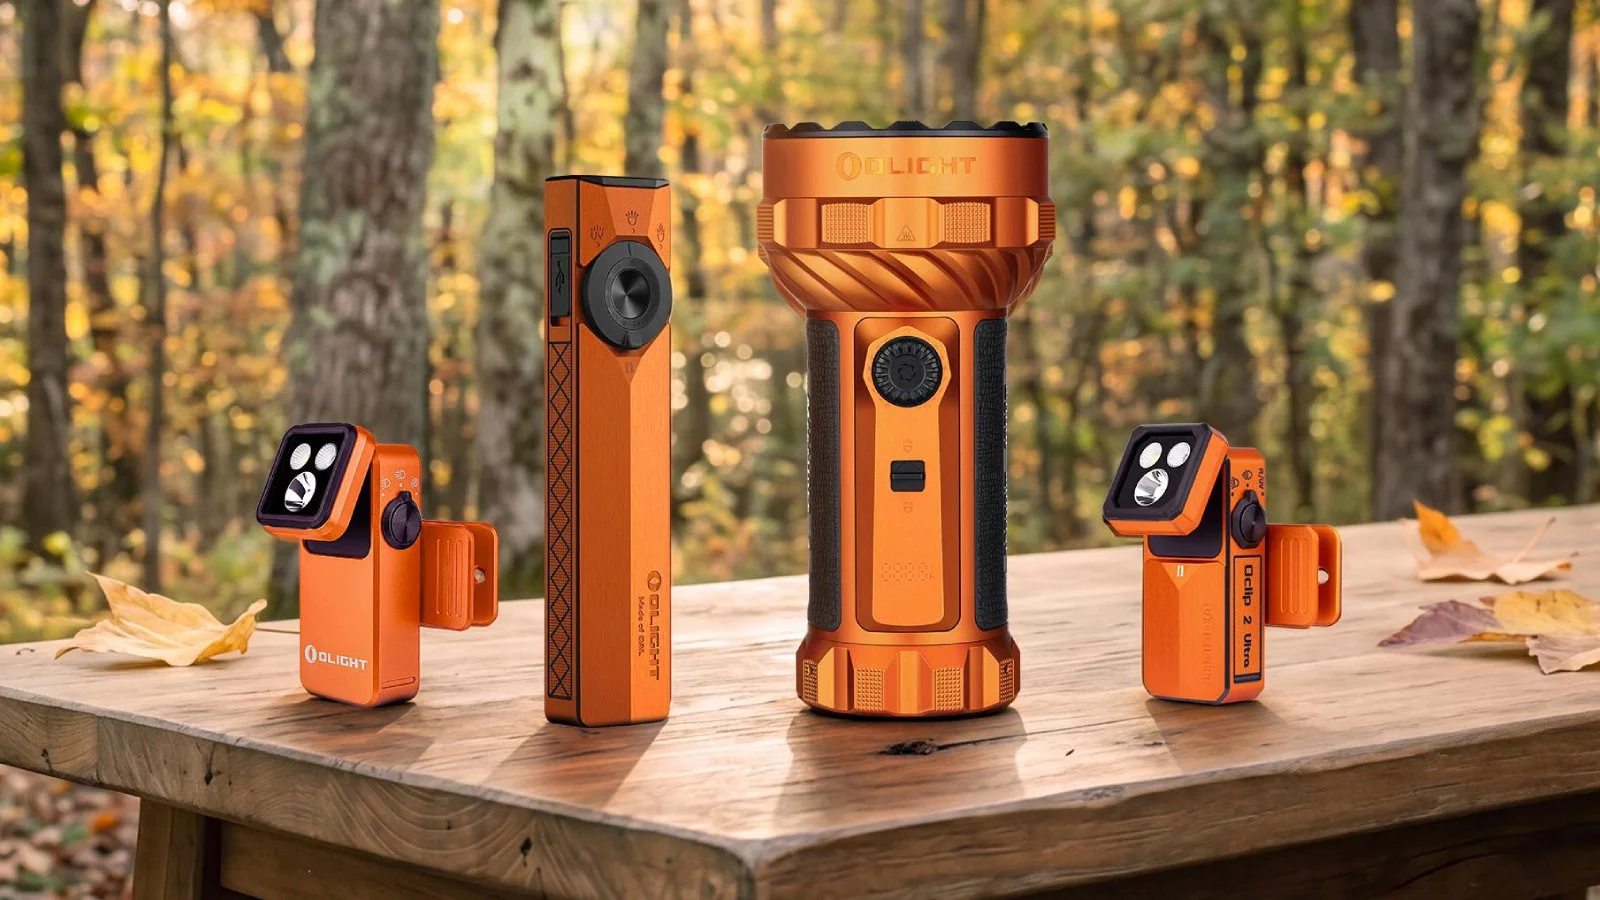
Olight makes some of the flashlights discussed here. Olight specs and prices come from its product pages as of September 2026; licensing rules come from the state agencies and statutes linked in each section.
⚡ TL;DR
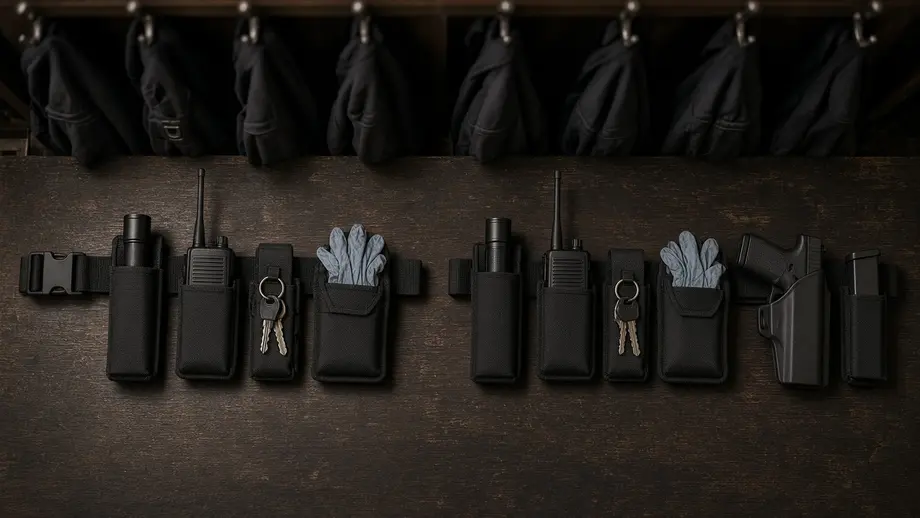
A good duty belt setup for security starts with your license and post orders, not with a police catalog. On an unarmed post, the lighter belt is better: flashlight, radio, keys and gloves, with the light and radio on the weak-side front. On an armed post, the holster sets the layout, so you place everything else around it and carry only what your state permit and employer allow.
This table sums up how the two belts differ in practice.
| Dimension | Armed post | Unarmed post | Which is simpler | How big the gap is |
|---|---|---|---|---|
| License needed to carry the gear | Guard license plus a firearm permit or commission | Guard license; some items need their own permit | Unarmed | Texas requires at least 30 hours of basic training for a commission |
| What sets the layout | The handgun holster on the strong side | The flashlight and radio | Unarmed | One fixed item vs a free choice |
| Items on the belt | Holster, magazines, light, radio, keys, gloves, plus any permitted tools | Light, radio, keys, gloves, plus any permitted tools | Unarmed | Usually 2 or more extra pouches on armed belts |
| Belt weight | Heavier, and weighted toward the strong side | Lighter and easier to balance | Unarmed | Depends on your gear; weigh it |
| Carry method rules | Florida requires the firearm to be carried openly, with limited exceptions | No firearm rules apply | Unarmed | A state rule vs none |
| Where the flashlight goes | Weak-side front, so it never competes with the holster | Weak-side front by default, or wherever reach is easiest | About equal | Same zone in most setups |
Many new officers copy a police belt from a video and end up wearing tools their license does not cover. Others work unarmed posts with a belt that is nearly empty, yet the flashlight and radio ride behind the hip where they are hardest to reach. The sections below fix both problems: the license check first, then placement, the flashlight, weight and fit.
📋 Table of Contents
- 1. How Should a Duty Belt Be Set Up?
- 2. Armed vs Unarmed Security Posts: What Goes on the Belt?
- 3. What Can Security Guards Carry? State Rules in California, Texas and Florida
- 4. What Should Be on a Duty Belt?
- 5. Why Should the Flashlight and Radio Ride on the Weak-Side Front?
- 6. How to Set Up a Security Belt, Step by Step?
- 7. Building Patrol vs Parking Lot Patrol: Which Flashlight Fits?
- 8. Does a Heavy Duty Belt Cause Back Pain?
- 9. Common Mistake: Is a Fuller Belt More Professional?
- 10. Matching the Belt, Flashlight Holster and Uniform
- 11. Which Duty Belt Setup Fits Your Post?
- 12. FAQ
How Should a Duty Belt Be Set Up?
A duty belt should be set up in zones. Put the item you use most, usually the flashlight, on your weak-side front, and keep the radio where your weak hand reaches it without looking. On an armed post, the holster takes the strong-side hip. Keep hard items off the center of your lower back, and add only gear your license and post orders allow.
Think of the belt as a clock face seen from above, with 12 o'clock at your belt buckle. This table uses a right-handed officer; a left-handed officer mirrors every position.
| Zone (right-handed officer) | Clock position | Armed post | Unarmed post |
|---|---|---|---|
| Strong-side hip | About 3 o'clock | Handgun holster | Radio or flashlight, if you prefer strong-hand access |
| Strong-side rear | About 4 to 5 o'clock | Handcuff case, if authorized | Handcuff case or glove pouch, if authorized |
| Center of the back | 6 o'clock | Leave clear of hard items | Leave clear of hard items |
| Weak-side rear | About 7 to 8 o'clock | Glove pouch or key holder | Key holder |
| Weak-side hip | About 9 o'clock | Radio | Radio |
| Weak-side front | About 10 to 11 o'clock | Flashlight holster, magazine pouch | Flashlight holster |
Keeping hard items away from 6 o'clock matters for two reasons. You sit on patrol cart seats and in guard booths for hours, and a rigid case against your spine presses on it the whole time. It is also the spot you are most likely to land on if you fall.
Most officers wear a stiff outer duty belt over an inner belt, joined by belt keepers. The keepers stop the outer belt from sliding, which keeps each pouch in the same place every shift. That consistency is the point of the whole layout: your hand should find the light in the dark on the first try.
Armed vs Unarmed Security Posts: What Goes on the Belt?
An armed post belt carries a holstered handgun, spare magazines and every unarmed item, so it is heavier and its layout is fixed around the holster. An unarmed post belt carries a flashlight, radio, keys and gloves, plus any tool your license and employer allow. The lighter unarmed belt gives you more freedom to put the light and radio where they are easiest to reach.
The gear list below is a starting point. Your post orders decide the final list, and some sites ban items that your license would otherwise allow.
| Item | Armed post | Unarmed post | Notes |
|---|---|---|---|
| Flashlight and holster | Yes | Yes | The one tool every patrol uses every night |
| Radio and radio holder | Yes, if the site issues radios | Yes, if the site issues radios | Some sites use phones instead |
| Keys and key holder | Yes | Yes | A silent key holder stops the jingle on quiet rounds |
| Disposable gloves pouch | Yes | Yes | For first aid, spills and searches of lost items |
| Handgun holster | Yes | No | Only with a state firearm permit or commission |
| Magazine pouch | Yes | No | Count set by employer policy |
| Handcuff case | Only if authorized and trained | Only if authorized and trained | Check post orders; many sites do not issue cuffs |
| Baton | Only with the state permit, if required | Only with the state permit, if required | California requires baton training for on-duty carry |
| Chemical spray | Only if the state and employer allow it | Only if the state and employer allow it | California requires a training course for tear gas |
Two things stand out in this list. First, almost every item below the handgun line is a policy question, not a gear question. Second, the flashlight and radio are the only items on every belt at every post, which is why they deserve the best positions.
What Can Security Guards Carry? State Rules in California, Texas and Florida
Security guards can carry what their state license and employer allow, and firearms always need an extra permit or commission. California requires a separate BSIS firearms permit, a baton permit and tear gas training. Texas bars noncommissioned officers from carrying a firearm on duty. Florida requires a Class G license and open carry of a firearm, with limited exceptions.
These rules come from each state's licensing agency or statute, and they change. Check your own state's current rules and your employer's written policy before you buy anything.
California. The Bureau of Security and Investigative Services (BSIS) explains in its security guard registration fact sheet that the power to arrest training must be completed before a guard registration is issued, and that 32 hours of security officer skills training must be completed within the first six months. For batons, the same fact sheet says Business and Professions Code Section 7583.33 "requires anyone who carries a baton while on duty to be a registered security guard and to complete a baton training course." For tear gas, it says Section 7583.35 "requires all licensees or registrants wishing to carry tear gas while on duty to complete a training course." Firearms need a separate permit. The BSIS Firearms Permit fact sheet lists a minimum age of 21 and a firearms training course, and adds that applicants "must qualify with the caliber of weapon that will be carried while on duty." It also says the permit authorizes "an exposed firearm only of the caliber(s) listed on the firearms permit card itself."
Texas. Texas Occupations Code Chapter 1702, the Private Security Act enforced by the Texas Department of Public Safety, says in Section 1702.161 that an individual employed as a security officer "may not knowingly carry a firearm during the course of performing duties as a security officer unless the department has issued a security officer commission to the individual." Section 1702.1675 sets the commissioned officer basic training course at "a minimum of 30 hours," including handgun proficiency. Section 1702.323 extends the commission rule to in-house officers who carry a firearm for a single employer.
Florida. The Florida Department of Agriculture and Consumer Services (FDACS) states on its private security licenses page that any security officer must hold a Class "D" license, and that an officer who carries a firearm on duty must also hold a Class "G" Statewide Firearm License. It adds that the firearm "must be required by the employing agency and must be carried openly," with limited exceptions, and that "No licensee may carry more than two firearms on their person when performing their duties." It also says a licensee "may only carry a firearm of the specific type and caliber with which they are qualified."
This table turns those rules into belt decisions.
| State rule (source) | What it means for your belt |
|---|---|
| California: baton carry requires registration and a baton training course (BSIS) | No baton ring on the belt until you hold the permit and your employer allows it |
| California: tear gas carry requires a training course (BSIS) | No spray pouch until your training is complete and your site allows it |
| California: the permit covers an exposed firearm in the calibers listed on the card (BSIS) | Use an outside-the-waistband duty holster fitted to a handgun in a listed caliber, not a spare you own |
| Texas: no firearm on duty without a commission (Chapter 1702) | A noncommissioned officer's duty belt has no holster |
| Texas: in-house armed officers also need a commission (Section 1702.323) | Proprietary security jobs follow the same holster rule |
| Florida: firearm required by the employer and carried openly (FDACS) | Choose an outside-the-waistband duty holster, not a concealment holster |
| Florida: no more than two firearms on duty (FDACS) | Plan pouch space around your employer's firearm policy |
| Florida: only the type and caliber you qualified with (FDACS) | Match the holster and magazine pouches to that exact firearm type |
Note: Other states have different agencies and rules, and employers can be stricter than the state. If your post orders and your state rules seem to disagree, follow the stricter one and ask your supervisor in writing.
What Should Be on a Duty Belt?
A security duty belt should hold a flashlight, a radio, keys and a glove pouch, because those four items get used on almost every shift. Add a holster and magazines only on an armed post with the right permit. Add handcuffs, a baton or chemical spray only when your state license, training and employer all allow them.
The simplest way to decide is to sort each item by how often you use it. The more often you reach for it, the closer it goes to the front of your belt.
- Every round: flashlight, radio, keys. These get the front and hip positions.
- Most shifts: gloves, a notepad or phone, a pen. Gloves go on the belt; the notepad can live in a shirt pocket.
- Rarely, but required: holster and magazines on armed posts, plus any issued tools. These go where your training placed them.
- Never used at this site: leave it in your locker.
The fourth group is where most weight creeps in. An item that looks professional but never leaves its pouch still loads your hips for the whole shift.
Tip: Once a month, take every item off your belt and put back only what you used in the past 30 days, plus anything your post orders require. Write the list down so your supervisor can confirm it.
Why Should the Flashlight and Radio Ride on the Weak-Side Front?
The flashlight and radio should ride on your weak-side front because those are the tools you grab most, and your weak hand is the one that is free. On an armed post, your strong hand must stay near the holster. On an unarmed post, your strong hand often holds a pen, a door or a clipboard while the weak hand grabs the light.
Picture a door check at 2 a.m. Your strong hand turns the handle, and your weak hand draws the light and points it through the gap. If the light rides behind your hip, you have to let go of the door or twist to reach it. With the light at 10 or 11 o'clock, the draw is short and straight.
The radio follows the same logic. You key it while your eyes stay on what you are reporting, so it needs to sit where your hand finds it without looking. Many officers put it on the weak-side hip and run a shoulder microphone. That leaves the front of the belt for the flashlight alone.
A few points help the light come out cleanly every time:
- Bezel down or bezel up, but always the same way. Pick one orientation and never change it, so your grip is correct on the draw.
- Switch within reach of your thumb. On a tail-switch light, the switch should meet your thumb as the light leaves the holster.
- No flap unless the site requires it. An open-top holster is faster; a flap keeps rain out. Choose based on your weather.
- Same spot on every uniform. If you wear two belts, set both up the same way.
How to Set Up a Security Belt, Step by Step?
To set up a security belt, confirm what your license and post orders allow, then fit the inner and outer belts, mount the holster or flashlight first, place the radio on the weak side, and fill the rest by frequency of use. Finish by walking a full patrol route and sitting in your booth or cart for 15 minutes before you lock the layout.
- Get the rules in writing. Ask for your employer's equipment policy and check your state agency's rules. List what is required, what is optional and what is banned.
- Measure over your uniform. Put on your duty pants and inner belt, then measure around the outside at the belt line. Buy the outer belt to that measurement, not your pants size.
- Mount the anchor item. On an armed post, fit the holster at the strong-side hip where your training placed it. On an unarmed post, the flashlight holster at the weak-side front is the anchor.
- Place the radio. Put it on the weak-side hip, or on the strong side if you are unarmed and prefer it there.
- Fill by frequency. Keys and gloves go next; any rarely used tool goes to the rear, but not at 6 o'clock.
- Lock it down. Add belt keepers between pouches so nothing slides when you run or climb stairs.
- Walk and sit. Walk your full route, climb the stairs, get in and out of the patrol vehicle, and sit for 15 minutes. Move anything that digs in or catches.
- Weigh it. Put the loaded belt on a bathroom scale and write the number down. That number is your baseline for a quarterly weigh-in.
Safety note: Handle, holster and unholster a firearm only as your firearms training and employer policy direct. Adjust a holster with the firearm unloaded or removed, and follow the rules of your range and training facility.
Building Patrol vs Parking Lot Patrol: Which Flashlight Fits?
For parking lot patrol, choose a light with high candela, because you need to reach across rows of cars; the Warrior 3S rates 23,000 candela and 300 m. For building patrol, a wider, adjustable beam wastes less light on close walls; the Seeker 4 Pro rates 4,600 lumens and has a rotary dimming switch. Either one covers an 8-hour shift on its medium mode.
Lumens measure total light output, while candela measures how intense the beam is at its center. The Olight guide to candela vs lumens vs lux explains the difference in detail. For patrol, the practical number is lux on the target, which you can estimate as candela divided by distance squared.
This table applies that formula to each light's official candela rating. The distances match common patrol tasks, from a stairwell to the far end of a parking lot. These are calculated values from published specs, not field measurements.
| Distance | Typical patrol task | Warrior 3S (23,000 cd) | Seeker 4 Pro (16,895 cd) |
|---|---|---|---|
| 10 m (33 ft) | Stairwell, loading dock door | 230 lux | 169 lux |
| 25 m (82 ft) | Across two parking rows | 36.8 lux | 27.0 lux |
| 50 m (164 ft) | Far corner of a surface lot | 9.2 lux | 6.8 lux |
| 100 m (328 ft) | Fence line or back of a large lot | 2.3 lux | 1.7 lux |
The Warrior 3S puts about 36 percent more light on a distant target at every distance, because 23,000 is about 1.36 times 16,895. The Seeker 4 Pro puts out twice as many lumens (4,600 vs 2,300) with less center intensity. Its lumen-to-candela ratio is about 2.7 times higher, which is a rough sign that it spreads its light over a wider area. That wider spill suits hallways, offices and stairwells, where a tight hotspot bounces off close walls.
Runtime matters as much as throw on a long shift. This table uses Olight's official runtimes and assumes your light is on for a quarter of the shift, a planning figure for illustration, not a measured duty cycle.
| Mode (Olight spec) | Warrior 3S | Seeker 4 Pro | Share of charge used in 3 hours of a 12-hour shift |
|---|---|---|---|
| Medium | 200 lumens, 13 hours | 300 lumens, 11 hours | About 23% (Warrior 3S), about 27% (Seeker 4 Pro) |
| Low | 15 lumens, 130 hours | 50 lumens, 60 hours | About 2% (Warrior 3S), 5% (Seeker 4 Pro) |
| Turbo | 2,300~805~253 lumens, 2.5 + 160 + 39 minutes | 4600~1200~600 lumens, 2.5 + 122 + 35 minutes | Turbo steps down after 2.5 minutes on both |
The Turbo row shows why a high number on the box does not describe a patrol. Both lights hold their peak for 2.5 minutes and then step down. Medium mode is where you will spend most of the night, and both lights hold it for longer than an 8-hour shift. The Warrior 3S Medium rating also covers a 12-hour shift; the Seeker 4 Pro's 11-hour rating falls just short, so recharge it between shifts.
For more patrol light picks, see Olight's guide to patrol flashlights for security guards, or compare throw, runtime and switch layouts across Olight's handheld tactical flashlights.
Does a Heavy Duty Belt Cause Back Pain?
A heavy duty belt is linked to back pain in officer surveys, but research has not shown that the belt alone causes it. A NIOSH evaluation found nearly half of one police department's officers reported low back pain in the prior 3 months, and that unclear policies led many to carry unnecessary weight. Carrying only required gear is the simplest fix.
The NIOSH Health Hazard Evaluation looked at a police department whose managers asked whether duty belts were linked to back pain and injuries. The investigators found "communication gaps" between officers and management about "uniform policies specifying what equipment was required versus what was optional. This led to many officers carrying unnecessary weight." They recommended a policy that "clearly states what equipment is required versus what is optional" and examples of different wear configurations.
A 2023 study in the Journal of Functional Morphology and Kinesiology, published on PubMed Central, adds a more careful view. It opens by noting that "Sixty percent of all law enforcement officers (LEOs) experience low back pain (LBP), with the LEO duty belt (LEODB) commonly reported to be a contributing factor." Its 24 participants, young and healthy adults rather than working officers, wore a 7.2 kg (about 15.9 lb) leather belt, a 7.2 kg nylon belt, and a 7.2 kg weighted vest while doing hip hinge lifts. The researchers found no significant effect of load on muscle activity. Participants rated the vest as more comfortable and less restrictive than either belt. The authors call for research on wear times closer to a real shift of 8 hours or more.
The NIOSH evaluation looked at police officers, and the lab study used a police-style belt loaded with pouches and a holster. Both belts usually carry more than an unarmed security belt. The lesson carries over, though: every item you drop reduces load, and comfort is a real reason to change your setup.
This table shows how much of a 7.2 kg research belt each flashlight in this guide accounts for, using Olight's official weights with the battery included.
| Flashlight (Olight spec) | Weight with battery | Share of a 7.2 kg (15.9 lb) loaded belt |
|---|---|---|
| Warrior 3S | 6.21 oz (176 g) | About 2.4% |
| Seeker 4 Pro (all versions except silver-plated bronze) | 7.23 oz (205 g) | About 2.8% |
The flashlight is rarely the problem. The weight savings come from pouches you never open, a spare magazine your policy does not require, or a heavy leather belt when your employer allows nylon.
Tip: If your back hurts after shifts, ask your employer whether a load-bearing vest or suspenders are allowed under your uniform policy, and see a health care professional about ongoing pain.
Common Mistake: Is a Fuller Belt More Professional?
A fuller belt is not more professional. On a security post, what shows competence is a neat uniform, a quick radio call and a light that comes out on the first try. Extra tools add weight, and some of them, like a baton or tear gas in California, need training before you can carry them on duty. Carry what your post requires.
These are the most common belt mistakes on security posts, with a fix for each.
- Copying a police belt. Police officers carry tools that most security licenses do not cover. Fix: build from your employer's list, not from a police video.
- Putting the light behind the hip. It is the tool you use most, so it needs the fastest reach. Fix: move it to your weak-side front.
- Carrying a baton or spray "just in case." In California, both need training before on-duty carry. Fix: get the permit and your employer's approval first, or leave it at home.
- Buying the outer belt by pant size. The outer belt goes around your pants and inner belt. Fix: measure over your uniform.
- Skipping belt keepers. Pouches slide and your draw changes from night to night. Fix: add keepers between pouches.
- Never weighing the belt. Weight creeps up one pouch at a time. Fix: weigh it every quarter and write the number down.
Matching the Belt, Flashlight Holster and Uniform
Match the flashlight holster to both your light and your belt width. Most outer duty belts are wider than a trouser belt, so check that the holster's belt loop fits before you buy. Pick an open-top holster for fast draws on dry posts, and a flap or cover for rain. Then match colors and hardware to your uniform so the belt looks tidy.
Your holster options depend on the light you choose. Here is how the two lights in this guide are set up by Olight.
Warrior 3S for parking lots and perimeter patrol. The hard part of a lot patrol is reaching the back rows and the fence line without walking to each one. The Olight Warrior 3S tactical flashlight rates 23,000 candela and 984 ft (300 m) of beam distance, and its two-stage tail switch reaches turbo with a single press. A built-in proximity sensor drops the brightness when an object is close in high, turbo or strobe mode. It comes with a holster and pocket clip in the box. The price is $119.95 (regular price, September 2026). The limit: its beam puts more of its output into the center, so it lights a whole room less evenly, and its 2,300 lumens are half the Seeker 4 Pro's.
Seeker 4 Pro for building patrol. Indoor rounds need even light and quick changes in brightness. The Olight Seeker 4 Pro flashlight has a rotary knob for "step-less dimming," which Olight says allows "easy operation even with heavy gloves," and 4,600 lumens at its peak. Its included vertical holster offers "quick lock/unlock" and charges the light over USB-C. The Olight user manual explains how that works on a belt: the light unlocks automatically when you pull it from the holster, and it locks when you put it back while it is off. That stops it from switching on against your hip while you sit. The price is $139.99 (regular price, September 2026). The limits: at 7.23 oz it is the heavier of the two, its 16,895 candela reaches less far than the Warrior 3S, and the vertical holster stands upright, so check that it clears your thigh when you sit in a cart or booth.
For other holster styles and ways to carry a light, see the Olight holster guide, and browse replacement holsters and clips in Olight flashlight accessories.
Warning: Olight's product pages describe strobe and turbo modes on both lights. Use them only as your employer policy allows, and avoid shining a high-output beam into people's eyes, including drivers in a parking lot. A flashlight on a security post is for seeing, signaling and being seen.
Which Duty Belt Setup Fits Your Post?
The right duty belt setup depends on your license, your site and whether you spend the night outdoors or indoors. Unarmed officers on indoor posts need the lightest belt, built around a wide-beam light. Armed officers on outdoor posts need the holster first and a long-throw light on the weak side. Everyone else falls in between.
This table matches common security posts to a belt setup.
| Your post | Belt setup | Flashlight priority |
|---|---|---|
| Unarmed, mall or office interior | Light, radio, keys, gloves only | Wide beam, easy dimming, like the Seeker 4 Pro |
| Unarmed, parking garage or surface lot | Light, radio, keys, gloves; reflective vest if site requires | Long throw, like the Warrior 3S |
| Unarmed, hospital | Light, radio, keys, gloves; follow the hospital's tool policy | Low modes for patient areas; bright mode for grounds |
| Armed, bank or cash-handling site | Holster, magazines as policy requires, light, radio, keys | Tail switch you can find without looking |
| Armed, industrial or perimeter patrol | Holster, magazines, light, radio, gloves | Long throw and a runtime that covers the shift |
| Any post with a 12-hour shift | Fewest items that meet post orders | Medium-mode runtime of 12 hours or more, or a mid-shift recharge |
Before your next shift, work through this short action list:
- Get your employer's equipment policy in writing and check your state agency's rules.
- Remove every item you have not used in 30 days and do not need by policy.
- Move the flashlight to your weak-side front and the radio to your weak-side hip.
- Keep hard items away from the center of your lower back.
- Walk your route and sit for 15 minutes, then adjust.
- Weigh the belt and note the date.
FAQ
Changelog
- September 21, 2026: First published.