Olight makes some of the lights discussed here. Olight specs and regular prices come from its US product pages and user manuals as of September 2026. The tilt, glare, reach and runtime figures are our own arithmetic from those published ratings and the public sources linked in each section; every formula and assumption is shown.
⚡ TL;DR
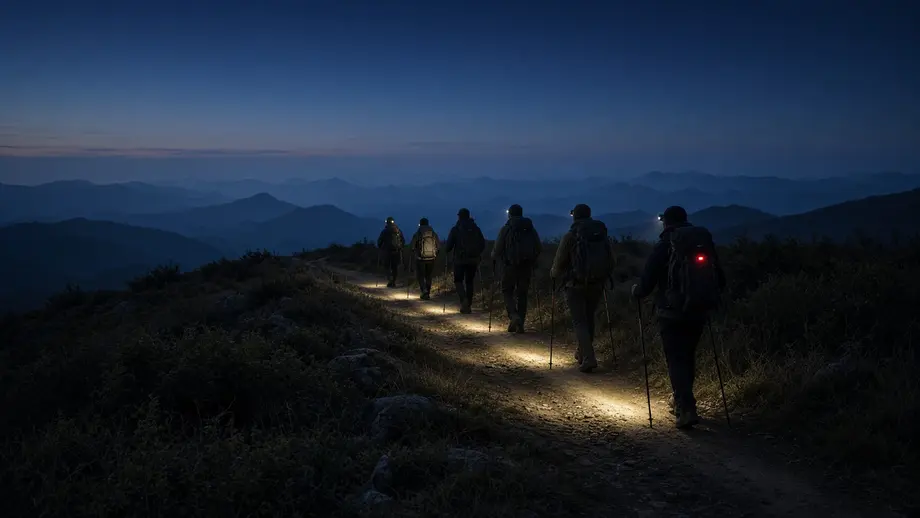
A hiking headlamp for a pre-dawn group start should run a wide 30 to 120 lumen beam for twice the dark part of your hike, with red light for the trailhead. Then set three group rules: the leader uses low flood light, everyone tilts the beam to the ground 3 to 5 meters ahead, and each hiker keeps the next person just beyond their hot spot.
This hiking headlamp kit list covers a group of four to eight people on a start of one to three hours before sunrise.
| Use | Recommended type | Minimum spec | Olight example |
|---|---|---|---|
| Leader's main light | Headlamp with a wide beam and a long middle mode | 100 to 120 lm for the whole dark window; red light; IPX4 or better | Olight Perun 3 (120 lm for 25 h, IP68) |
| Middle hikers | Any headlamp, or a chest light on a pack strap | 30 lm or less that lasts the whole start; a way to reach Low without passing through Turbo | Olight Oclip 2 Pro (Floodlight 10 lm for 25 h) |
| Sweep (last hiker) | Headlamp plus a rear marker | Forward light like the leader's; a red marker visible from the front of the line | Olight Perun 3 plus an Olight Oclip on red |
| Trailhead gathering | Red light on every light that has one | 5 to 60 lm red | Perun 3 red 15 lm for 70 h |
| Signals and emergencies | Whistle for every hiker | Loud, light, on the outside of the pack | Olight Titanium Emergency Whistle (7 g) |
| Backup | One spare light or charged spare cell per two hikers | Enough runtime for the full dark window on Low | Any second light in the group |
The rest of this guide explains the geometry behind each rule, the settings for each spot in the line, and a 10-minute light check you can run in the parking lot.
📋 Table of Contents
- 1. Quick Answer: Three Rules for Headlamps in a Pre-Dawn Group
- 2. How Do You Hike in a Group at Night With Headlamps?
- 3. Headlamp Tilt: Lighting the Ground at 3 to 5 Meters vs the Back Ahead of You
- 4. Light Discipline in the Column: Leader, Middle, and Sweep Settings
- 5. Which Headlamp Setting Is Best for Hiking?
- 6. How Far Apart Should Hikers Walk at Night?
- 7. Spacing and Signals: Using Light Instead of Shouting
- 8. What to Look for in a Hiking Headlamp for Group Starts
- 9. How Much Runtime Does a Pre-Dawn Start Need?
- 10. When Should You Turn Your Headlamp Off at First Light?
- 11. Team Light Check: A 10-Minute Trailhead Checklist
- 12. FAQ
- 13. Your Pre-Dawn Hiking Headlamp Action List
Quick Answer: Three Rules for Headlamps in a Pre-Dawn Group
Three rules fix most pre-dawn group problems. First, the leader runs a low, wide beam and calls every mode change. Second, everyone aims their beam at the ground 3 to 5 meters ahead, which is roughly an 18 to 28 degree downward tilt from forehead height. Third, each hiker walks 4 to 6 meters behind the next, so the hot spot lands behind the heels ahead.
The usual complaints come from breaking one of them: a beam aimed at head height blinds whoever turns around, a stretched-out line leaves the last hiker in the dark, a light that wakes up on Turbo stops the group, and a few white lights at the trailhead ruin everyone's night vision before the first step.
These rules have a basis. The National Highway Traffic Safety Administration's 2007 report to Congress on nighttime glare explains that "the closer the glare light is to where one is looking, the greater the disability glare will be" (NHTSA). The report is about drivers, but the same eye scatters a headlamp beam aimed at it on a trail. A beam aimed at the ground stays out of that zone.
If you are still choosing lights, our roundup of the best headlamps compares 10 models, and Olight's headlamps page shows the full range. This guide covers how a group uses them together.
How Do You Hike in a Group at Night With Headlamps?
To hike in a group at night with headlamps, agree on the light plan before you leave the trailhead: one leader who sets pace and light level, one sweep who never passes anyone, a single low mode for the middle of the line, red light while standing together, and a short set of light and whistle signals. Then walk in single file with 4 to 6 meters between hikers.
The National Park Service's hiking safety advice for groups is simple: "Let the slowest hiker set the pace. Always stay together. Put the slowest hiker near the front to keep your group together" (NPS hiking safety). In the dark, that advice matters more, because a gap of 50 meters in daylight becomes a hiker walking alone with their own small pool of light.
This order works well for a line of six:
- Leader. Knows the route, carries the brightest light and the navigation, and decides when the group changes modes.
- Slowest hiker. Second in line, so the leader's pace matches theirs.
- Middle hikers. Low mode, steep tilt, eyes on their own pool of light.
- Second-to-last. Checks that the sweep's light is still behind them at each switchback.
- Sweep. Carries a full forward light, a first aid kit and a red rear marker; never passes anyone and never leaves anyone behind.
The leader counts lights at every switchback or trail junction. On a switchback, the line folds back on itself, so the leader can look down the slope and count headlamps below. If the count is short, the group stops until the missing light appears.
Headlamp Tilt: Lighting the Ground at 3 to 5 Meters vs the Back Ahead of You
Tilt your headlamp so the center of the beam hits the ground 3 to 5 meters (10 to 16 feet) ahead of your feet. From a lamp about 1.6 meters off the ground, that takes a downward tilt of about 18 to 28 degrees. At that angle, the brightest part of your beam lands behind the person in front of you instead of on their back or face.
Here is the geometry. If your lamp sits at height h and you aim the beam center at a spot d meters ahead on flat ground, the downward tilt angle is θ = arctan(h ÷ d). The beam center then reaches a person G meters ahead at a height of h × (1 − G ÷ d). If G is larger than d, the beam center hits the ground before it reaches them.
For h, we used 1.6 meters. The CDC lists average measured height for U.S. adults as 68.9 inches (175.0 cm) for men and 63.5 inches (161.3 cm) for women (CDC). Assuming a headlamp sits about 10 cm below the top of the head, which is our assumption rather than a published figure, lamp height runs from about 1.51 to 1.65 meters. The table uses 1.6 meters and a hiker 4 meters ahead.
| Aim point on flat ground | Downward tilt (θ = arctan(1.6 ÷ d)) | Where the beam center reaches a hiker 4 m ahead | Result for the hiker ahead |
|---|---|---|---|
| 3 m ahead | 28.1° | On the ground, 1 m behind their heels | Their heels sit in your spill light; no glare |
| 5 m ahead | 17.7° | 0.32 m up, at calf height | Low glare; your light starts to throw their shadow forward |
| 10 m ahead | 9.1° | 0.96 m up, at hip or pack height | Their own shadow falls on the trail they need to see |
| 20 m ahead | 4.6° | 1.28 m up, mid-back | Bright on their pack; blinding if they turn around |
| Level (0°) | 0° | 1.6 m up, at head height | Straight into their eyes whenever they look back |
Check the arithmetic on one row: arctan(1.6 ÷ 5) = arctan(0.32) = 17.7 degrees, and 1.6 × (1 − 4 ÷ 5) = 1.6 × 0.2 = 0.32 meters. These are beam centers only. Every beam has spill around its center, so some light always reaches the person ahead. The goal is to keep the brightest part off them.
The shadow problem is real: a shallow beam from behind throws the next hiker's shadow onto the rocks and roots they are trying to read. A steep tilt puts that shadow behind their feet.
On a descent, the ground drops away and the hot spot lands farther out, often on the back of the hiker below, so tilt down one more notch at the top of any long descent.
How you set the tilt depends on the light. The Olight Oclip 2 Pro states the range in its manual: "Tilt the light head up to 115° to adjust the vertical beam angle." The Olight Perun 3 sits in a headband bracket, and its product page doesn't list a tilt range. Check any headlamp at home by standing 4 meters from a wall and adjusting until the hot spot lands on the floor well before the wall.
Note: A tilted headlamp only stays tilted if the band holds it still. A loose band lets the lamp nod up with every step. Our guide to headlamp comfort explains band placement and top straps for long wear.
Light Discipline in the Column: Leader, Middle, and Sweep Settings
Give each position in the line its own job and light level. The leader runs 100 to 120 lumens on a wide beam, with short bursts of a higher mode to find the route. Middle hikers run 10 to 30 lumens with a steep tilt. The sweep runs the same forward level as the leader and wears a red marker on the back of the pack.
Light discipline means using the least light that keeps you safe and announcing any bright mode, such as "going bright for the junction," so the group looks down first.
Leader: a wide beam with enough reach to find the trail
The Olight Perun 3 fits the leader's role. Olight rates it at 3,000 lumens, 6,400 candela and a 160 m beam distance, which is a broad beam for that much output rather than a tight spot. Its 120-lumen Med mode is the leader's walking level, and it holds for 25 hours. Olight lists five white levels on its 5,000 mAh 21700 battery: Turbo 3,000~800~600 lumens for 2 + 180 + 30 minutes, High 600~120 lumens for 300 + 30 minutes, Med 120 lumens for 25 hours, Low 30 lumens for 89 hours and Moon 5 lumens for 20 days. Its red light runs 60 lumens for 14 hours or 15 lumens for 70 hours. It is rated IP68 and costs $89.99 (regular price, September 2026).
The limits are weight and reach at low levels. At a listed 150 g, the Perun 3 is heavier than a clip light. Olight also warns on the product page that the "Headlamp mounting bracket is METAL - it is expected to scratch the body of the torch if taken in / out repeatedly." Its user manual lists a working temperature of 0-40°C, so on a start below freezing, keep it and a spare light close to your body before you set off.
Middle hikers: low, steep and steady
Middle hikers only need their own feet lit, and a chest light helps. The Olight Oclip 2 Pro clips to a pack shoulder strap (Olight says its clip grips objects up to 14 mm thick) and tilts its head up to 115 degrees. A chest light doesn't follow your gaze, so when you turn your head to talk to the person behind you, the beam stays on the trail. Olight lists its Floodlight at 530~300~100 lumens in Turbo for 1 + 58 + 5 minutes, 100 lumens for 3 hours 45 minutes on Medium, 10 lumens for 25 hours on Low and 1 lumen for 144 hours on Moon. Its red light runs 40 lumens for 4 hours or 4 lumens for 27 hours. It weighs 75.5 g with its battery, is rated IP66 with 2.0 m impact resistance, and costs $54.99 (regular price, September 2026). The Oclip 2 user manual adds a caution for anyone with an implanted heart device: "If you have an ICD or pacemaker, avoid close or prolonged contact with this product to prevent possible interference."
Two limits apply. Olight's Oclip Series Headlamp Strap lists compatibility with the Oclip Pro, Oclip Pro S and Oclip Ultra, not the Oclip 2 series, so plan to wear the Oclip 2 Pro on your pack strap rather than your head. And while its IP66 rating covers powerful water jets, its manual says "Do not immerse the product in water or other liquids, as it will damage the product." Clip it high on the strap at stream crossings. The Olight Perun 3 Mini would also suit this spot, at 54 g with 100 lumens for 4.5 hours and 10 lumens for 30 hours, but Olight's US store listed its default Orange CW version as Sold Out on September 24, 2026, so it isn't a pick here.
Sweep: full forward light plus a rear marker
The sweep's forward light should match the leader's. The extra item is a rear marker, and the Olight Oclip works well as one. It weighs 30 g with its battery and gives 4 lumens of constant red light for 5 hours. Its manual adds a blinking red option: "In the red light mode, press and hold for more than 0.5 seconds to switch to red light blink." Clip it facing backward on the top of the sweep's pack. Constant red is easier on the eyes of anyone behind the group; the blink is easier to spot from the front across a switchback. It costs $29.99 (regular price, September 2026).
The Oclip is a poor main light for a long start. Its 100-lumen Medium mode lasts 90 minutes, and it is rated IPX5. Use it as a marker or a backup, not as anyone's only light.
This table sums up the settings by position, using Olight's rated levels as examples.
| Position | Normal mode | Brief bursts | Red light | Example Olight setting |
|---|---|---|---|---|
| Leader | 100 to 120 lm, wide beam | 300 to 600 lm at junctions, announced first | At stops | Perun 3 Med 120 lm; High 600 lm for route checks |
| Middle hikers | 10 to 30 lm, steep tilt | None | At stops and in the parking lot | Oclip 2 Pro Floodlight Low 10 lm; Perun 3 Low 30 lm |
| Second-to-last | 30 lm | None | At stops | Any light on Low |
| Sweep | 100 to 120 lm forward | Only when searching for a lost item or person | Rear marker on all the time | Perun 3 Med 120 lm plus an Oclip on red facing back |
Which Headlamp Setting Is Best for Hiking?
For walking in a group on a maintained trail, the best headlamp setting is a low or medium mode of about 30 to 120 lumens on a wide beam. Lower levels of 5 to 30 lumens suit middle hikers and rest stops. High and Turbo modes are for short route checks, not for walking, because they shorten runtime and dazzle everyone around you.
The numbers below show why, and they point at one fact about group hiking: the light you need on your own path is about the same light you put in someone's eyes when you turn around. Your aim point 3 meters ahead sits about 3.4 meters from your lamp (√(1.6² + 3²) = 3.4), and the hiker behind you walks 4 to 6 meters back. Any mode bright enough for your feet is bright enough to dazzle them.
To put numbers on it, we assume the beam keeps the same shape at every level, which is our assumption, because Olight publishes candela only for the maximum mode. Candela then scales with lumens: mode candela = 6,400 × (mode lumens ÷ 3,000) for the Perun 3. Illuminance in lux = candela ÷ distance². For scale, Pelican's summary of the ANSI/NEMA FL 1 flashlight standard (Olight's Oclip manual rates its data per ANSI/NEMA FL 1-2009; the current edition is ANSI/PLATO FL 1-2025) says beam distance ends where the light falls to 0.25 lux, and that "0.25 lux is approximately the equivalent of the light emitted from the full moon" (Pelican).
This table compares each Perun 3 white level with a 30-lumen Low, the light on your own aim point, and the light on the face of the hiker behind at the two gaps this guide recommends. The figures are estimates based on Olight's rated lumens and candela, not measured.
| Perun 3 mode | Rated output | Step-up over a 30 lm Low | Lux across the beam at your 3 m aim point (3.4 m) | Lux on a face 4 m back if you turn around | Lux on a face 6 m back |
|---|---|---|---|---|---|
| Moon | 5 lm | 0.17× | 0.9 lux | 0.7 lux | 0.3 lux |
| Low | 30 lm | 1× | 5.5 lux | 4.0 lux | 1.8 lux |
| Med | 120 lm | 4× | 22 lux | 16 lux | 7.1 lux |
| High | 600 lm | 20× | 111 lux | 80 lux | 36 lux |
| Turbo | 3,000 lm | 100× | 554 lux | 400 lux | 178 lux |
Check the High row: 6,400 × (600 ÷ 3,000) = 1,280 candela; 1,280 ÷ 3.4² = 1,280 ÷ 11.56 = 111 lux; 1,280 ÷ 4² = 80 lux; 1,280 ÷ 6² = 35.6 lux. The step-up column needs no assumption at all: 600 ÷ 30 = 20.
The table explains the rules. A middle hiker on Low already puts about 5.5 lux on the trail at their aim point, 22 times the 0.25 lux full-moon reference (5.5 ÷ 0.25 = 22). If that same hiker turns around on High, the person 4 meters back gets about 80 lux in the face, 320 times the full-moon reference. The NPS explains that night vision depends on rhodopsin, which takes "from 20 to 40 minutes" to build, and that "It only takes a few seconds of bright light to cause the rhodopsin to decay" (NPS dark adaptation article). One careless sweep of a bright beam can undo half an hour of adaptation for the whole line.
The last two columns also show why spacing and mode work together. Moving from a 4-meter to a 6-meter gap cuts the glare by a factor of 2.25 (6² ÷ 4² = 36 ÷ 16), while dropping one mode, from Med to Low, cuts it by 4. A dimmer mode protects the hiker behind you more than extra distance does.
Warning: The Oclip and Oclip 2 manuals say "Do not look directly at the light source or shine it into your eyes, as this may cause temporary blindness or permanent damage to your eyes." On a group hike, the risk is the turn of a head. Drop to red or Low before you turn to face anyone.
How Far Apart Should Hikers Walk at Night?
On a maintained trail at night, hikers in a group should walk about 4 to 6 meters (13 to 20 feet) apart. That spacing puts your hot spot on the ground just behind the heels of the person ahead while keeping their feet inside your spill light, so you can follow their line without lighting their back. Close up at junctions and rest stops.
The spacing follows from the tilt rule. If you aim 3 to 5 meters ahead, the person in front should be about 1 meter beyond your aim point. That gives a simple formula: gap = aim distance + 1 meter. At a 3-meter aim, the gap is 4 meters. At a 5-meter aim, the gap is 6 meters.
At 2 meters, your hot spot sits on their pack and any stumble becomes a collision. Much wider, and the leader's calls stop carrying and the sweep walks alone.
Column length adds up fast. For six hikers at 4 to 6 meters apart, there are five gaps, so the line runs 20 to 30 meters from leader to sweep (5 × 4 = 20; 5 × 6 = 30). At that range, the leader sees the lights behind as small points rather than people, so the leader has to count lights instead of watching feet. For groups of more than eight, split into two lines, each with its own leader and sweep, and set a regroup point.
This table gives spacing by trail condition, using the aim-point rule.
| Condition | Aim point | Gap to the hiker ahead | Why |
|---|---|---|---|
| Wide, smooth trail | 5 m | About 6 m (20 ft) | Faster pace; flatter tilt is fine |
| Rooty or rocky trail | 3 m | About 4 m (13 ft) | Short steps; you need detail at your feet |
| Steep descent | 3 m, extra notch of tilt | 4 to 6 m | The ground drops away and the beam reaches farther |
| Stream crossing or ledge | Your own feet | One person at a time; the next waits on dry ground | The waiting hiker lights the far bank or the crossing hiker's feet |
| Loose slope | 3 m | Stand to the side, never directly below another hiker | A dislodged rock rolls straight down the fall line |
| Junctions and breaks | Ground at the group's feet | Close up to within talking distance | Head count and plan check |
Spacing and Signals: Using Light Instead of Shouting
Pick four signals before you start and practice them once at the trailhead. A short set of light and whistle signals works better than shouting down a 30-meter line, because a light is easy to see, a whistle carries past wind and water noise, and neither one depends on everyone hearing the same words.
The NPS outdoor emergency plan notes that "Blowing a whistle helps people find you and saves your energy from yelling," and describes the flashlight SOS pattern as "Three times quickly, three times slowly, three times quickly" (NPS outdoor emergency plan). Reserve both for real emergencies, and use a separate, simpler code for routine calls.
No national standard exists for routine trail signals, so this table is a suggested group code. Agree on your own version at the trailhead.
| Signal | Meaning | Who sends it | How to send it without glare |
|---|---|---|---|
| Light circled slowly on the ground | All OK, keep moving | Anyone, in answer to a check | Beam aimed at your own feet |
| Two flashes on the ground | Stop and wait | Anyone who needs a pause | Flash your Low mode on the trail, not at people |
| Rear red marker switched to blink | Sweep has stopped | Sweep | Blinking red is dim and faces backward |
| One whistle blast | Where are you? Answer with one blast | Leader or sweep | No light needed |
| Three whistle blasts, repeated | Emergency: come to me | Anyone | Add the flashlight SOS pattern if help may be far away |
Pair each hiker with the person behind them. If you lose sight of your partner's light, stop and send the stop signal.
The Olight Titanium Emergency Whistle weighs 7 g and measures 0.35 in across and 2.09 in long, according to Olight. It costs $15.99 (regular price, September 2026). For a six-person group, a whistle for everyone adds 42 grams across the whole party (6 × 7 g). Clip it to a shoulder strap, not inside a pocket, so you can reach it with gloves on.
Safety note: If someone goes missing on a dark trail, stop the whole group in one place and send the whistle signal. Don't send hikers back alone to search. Follow the plan you set before the hike, and call for help if you can't make contact.
What to Look for in a Hiking Headlamp for Group Starts
For group starts, look for a hiking headlamp with a wide beam at its main walking level, a low mode you can reach directly from off, one-hand mode changes you can work with gloves, red light, and a band that holds the tilt. Peak lumens matter much less than these five features, because the group walks on low modes.
Beam: flood for walking, a short reach for route checks
A wide beam lights the trail around your feet evenly, which suits walking in a line. A useful rough check is candela per lumen: lower numbers mean more spread, and our best camping headlamp guide scores several lights on it. For a group start, the practical test is simpler: at your walking level, the beam should light the full width of the trail at your aim point, not just a bright dot. A light with both a floodlight and a spotlight, like the Oclip 2 Pro, lets one person walk on flood and switch to spot to read a sign.
A note on the Oclip 2 Pro's reach: its spec table lists Max Throw as "426.5 ft (125 m)." The meter figure matches the product highlights, which describe "a 125-meter spotlight." The feet figure converts to 130 m (426.5 ÷ 3.28 = 130), the same "426.5 ft (130 m)" listed for the Oclip 2 Ultra, so the 125 m figure is the one to plan with.
Low mode first: one press straight to a dim level
The worst moment in a group start is turning on a light that remembers Turbo. Look for a direct path to a low mode. Olight's Perun 3 manual says, "When the flashlight is off, double press the switch to access Low." The Oclip manual says, "When turned off, the current mode will be memorized," so set it to red or Low before you pack it and it comes back on at that level.
Glove-friendly controls
Olight describes the Perun 3's control as a "Large Metal Side Button" that "Enables simple, glove-friendly operation." The Oclip 2 Pro adds a selector for flood, spot and red, so you can choose red by feel before you press the button.
Red light for the trailhead
Red light keeps the parking lot from becoming a glare field while people load packs. The NPS article on dark adaptation explains that "deep red lights do not trigger the neutralization of the rhodopsin" and that "a dim red light is best"; our guide to red light and night vision covers the science.
Cold-weather limits
Check how the light behaves in the cold. The Oclip 2 manual says, "In environments below 0°C (32°F), the white light is limited to Low and Medium modes," and that "In 0°C to 10°C conditions, the white light Turbo will be unavailable." That doesn't matter much for a middle hiker on Low, but a leader who relies on Turbo for route finding needs a different plan on a freezing morning.
A band that holds the tilt
A tilt setting is only as good as the band, and elastic wears out. Olight sells the Headband for Perun Series for $9.99 (regular price, September 2026).
This table matches common sub-scenarios of a pre-dawn start with the light each one needs.
| Sub-scenario | Output that works | Runtime needed | Water rating | Beam |
|---|---|---|---|---|
| Parking lot and trailhead | 5 to 60 lm red | 15 to 30 minutes | Any | Red, aimed at the ground |
| Forest trail in single file | 10 to 30 lm (middle); 100 to 120 lm (leader) | 2 × the dark window | IPX4 or better for dew and rain | Wide flood |
| Junctions, cairns and signs | 300 to 600 lm in short bursts | A few minutes in total | Same as above | Spot or narrow beam |
| Stream crossings | 30 to 120 lm on your own feet | Brief | IP66 or better; IP68 if the light could be submerged | Flood |
| Rest stops and map checks | Red, or 5 to 10 lm white | 5 to 10 minutes per stop | Any | Red or dim flood |
| First light | Moon or red, then off | Until footing is clear | Any | Dim |
How Much Runtime Does a Pre-Dawn Start Need?
Plan for at least twice the time between your start and the beginning of civil twilight, on the mode you will actually walk on. The doubling covers a slow group, a wrong turn or a long stop. For a 3:30 a.m. start in the Colorado high country in mid-July, that is about 3.5 hours of light per hiker.
Here is the worked example. For July 15, 2026, near Guanella Pass, Colorado (39.60° N, 105.71° W, Mountain Daylight Time), the U.S. Naval Observatory's calculator gives civil twilight beginning at 5:16 a.m. and sunrise at 5:48 a.m. (USNO). The moon is a 3% crescent that doesn't rise until 7:08 a.m., so the start is fully dark. A 3:30 a.m. start gives 106 minutes of dark walking (3:30 to 5:16). Doubling that gives 212 minutes, or 3 hours 32 minutes.
Early starts in the mountains are common for a reason, and the NPS list of 10 essentials treats light as basic gear: "Headlamps are the recommended light source because they are hands-free. Be sure to pack extra batteries" (NPS 10 essentials). The National Weather Service advises that "in mountainous areas, thunderstorms typically develop in the early afternoon, so plan to hike early in the day and be down the mountain by noon" (NWS lightning safety). In the desert, the reason is heat. Grand Canyon National Park tells hikers, "Plan your day so you are not hiking between the hours of 10am and 4pm," and suggests, "Enjoy a predawn start and a late afternoon finish" (Grand Canyon Hike Smart).
This table turns Olight's rated runtimes into the number of 212-minute pre-dawn starts one full charge covers: rated minutes ÷ 212. Anything below 1.0 won't last even one planned start on that mode.
| Light and mode | Rated runtime | Rated minutes | Starts per charge (÷ 212 min) | Verdict |
|---|---|---|---|---|
| Perun 3, Med 120 lm | 25 hours | 1,500 | 7.1 | About a week of daily starts for the leader or sweep |
| Perun 3, Low 30 lm | 89 hours | 5,340 | 25.2 | About 25 starts on one charge |
| Oclip 2 Pro, Floodlight Medium 100 lm | 3 hours 45 minutes | 225 | 1.06 | One start, just; charge it the night before every hike |
| Oclip 2 Pro, Floodlight Low 10 lm | 25 hours | 1,500 | 7.1 | About a week of starts for a middle hiker |
| Oclip, Medium 100 lm | 90 minutes | 90 | 0.42 | Less than half a start; not a main light |
| Oclip, Low 10 lm | 12 hours | 720 | 3.4 | Three starts as a backup light |
| Oclip, red 4 lm | 5 hours | 300 | 1.42 | One start for the sweep's rear marker, with a margin |
Check two rows: 25 hours × 60 = 1,500 minutes, and 1,500 ÷ 212 = 7.08; 90 ÷ 212 = 0.42. These ratios are based on Olight's rated runtimes, not measured. The Oclip manual notes that its runtime figures come from tests "performed indoors," and cold mornings shorten real runtime.
For a very long night with spare cells, our guide to the best headlamp for ultra running covers battery swaps in the dark.
When Should You Turn Your Headlamp Off at First Light?
Turn headlamps down when civil twilight begins and off once everyone can see their footing, which on open ground is often before sunrise. The leader makes the call so the whole line switches at once. Staying on bright white after the sky starts to lighten keeps your eyes adapted to the beam instead of the dawn.
The National Weather Service defines civil twilight as the period when "the geometric center of the sun is 6 degrees below the horizon," ending at sunrise. Under those conditions, "the horizon and terrestrial objects can be discerned, and in many cases, artificial lighting is not needed." In nautical twilight before that, "detailed outdoor activities are likely curtailed without artificial illumination" (NWS twilight types). In the Colorado example above, civil twilight lasts 32 minutes, from 5:16 to 5:48 a.m.
Use a three-step switch-off:
- At the start of civil twilight: leader calls "down to Moon." Everyone drops to their lowest white mode or red.
- When the leader can see rocks and roots without a light: leader calls "lights off, keep them handy." Hikers under trees or on rough ground may keep Moon on for a few more minutes.
- At the next stop: everyone checks that their light is off, locked or stowed where it won't switch on in the pack.
Forest and canyons stay dark longer than open ridges, so turn Low back on if the trail drops into trees. Be careful with white light around older hikers: the NHTSA report notes that "Older drivers also take longer for their eyes to recover their sensitivity after being exposed to glare."
Team Light Check: A 10-Minute Trailhead Checklist
Run a 10-minute light check in the parking lot, on red, before anyone starts walking. It confirms that every hiker has a charged light with a low mode they can reach, a backup, a whistle and the group's signals, and it catches the one light stuck on Strobe before it matters on the trail.
Use these steps in order:
- Minute 0 to 1: switch to red. Everyone turns on red or their lowest mode. Anyone without red points the light at the ground.
- Minute 1 to 3: charge check. Each hiker reads their battery indicator aloud. Anything below half goes to the back as a backup, not a main light.
- Minute 3 to 4: low-mode drill. Each hiker turns their light off, then on to Low, with gloves on.
- Minute 4 to 5: tilt check. Everyone faces the same way and aims their beam at the ground about 3 meters ahead. The leader walks down the line and checks that no beam reaches head height.
- Minute 5 to 6: positions. Name the leader, the sweep and the order of the line. Put the slowest hiker second.
- Minute 6 to 7: signals. Run through the four signals once. Everyone blows their whistle once so you know the whistles work.
- Minute 7 to 8: backups. Count backup lights and spare cells: at least one per two hikers.
- Minute 8 to 9: rear marker. The sweep switches on the red marker, and the leader walks 20 meters up the trail and confirms they can see it.
- Minute 9 to 10: timing. The leader states the start of civil twilight, the turnaround time and the regroup points.
Tip: Charge every light the night before, not in the car on the way. A light topped up from a car port on a short drive may start the hike well below full.
FAQ
Your Pre-Dawn Hiking Headlamp Action List
Before the next early start, work through this list with the whole group, not just the leader. Each item is something you can check the night before or in the parking lot, and together they cover beam, tilt, spacing and timing.
- Look up civil twilight for your trailhead and date, subtract your start time, and double it. That is your runtime target.
- Check every hiking headlamp in the group against that target on the mode you will walk on, not on its lowest mode.
- Give the leader and sweep the longest-running lights, and put a red rear marker on the sweep's pack.
- Set tilt at home: stand 4 meters from a wall and aim until the hot spot lands on the floor well before the wall.
- Set every light to red or Low before you pack it, so it doesn't come on at full power in the dark.
- Agree on four signals and give every hiker a whistle.
- Walk 4 to 6 meters apart, count lights at every switchback, and switch off together when civil twilight lets everyone see their footing.
If some of your group need their first headlamp, our guide to the best headlamp brands for hiking compares hiking headlamps from five brands on runtime, bands and warranty.
Changelog
- September 24, 2026: First published.