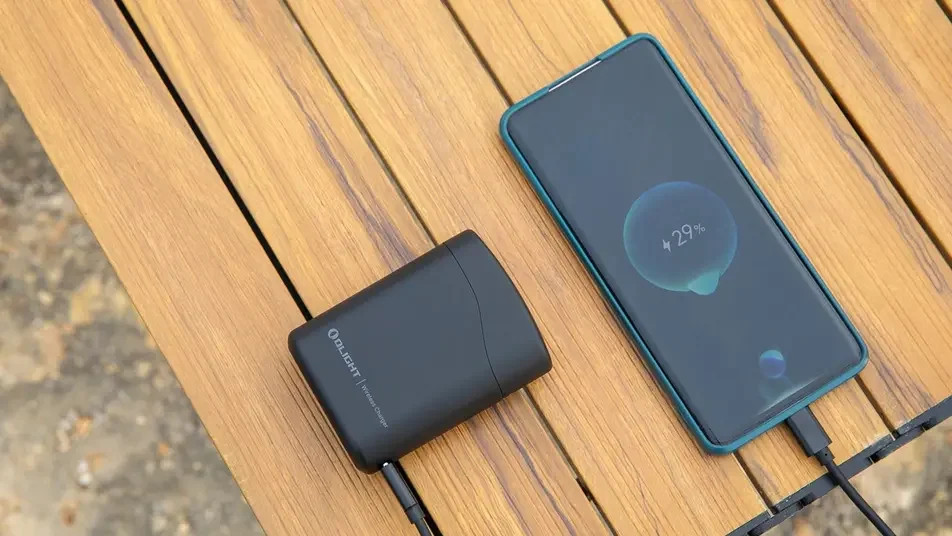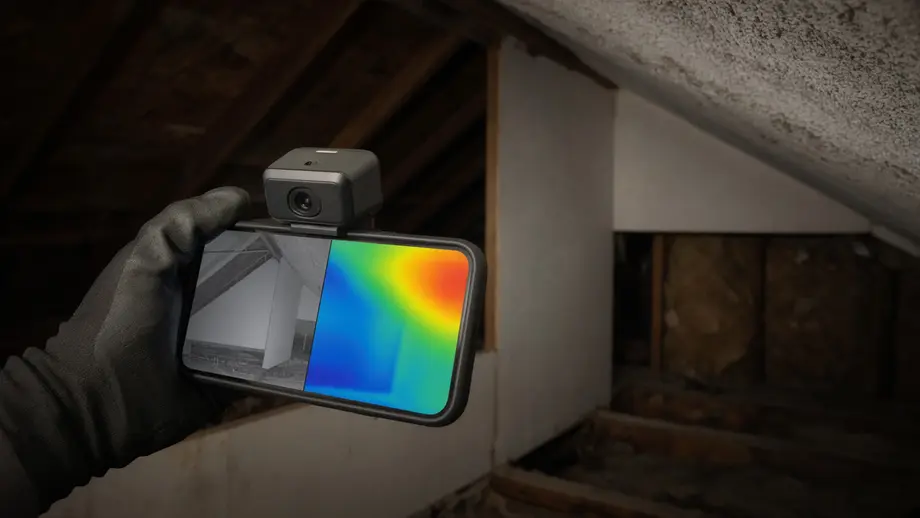
Olight sells the TC001 Max, a TOPDON product, through its OSelect store, and makes the Arkfeld Ultra flashlight. Olight specs and prices come from its product pages as of September 2026; other specs come from their makers. Cameras and meters were compared on published specs, not in field trials.
⚡ TL;DR
A thermal camera for home inspector work shows surface temperature differences, not water, mold or missing insulation. Treat every anomaly as a lead: confirm it with a moisture meter or a second check, then write what you observed, what you measured and who should evaluate it next. A 256 x 192 radiometric phone camera such as the TC001 Max covers most residential scans.
This equipment list shows what a thermal camera for home inspector reports needs around it, with minimum specs and example models (official specs and regular prices as of September 2026).
| Job in the inspection | Recommended tool type | Minimum spec to look for | Example model (official spec) |
|---|---|---|---|
| Find surface temperature patterns | Radiometric thermal camera | Stated accuracy, lockable level and span, sensitivity of 70 mK or finer | TC001 Max: 256 x 192, under 40 mK, ±2°C or ±2%, $309.00 (regular price, September 2026) |
| Confirm suspected moisture | Moisture meter, pin and pinless | A drywall scale or a reference (relative) mode | Delmhorst BDX-20 pin meter: drywall 0.1% to 6%, reference 1 to 100, $450.00 (Delmhorst, September 2026) |
| Visible light for photos, attics and crawlspaces | Rechargeable flashlight | A mid mode that outlasts a full inspection, a lockout, IPX7 or better | Olight Arkfeld Ultra: 1,400 lumens max, 100 lumens for 9 h 45 min, IPX7, $119.99 (regular price, September 2026) |
| Pointing out a spot on a high ceiling | Low-power laser pointer | Visible class label, used away from eyes | Arkfeld Ultra green laser, Class 3R |
| Checking the camera before you rely on it | Ice-water bath | Reads 0°C ±2°C with emissivity set to 0.96 | Method from TOPDON's TC001 Max user manual |
| Recording conditions | Indoor and outdoor thermometer | Any reliable air thermometer | Write both temperatures on every thermal page |
Here is how thermal findings usually go wrong. A blue patch on a bathroom ceiling goes into the report as "moisture." The buyer panics, the seller's plumber finds a dry ceiling, and the inspector gets a call from two agents. The camera did its job; the wording did not. This guide covers what the camera can and cannot show, the conditions you need, how to confirm with a moisture meter, how to word findings so they hold up, and what ASHI, InterNACHI and state standards say.
📋 Table of Contents
- 1. What Can a Thermal Camera for Home Inspector Work Actually Show?
- 2. What Does an Infrared Scan Find in a Home Inspection?
- 3. Why Do You Need an Indoor-Outdoor Temperature Difference?
- 4. How Do You Confirm a Thermal Anomaly With a Moisture Meter?
- 5. How Should You Word Thermal Findings in a Home Inspection Report?
- 6. How Far Can You Stand From a Wall or Ceiling?
- 7. Phone Thermal Cameras for Home Inspectors Compared
- 8. Can a Thermal Camera See Mold Behind Walls?
- 9. What Do ASHI, InterNACHI and State Standards Say About Thermal Imaging?
- 10. Is Thermal Imaging Worth It for a Home Inspection?
- 11. What Is the Best Camera for Home Inspectors?
- 12. What Is the Best Thermal Camera for Electrical Inspections?
- 13. Thermal Scan Checklist for Your Next Home Inspection
- 14. FAQ
What Can a Thermal Camera for Home Inspector Work Actually Show?
A thermal camera for home inspector work shows the apparent surface temperature of walls, ceilings, floors and equipment. It cannot see water, mold, studs or wires directly. TOPDON's TC001 Max user manual says the device is "designed to measure surface temperatures but cannot detect heat through transparent materials like glass, acrylic, or water, nor through opaque objects." Every thermal finding in your report starts from that limit.
Teledyne FLIR, which makes thermal cameras, says the same in its explainer on whether thermal imaging can see through walls: "No, thermal cameras cannot see through walls, at least not like in the movies." It adds that "if something inside the wall causes enough of a temperature difference, a thermal imager will be able to sense it on the surface of the wall." Windows are worse. FLIR notes that "glass acts like a mirror for infrared radiation," so a scan of a window mostly shows reflections.
Two numbers on the spec sheet explain how to use the readings. The TC001 Max, one of the thermal imaging cameras Olight sells through its OSelect store, lists thermal sensitivity (NETD) under 40 mK, which is about 0.07°F, and accuracy of ±2°C or ±2% of reading, which is ±3.6°F for any surface under 212°F. The camera can show a difference about 50 times smaller than the possible error on any single number (3.6 ÷ 0.072 = 50). That ratio gives you a reporting rule: compare neighboring areas in the same frame and report the difference, and treat any single absolute temperature as approximate.
Tip: Check the camera before a busy week. The TC001 Max manual suggests stirring an ice-water mixture, setting emissivity to 0.96, entering the actual distance, and confirming the reading is 0°C ±2°C. If it is not, contact TOPDON support before you use the numbers in a report.
What Does an Infrared Scan Find in a Home Inspection?
An infrared scan in a home inspection finds three kinds of surface patterns worth following up: cool areas that may be damp materials, cold or warm areas where insulation is missing or air is leaking, and warm spots on electrical or mechanical equipment. Each pattern is a lead. It becomes a reported defect only after a second method or a clear visual sign backs it up.
The Department of Energy's guide to thermographic inspections (archived copy) describes the same three uses. It says "Thermograms of electrical systems can detect abnormally hot electrical connections or components," that thermography helps assessors check "the effectiveness of insulation," and that "because wet insulation conducts heat faster than dry insulation, thermographic scans of roofs can often detect roof leaks." HVAC equipment adds a fourth use; our guide to the best thermal imaging camera for HVAC covers coils, line sets and registers.
Moisture also leaves recognizable shapes. FLIR's guide on how to detect a water leak with thermal imaging lists them: a "top-down triangular shape" on walls as water spreads downward, an "amorphous, unstructured shape" on ceilings, water "wicking up a wall" after flooding, and a hot water pipe leak that "shows as a warm area."
This scenario table sets out, for each common finding, the conditions you need, the pattern to expect, how to confirm it and what else can look the same.
| Sub-scenario | Conditions you need | Typical thermal pattern | Confirm with | Common look-alike |
|---|---|---|---|---|
| Ceiling below a bathroom or roof | Fixtures run during the inspection; stable indoor temperature | Irregular cool patch | Pinless map plus a pin reading against a dry reference | Supply air washing the ceiling; missing attic insulation |
| Wall below a window or roof line | Recent rain helps; interior surface out of direct sun | Cool triangle that widens downward | Pinless map along the edges; pin at the lowest point | Air leaking at the window frame |
| Base of a wall after a leak or flood | Access to the baseboard | Cool band along the floor line | Pin reading at the baseboard | Cold exterior wall at the floor junction |
| Hot water supply leak | Hot water run for several minutes | Warm spot that grows from the pipe path | Moisture meter, then plumber | A normal hot pipe inside the wall |
| Insulation gaps in walls or ceilings | At least 20°F indoor-outdoor difference | Cavity-shaped cold areas in winter, warm areas in summer | Visual check from the attic where accessible | Framing, which shows as regular stripes |
| Air leakage | Temperature difference plus wind or a blower door | Streaks at outlets, top plates and trim | Visual check at the source | Reflections from glass or shiny trim |
| Electrical panel or receptacle | Circuit under load | One breaker or lug warmer than similar ones | Report as observed; refer to an electrician | Uneven load between circuits |
Why Do You Need an Indoor-Outdoor Temperature Difference?
Insulation gaps and air leaks show up only when heat is flowing through the wall, and heat flows only when inside and outside temperatures differ. The Department of Energy says the most accurate thermographic images usually occur with "a large temperature difference (at least 20°F [14°C]) between inside and outside air temperatures." On a mild day, envelope patterns shrink until other effects hide them.
A simple calculation shows how fast the contrast shrinks. It uses a 2x4 wall with 1/2 inch drywall, R-13 batts, 1/2 inch plywood sheathing and hollow-backed vinyl siding. The R-values come from a building materials R-value table used in a University of Washington architecture course: interior air film R-0.68, drywall R-0.45, plywood about R-0.63, siding R-0.61, exterior air film R-0.17, and R-1.00 for an empty air space. The insulated wall totals about R-15.5; the same wall with an empty cavity totals about R-3.5.
The interior surface sits below room air by the temperature difference times 0.68 divided by the wall's total R-value. This table applies that to a room held at 70°F.
| Indoor-outdoor difference | Insulated cavity surface | Empty cavity surface | Contrast you can image |
|---|---|---|---|
| 40°F (70°F in, 30°F out) | 1.75°F below room air | 7.68°F below room air | About 5.9°F |
| 30°F | 1.31°F below | 5.76°F below | About 4.5°F |
| 20°F (DOE minimum) | 0.88°F below | 3.84°F below | About 3.0°F |
| 10°F | 0.44°F below | 1.92°F below | About 1.5°F |
| 5°F | 0.22°F below | 0.96°F below | About 0.7°F |
A camera with 40 mK sensitivity can still display a 0.7°F difference. The problem is everything else that makes differences of that size: a sunny wall, a register blowing across the drywall, a bookcase that just moved, or your own reflection. The model ignores studs, air movement and sun, so treat it as an illustration. It still supports a practical rule: below about 20°F, do not call insulation defects from the image, and say that conditions limited the scan.
When the weather will not cooperate, use these steps:
- Record the conditions. Write the indoor and outdoor temperatures on each thermal page, and state that the envelope scan was limited when the difference was under 20°F.
- Ask ahead. The DOE guide notes that it can be necessary "to create and maintain a specific inside/outside temperature difference for a period of up to four hours" by running the heat or air conditioning. Ask the listing agent to leave the system running before the appointment.
- Keep scanning for moisture. FLIR explains that water is detected "due to temperature differences caused by evaporation, capacitance, or conduction," and that these processes "can be affected by weather conditions or interior humidity." Damp spots can show on a mild day, but a humid house slows evaporation and weakens them.
- Use the plumbing run. InterNACHI's standard already has you inspect "interior water supply, including all fixtures and faucets, by running the water." Scan ceilings and walls below the bathrooms after that run.
How Do You Confirm a Thermal Anomaly With a Moisture Meter?
Confirm a thermal anomaly by measuring the cool area and a dry reference area of the same material with a moisture meter, then comparing the two. FLIR's water leak guide says a pattern that looks like moisture "does not guarantee the presence of water," and that you "should always use a moisture meter to confirm what the thermal camera has detected." Report the camera and meter results together.
Follow this sequence for each anomaly:
- Capture a matched pair. Save the thermal image and a visible photo from the same spot. The TC001 Max's Dual Fusion mode overlays the two.
- Rule out reflections. Step a few feet to one side. FLIR's emissivity explainer warns that a surface can "show a much higher temperature according to your camera if a nearby heat source (such as the thermographer) was reflecting off the surface." If the spot moves with you, it is a reflection.
- Take a dry reference. Read the same material in a normal area first. Wagner Meters describes this relative approach as "measuring a known dry area of the material to establish a baseline," then looking for areas that read significantly higher.
- Map with a pinless meter. Sweep across the cool patch and past its edges. Wagner notes that most pinless meters read to a maximum depth of about 3/4 inch, and Delmhorst notes that a pinless reading averages everything in that zone, so "you won't know how deep it is."
- Pin where you have permission. Use pins at the wettest pinless point, at a baseboard or another spot where a small hole is acceptable. ASHI's standard lists "Probe surfaces that would be damaged" among the things inspectors are not required to do.
- Photograph the meter in place. Show the display and the scale it was set to.
- Write the numbers down. Record the reading, the dry reference and the scale in the report, next to the thermal pair.
This table compares the two meter types using the makers' own descriptions from Delmhorst and Wagner Meters.
| Feature | Pin meter | Pinless meter |
|---|---|---|
| How it measures | Electrical resistance between two pins | Electromagnetic (radio frequency) field under a sensor plate |
| Surface damage | Two small holes | None; often called non-destructive |
| Depth | The depth the pins reach | Fixed depths, commonly 1/4 inch and 3/4 inch |
| Best inspection use | Pinpointing the wettest spot; baseboards and trim | Fast mapping of large drywall and ceiling areas |
| Watch-outs | Needs the right material scale | Needs full flat contact; metal or dense material behind can raise readings |
Wagner also warns that materials behind a thin panel, such as "concrete, metal, or other materials that cause elevated meter readings," affect pinless results. A high pinless reading over a wall with metal or masonry close behind the surface deserves a pin check before it goes in the report.
This decision table turns each combination of camera and meter results into report wording.
| Thermal result | Meter result | What to write |
|---|---|---|
| Cool pattern | Elevated compared with the dry reference | Elevated moisture readings confirmed at the pattern; recommend evaluation by a qualified plumber or roofer to find the source |
| Cool pattern | Same as the dry reference | Temperature anomaly observed; moisture not detected at the locations checked; may relate to insulation, airflow or surface conditions |
| No pattern | Elevated at a visible stain | Moisture readings elevated at the stain; recommend evaluation; note that thermal conditions may not show every damp area |
| No pattern | Dry at a visible stain | Stain observed, dry at the time of inspection; recommend asking the seller about its history and monitoring |
| Warm pattern along a hot water line | Elevated | Possible hot water supply leak; recommend prompt evaluation by a licensed plumber |
Warning: Never write "no moisture present." A meter reads only the spots you test, and intermittent leaks come and go. Write "no elevated readings at the locations checked," and name the locations.
How Should You Word Thermal Findings in a Home Inspection Report?
Word thermal findings in three parts: what the image showed, the confirming measurement and its result, and a recommendation that names who should evaluate it next. Describe the pattern, location and conditions. Leave causes, mold and repair methods to the specialist, because the ASHI and InterNACHI standards both exclude determining the cause of conditions and the presence of mold.
ASHI's Standard of Practice asks for "reasoning or explanation as to the nature of the deficiencies" that "are not self-evident," plus recommendations "to correct, or monitor for future correction" or items "needing further evaluation." A thermal anomaly is almost never self-evident to a buyer, so the reasoning sentence matters. Also assume the images may travel. The DOE guide notes that "a thermographic scan performed by a certified technician is usually accurate enough to use as documentation in court proceedings."
This table lists phrases that cause trouble and wording that stays within what you observed.
| Avoid writing | Why it causes trouble | Write instead |
|---|---|---|
| "Thermal image shows mold behind the wall." | Cameras cannot see mold, and both major standards exclude it | "A cooler area was observed on the wall below the kitchen window. Moisture readings there were elevated compared with a dry area of the same wall." |
| "Moisture present" (camera only) | FLIR: a moisture-like pattern does not guarantee water | "Temperature pattern consistent with possible moisture; not confirmed with a meter because the surface was not accessible." |
| "Missing insulation in the north wall" | Needs a temperature difference, and framing or airflow can look similar | "Pattern consistent with missing or displaced insulation in two stud bays. Indoor 68°F, outdoor 31°F at the time of the scan." |
| "Roof leak above the hallway" | Determining the cause is excluded | "Elevated moisture at the hallway ceiling; recommend evaluation by a licensed roofing contractor to identify the source." |
| "Wiring is overheating." | Load, emissivity and the cover change the reading | "Breaker 14 appeared warmer than adjacent breakers under the loads present; recommend evaluation by a licensed electrician." |
| "No leaks found." | You checked some spots on one day | "No elevated moisture readings were found at the locations checked on the inspection date." |
Use this four-line template for each thermal finding:
- Observation: "A cooler irregular area, about 2 feet across, was observed on the ceiling below the upstairs hall bathroom (thermal image 7, visible photo 7A)."
- Conditions: "Indoor 71°F, outdoor 48°F. Hall bath fixtures had been run for about 10 minutes before the scan."
- Confirmation: "Pinless readings were elevated across the cool area compared with a dry reference area of the same ceiling; a pin reading at the wettest point was also elevated."
- Recommendation: "Recommend evaluation by a licensed plumber to determine the source and extent before closing. The inspector did not determine the cause or test for mold."
Keep the images honest, too. FLIR's water leak guide recommends manual level and span, noting that moisture problems "appear best when the image is adjusted for about a 10°C or 20°C span." Lock that span for every image of the same area, name the palette, and remember that blue only means cooler than the rest of the scale you chose.
Tip: Put the thermal scope in your pre-inspection agreement. Say which areas you scan, that the camera reads surface temperatures only, and that anomalies are confirmed where accessible. Clients who read it before the inspection read the report more calmly.
How Far Can You Stand From a Wall or Ceiling?
With a 256 x 192 camera like the TC001 Max, stand within about 10 feet of the surface you plan to report on. At 10 feet each pixel covers about 0.45 inch, so a feature needs to be about 1.4 inches wide to span three pixels. One frame from that distance covers about 10.6 x 7.7 feet, enough for most wall sections in a single shot.
The math uses the TC001 Max manual's instantaneous field of view (IFOV), 3.75 milliradians per pixel, and its 56° x 42° field of view. Pixel footprint equals IFOV times distance. Frame width equals twice the distance times the tangent of half the angle. The Bureau of Reclamation's thermal analysis manual (FIST 4-13) puts the underlying rule plainly: "The thermographer needs to recognize the spot size and ensure that the target size is adequate." This guide uses three pixels across a target as a working minimum. The FLIR Edge Pro column uses 160 pixels across a 54° view, about 5.9 milliradians per pixel.
| Distance to surface | TC001 Max pixel footprint | TC001 Max 3-pixel minimum | TC001 Max frame size | FLIR Edge Pro 3-pixel minimum |
|---|---|---|---|---|
| 3 ft | 0.14 in | 0.41 in | 3.2 x 2.3 ft | 0.64 in |
| 6 ft | 0.27 in | 0.81 in | 6.4 x 4.6 ft | 1.27 in |
| 10 ft | 0.45 in | 1.35 in | 10.6 x 7.7 ft | 2.12 in |
| 15 ft | 0.68 in | 2.03 in | 16.0 x 11.5 ft | 3.18 in |
The practical results are simple. A damp ceiling patch a foot across is visible from anywhere in a normal room. A warm receptacle face or a single breaker handle needs you within a few feet. For quoted numbers, stay closer still. The TC001 Max spec sheet does not state a calibrated measuring distance, but TOPDON lists a "Calibration Temperature Measurement Distance" of 0.2 to 5 m (about 16.4 feet) for its TC002C Duo, which shares the TC001 Max's 256 x 192 sensor, 3.2 mm lens and 56° x 42° view. This guide therefore treats about 16 feet as a conservative outer limit for any temperature you write down.
Phone Thermal Cameras for Home Inspectors Compared
For most home inspectors, a phone-mounted radiometric camera with 256 x 192 native pixels, 40 mK sensitivity and a stated accuracy covers residential scans. The TC001 Max and TOPDON's TC002C Duo share those core numbers, while the FLIR Edge Pro trades resolution for a wireless link that lets you hold the camera away from the phone.
This table compares the three on their makers' published specs and prices as of September 2026.
| Spec (official) | TC001 Max | TC002C Duo | FLIR Edge Pro |
|---|---|---|---|
| Native resolution | 256 x 192 (49,152 pixels) | 256 x 192 | 160 x 120 |
| Enhanced image | 512 x 384 via TISR | 512 x 384 via TISR | 480 x 360 super resolution |
| Thermal sensitivity | Under 40 mK | Under 40 mK | 70 mK |
| Frame rate | 25 Hz | 25 Hz | 8.7 Hz |
| Field of view | 56° x 42° | 56° x 42° | 54° x 42° |
| Temperature range | -4°F to 1,022°F | -4°F to 1,022°F | -4°F to 248°F and 32°F to 752°F |
| Accuracy | ±2°C or ±2% of reading | ±2°C or ±2% | ±3°C (5.4°F) or ±5% |
| Connection | Plugs into iOS, Android or Windows; USB-C to Lightning cable and USB-C extension included | Plugs into USB-C iPhones, Android and Windows; USB-C to Lightning cable in the box | Wi-Fi, up to 5 m (16.4 ft) from the phone |
| Power | Draws from the phone; no batteries | Uses the device | Own battery, about 2 hours 30 minutes |
| Ingress rating | IP54 | Listed as NA | IP54 |
| Drop rating | 1 m (3.28 ft) | 2.0 m | 2 m (6.56 ft) |
| Weight | 30 g | 30 g | 153 g |
| Price | $309.00 (regular price, September 2026) | $299.00 (TOPDON) | $529.00 (FLIR) |
The TC001 Max suits inspectors who want the most pixels for the money plus a stated dust and splash rating. It needs no charging, and Olight says it works "without removing most phone cases." Its limits matter on the job. The listed working range is 14°F to 122°F. If an attic is hotter than that, scan it early in the day and keep the phone out of the sun between shots. IP54 is splash protection, not a rating for rain on a roof.
The TC002C Duo matches the sensor, lens and accuracy and lists a higher 2.0 m drop rating, but TOPDON lists its IP rating as NA, and Olight does not currently list it in its US store. The FLIR Edge Pro has fewer pixels and coarser sensitivity, yet its Wi-Fi link lets you push the camera through an attic hatch or into a crawlspace opening while you watch the phone. From the 3-pixel table above, it needs you about 1.6 times closer than the TC001 Max for the same detail.
Can a Thermal Camera See Mold Behind Walls?
No. A thermal camera cannot see mold, behind walls or on them. It shows surface temperature, and mold at room temperature looks like the drywall around it. What a camera can sometimes show is the cool pattern of damp material, and damp material is where mold grows. Report the moisture evidence, and refer mold questions to a qualified mold professional.
The EPA's brief guide to mold, moisture and your home explains why moisture is the part worth reporting. It says "it is important to dry water-damaged areas and items within 24-48 hours to prevent mold growth." It lists hidden mold sites such as "the back side of dry wall, wallpaper, or paneling, the top side of ceiling tiles, the underside of carpets and pads." It also warns that "removal of wallpaper can lead to a massive release of spores," and suggests hiring "an experienced professional" for suspected hidden mold. That is a good reason not to open anything during an inspection.
These are the misconceptions that most often turn a good scan into a bad report:
- "Blue means wet." Palette colors are relative to the level and span you set. Blue means cooler than the rest of that scale, nothing more.
- "The camera reads the pipe inside the wall." It reads the drywall surface. A warm stripe is the drywall warmed by a pipe, and its temperature is well below the pipe's.
- "No anomaly means no leak." A dried-out or intermittent leak, high indoor humidity or a thick finish can hide moisture from the camera.
- "Thermal imaging detects mold." Both the InterNACHI and ASHI standards exclude determining mold, and Texas lists mold among the risks its inspectors are not required to determine.
- "The camera sees through windows." Glass reflects infrared, so the camera mostly shows reflections of you and the room.
What Do ASHI, InterNACHI and State Standards Say About Thermal Imaging?
None of the major home inspection standards requires thermal imaging. ASHI and InterNACHI both describe inspections as not technically exhaustive and exclude mold and causes of conditions. Texas goes further and names thermal imaging equipment and moisture meters as specialized equipment an inspection does not require. If you offer thermal imaging anyway, Texas requires you to have the competency to do it.
This table quotes the relevant text and translates it into what you do with a thermal finding. Quotes come from InterNACHI's Home Inspection Standards of Practice (last revised October 2022; archived copy), ASHI's Standard of Practice and Texas rule 22 TAC § 535.227.
| Standard | What it says | What it means for thermal findings |
|---|---|---|
| InterNACHI SOP 2.1 and glossary | "An inspection is not technically exhaustive." Technically exhaustive includes "special equipment, measurements, calculations, testing" | Present the thermal scan as an added service, with its own scope |
| InterNACHI SOP 2.2 | Not required to determine "the cause or reason of any condition" or "the presence of mold, mildew or fungus" | Report patterns and readings; refer causes and mold |
| InterNACHI SOP 2.2 | Not required to operate "moisture meters, gas detectors or similar equipment" | If you use a meter, say where and how |
| InterNACHI SOP 3.7 | Report receptacles with "evidence of arcing or excessive heat"; not required to "remove panelboard cabinet covers or dead fronts" | A warm receptacle is reportable; a closed panel cover shows only the cover's temperature |
| ASHI SOP, report requirements | Explain deficiencies that "are not self-evident"; recommend correction, monitoring or "further evaluation" | Add a reasoning sentence to every thermal finding |
| ASHI SOP, limitations and exclusions | Not "technically exhaustive"; not required to determine "The causes of conditions and deficiencies" or "molds and mold-like substances" | Same observation-and-referral wording |
| Texas 22 TAC § 535.227(a)(3)(C) | Does not require "thermal imaging equipment" or "moisture meters" | Thermal work in Texas is beyond the minimum standard |
| Texas 22 TAC § 535.227(a)(4) | If you use specialized equipment, "the inspector must possess the competency required to do so" | Keep training records for your camera and meter |
| Texas 22 TAC § 535.227(d)(3) | Not required to determine "mold, mildew" or "the cause or source of a condition" | Same observation-and-referral wording in Texas reports |
| New York Real Property Law § 444-d | No home inspection "for compensation unless such person is" licensed or exempt | A license, not a thermal certificate, is what lets you inspect for pay in New York |
ASHI held a member vote on a proposed revision of its standard that closed on January 8, 2026, and says that until an implementation date is set, "the Standard of Practice below is the current version." ASHI's standard also says it "shall not limit or prevent the inspector from meeting state statutes which license professional home inspection and home inspectors."
State licensing law sits above both association standards. Texas applies its standards of practice when an inspector "who is licensed under this chapter accepts employment to perform a real estate inspection." New York's Real Property Law § 444-d says "No person shall conduct or represent that he or she has the ability to conduct a home inspection for compensation unless such person is" licensed or falls under a listed exception, such as a regulated architect or engineer. Neither text makes a thermal camera a license requirement. Licensing and standards differ by state, so check your state licensing board's current rules before you change your report templates.
Is Thermal Imaging Worth It for a Home Inspection?
Yes, for most inspectors who can explain its limits. A phone thermal camera around $300 adds a fast way to find leads on moisture, insulation and electrical heat that a visual walk-through misses, and the Department of Energy tells buyers to get a thermographic scan before purchase. It is worth less on mild days, in vacant homes with utilities off, and in reports that overstate what the images prove.
The DOE guide tells buyers: "you should have a scan done before purchasing a house; even new houses can have defects in their thermal envelopes." Buyers who read that will ask about thermal imaging, and inspectors who can answer with a clear scope and honest wording have an easier conversation.
Use this quick check to decide whether the scan will earn its place on a given job:
- Worth running: indoor-outdoor difference of 20°F or more, utilities on, HVAC running, fixtures you can operate, and a moisture meter in your bag.
- Run it, but say it was limited: difference under 20°F, a house that was closed up for weeks, heavy furniture against exterior walls, or high indoor humidity.
- Skip the envelope scan: utilities off. You can still check a visible stain with a meter, but do not imply the camera cleared the house.
What Is the Best Camera for Home Inspectors?
The best camera for home inspectors is a small kit rather than one device: a phone or digital camera for visible photos, a radiometric thermal camera for temperature patterns, a moisture meter to confirm them, and a bright flashlight so photos and Dual Fusion overlays show detail in attics and crawlspaces. Each tool covers a gap the others leave.
Light is the part that gets forgotten. The Dual Fusion overlay depends on the camera's visible layer, and in a dark attic or crawlspace that layer needs light to show anything. A handheld light also rakes across drywall to show seams, bulges and stains that the thermal image should be compared with.
The Olight Arkfeld Ultra fits that role in a pocket-size body. Olight lists 1,400 lumens maximum, 2,630 candela, 337 ft (103 m) beam distance, IPX7 and 119 g, at $119.99 (regular price, September 2026). Runtime is the spec that matters over a long inspection. Its 100-lumen Medium mode is rated at 9 hours 45 minutes, enough for about three 3-hour inspections per charge (9.75 ÷ 3 = 3.25). Turbo is rated at 1,400~420 lumens for 4 + 121 minutes, so expect it to step down after the first few minutes in an attic.
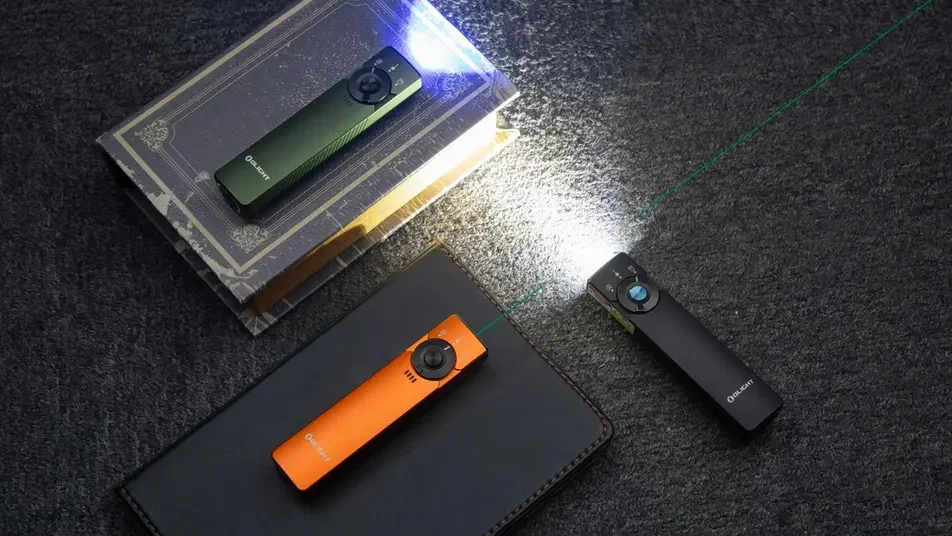
It has two extra light sources. The UV light is rated at 900 mW, and Olight's list of uses includes "Stain Detection"; our guide to what a UV flashlight can reveal covers what fluoresces and what does not. The green laser is Class 3R, which is useful for pointing out a ceiling stain to a client from across a room. The Olight user manual shows a selector that switches between white light, laser and UV, and a lockout you set by holding the button for about 2 seconds with the light off.
Be clear about the limits. The Olight user manual lists CRI 70 for both white light versions, so it is not the light for judging subtle stain colors. Several color versions were listed as sold out in September 2026, with Olive Green CW in stock. If you want a light without a laser or UV, browse Olight's full range of flashlights, or compare options in our roundup of home inspector flashlights.
Warning: Treat the laser as a hazard, not a toy. The FDA's laser product hazard classes say a Class IIIa (IEC 3R) laser "can be momentarily hazardous when directly viewed." Never aim it at people, pets or reflective glass, and never at the sky; the FAA states that pointing a laser at an aircraft "is a federal crime." Do not look into the UV emitter, keep it off skin, and keep both the laser and UV away from children at the inspection.
What Is the Best Thermal Camera for Electrical Inspections?
For electrical checks during a home inspection, a 256 x 192 radiometric camera such as the TC001 Max is enough, because the limit is electrical load, not resolution. A connection heats only when current flows through it, so a lightly loaded circuit can look normal even with a loose lug. Report a warm spot as an observation under the loads present and refer it to a licensed electrician.
The Bureau of Reclamation's FIST 4-13 manual states that "heating is related to the square of the current." That makes load the key number. A connection carrying 3 amps on a 15-amp circuit produces (3 ÷ 15)² = 4% of the heat it would at 15 amps. At 7.5 amps it produces 25%. In a vacant house with nothing running, a bad connection may produce too little heat to see, which is why "under the loads present at the time of inspection" belongs in the finding.
The panel cover is the other limit. InterNACHI's standard does not require removing dead fronts, and the FIST manual notes that panels shield the current-carrying parts, which "makes it difficult to conduct a meaningful IR inspection," while removing them "raises safety concerns." A scan of a closed cover shows the cover's temperature. For severity, the NETA criteria quoted in the FIST manual treat 1 to 3°C over a similar component as a "possible deficiency," so compare each breaker with its neighbors rather than with a fixed number.
Safety note: Follow your state's rules and your own training on whether to remove panel covers, and never touch or probe inside an energized panel for a thermal image. For panel scans in depth, see our guide to the best thermal imaging camera for electricians.
Thermal Scan Checklist for Your Next Home Inspection
Run the same short routine on every job so your thermal findings are consistent and defensible. Check the camera, record conditions, scan in a set order, confirm each anomaly with a meter, and write each finding as observation, conditions, confirmation and recommendation. The list below turns a thermal camera for home inspector reports into a repeatable process.
- Put the thermal scope and its limits in your pre-inspection agreement.
- Check the camera in ice water (emissivity 0.96, reading 0°C ±2°C) at the start of the week.
- Ask for heat or air conditioning to run for several hours before the appointment.
- Record indoor and outdoor temperatures at arrival, and note whether the difference reaches 20°F.
- Scan ceilings and walls below bathrooms and kitchens after you run the fixtures.
- Stand within 10 feet for wall and ceiling findings, and within a few feet of receptacles and breakers.
- Step aside on every hot or cold spot to rule out reflections.
- Confirm every suspected damp area with a pinless map, a dry reference and a pin reading where permitted.
- Lock level and span for each area, and save a visible photo with every thermal image.
- Write each finding in four lines, and never write "no moisture present" or "mold."
FAQ
Changelog
- September 22, 2026: First published.