Olight makes the lights recommended here. Olight specs and prices come from its product pages and user manuals as of September 2026; safety rules and lighting guidance come from OSHA, CCOHS, the U.S. Department of Energy and the other sources linked in the text.
⚡ TL;DR
For panel work, an electrician flashlight fixed to the enclosure beats a headlamp. A magnetic or clip light parked 12 to 20 inches from the terminals and off to one side keeps light on the terminals when you glance away and sends glare off shiny metal away from your eyes. A headlamp wins while you move: attics, crawlspaces, walking a circuit and quick label checks.
You know the problem if you have worked a panel at night or in a dark basement. You tip your head down to find a wire nut and the beam leaves the panel. You look back up and the tinned bus bar throws your own headlamp into your eyes. Your hands and screwdriver sit between the light and the part you need to see. This guide shows where to put the light, how bright it needs to be, and when the headlamp should stay on.
This table sums up how a mounted electrician flashlight and a headlamp compare on a typical panel job.
| Dimension | Mounted flashlight (magnet or clip) | Headlamp | Who wins | By how much |
|---|---|---|---|---|
| Beam stays on the work when you look away | Yes, the light does not move with your head | No, a 15° nod moves the hotspot about 5.3 in at 20 in | Mounted | Large |
| Glare from shiny metal | Reflections leave at about 31° from your eyes when the light sits 12 in to the side at 20 in | Reflections return within about 6° of your eyes | Mounted | Large |
| Depth cues on screws and lugs | Side light casts small shadows that show depth | Light from your eye line flattens the scene | Mounted | Moderate |
| Moving through dark spaces | Needs a hand or a new mount every time you move | Goes where you look | Headlamp | Large |
| Reading labels and nameplates quickly | Needs aiming | Instant | Headlamp | Small |
| Setup time | 5 to 15 seconds to place and aim | None | Headlamp | Small |
| Conductive parts near live equipment | Stays outside the enclosure on the door or frame | Worn at head height, close to open equipment | Mounted | Depends on the job |
📋 Table of Contents
- 1. What Flashlight Do Electricians Use for Panel Work?
- 2. Why Does a Headlamp Fail Inside an Electrical Panel?
- 3. Panel Work Lighting: How Much Light Is Enough?
- 4. Magnet, Clip, or Stand: Where Should an Electrician Flashlight Go?
- 5. Can You Tell Wire Colors Apart Under a Cool White Light?
- 6. How Do You Stop Glare Off a Metal Panel?
- 7. What Changes When You Work Near Energized Parts?
- 8. A Panel Job Lighting Kit and When to Use Each Light
- 9. Is a 200,000 Lumen Flashlight Legal?
- 10. What Hand Tools Do Electricians Need?
- 11. What Is the Best Headlamp for an Electrician?
- 12. Who Should Choose a Mounted Flashlight and Who Should Choose a Headlamp?
- 13. FAQ
What Flashlight Do Electricians Use for Panel Work?
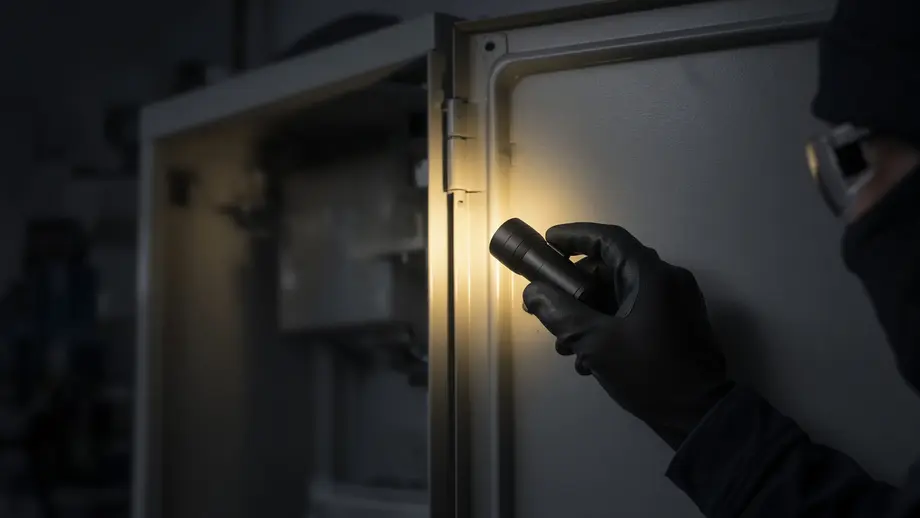
For panel work, electricians get the most from a small rechargeable flashlight that can hold itself in place: a magnetic tail, a magnetic clip or a clip that grips a door edge. The light should reach 100 lumens or more on a steady medium mode that runs at least three hours, and it should aim independently of the mount so the beam lands on the terminals, not your eyes.
Most of the lights that fit this job are small EDC flashlights rather than big work lights, because they are carried all day and then parked on the enclosure. You can browse Olight's EDC flashlights to see the category. What separates a good panel light from a pocket light is the mount and the aim, not the maximum lumens.
A practical setup uses two or three lights, each with one job:
- The mounted light. A clip light with a magnet that sticks to the steel door or enclosure side and tilts to aim. It does the lighting while your hands work.
- The headlamp. Worn for getting to the panel, working in attics and crawlspaces, and reading labels. It stays on low or off while you work inside the enclosure.
- The pocket light. A small flashlight with a tighter beam to look into conduit, ceiling cavities and the back of deep boxes.
This division matters because OSHA treats light as a safety condition. Under OSHA's general industry rule 29 CFR 1910.333(c)(4), "Employees may not enter spaces containing exposed energized parts, unless illumination is provided that enables the employees to perform the work safely." The next paragraph adds that where "lack of illumination or an obstruction precludes observation of the work to be performed, employees may not reach blindly into areas which may contain energized parts." That rule is about seeing the work, and a light that drifts off it every time you move your head makes that harder.
Why Does a Headlamp Fail Inside an Electrical Panel?
A headlamp fails inside a panel for three geometric reasons. The beam follows your head, so every glance at a meter or tool pouch moves the light off the terminals. The light sits a few inches from your eyes, so shiny metal bounces it straight back at you. And light from your own eye line hides the small shadows that show how deep a screw or lug sits.
Drift. Head movement moves the hotspot in proportion to your working distance. At a working distance of 20 inches (0.5 m), the spot moves by the distance multiplied by the tangent of the angle you turn your head. This table shows how far it moves for typical glances.
| Head movement | Typical reason | Hotspot shift at 20 in (0.5 m) |
|---|---|---|
| 10° | Checking the next breaker down | 3.5 in (8.8 cm) |
| 15° | Glancing at the meter in your other hand | 5.3 in (13.4 cm) |
| 20° | Looking at the wire you are stripping | 7.2 in (18.2 cm) |
| 30° | Looking down into your tool pouch | 11.4 in (28.9 cm) |
A 15° nod is small, yet it moves the brightest part of the beam more than 5 inches. On a panel, that is enough to leave the lug you are torquing in the dim edge of the beam.
Glare. Metal follows the law of reflection: light leaves a smooth surface at the same angle it arrives. If a headlamp sits about 2 inches (5 cm) above your eyes and you work 20 inches away, the lamp and your eyes are only about 6° apart as seen from the panel. A bus bar or a shiny breaker face tilted just 3° toward you sends the reflection straight into your eyes. CCOHS, Canada's national occupational safety center, lists reflected glare from "polished, shiny or glossy surfaces" as a common cause of poor visibility and recommends "positioning light fixtures to reduce reflected light that is directed toward the eyes."
Flat light. When light comes from your eye line, every shadow falls directly behind the object that casts it, where you cannot see it. A setscrew at the bottom of a lug hole and the empty hole look much the same. Move the light 12 inches to one side and the rim of the hole casts a visible shadow that shows its depth.
None of this makes a headlamp useless. It makes it the wrong tool for the part of the job where your hands are inside the enclosure.
Panel Work Lighting: How Much Light Is Enough?
Panel work lighting should put roughly 500 to 2,000 lux on the terminals. CCOHS lists 500 to 1,000 lux for medium-contrast work such as medium bench or machine work and 1,000 to 2,000 lux for "difficult inspections" and "difficult assembly tasks." Reading faded conductor markings in a dark enclosure sits at the upper end. A small light on its medium mode can reach this range at 12 to 20 inches.
You can estimate this yourself with one formula: illuminance in lux equals the light's intensity in candela divided by the distance in meters squared. Olight publishes maximum candela and the lumens for each mode. The table below assumes candela falls in proportion to lumens at lower modes, which is an estimate rather than a published figure, and it gives the brightest point at the center of the beam.
This table estimates center-beam illuminance for each light at 12 in (0.3 m) and 20 in (0.5 m), based on Olight's published ratings.
| Light and mode | Mode output | Estimated candela | Lux at 12 in | Lux at 20 in |
|---|---|---|---|---|
| Oclip 2 Pro spotlight, Medium | 90 lm | 879 cd | 9,765 | 3,515 |
| Oclip 2 Pro spotlight, Low | 9 lm | 88 cd | 977 | 352 |
| Oclip Pro S, Medium | 100 lm | 267 cd | 2,963 | 1,067 |
| Oclip Pro S, Low | 10 lm | 27 cd | 296 | 107 |
| Baton 4, Medium | 60 lm | 333 cd | 3,705 | 1,334 |
| Perun 3, Medium | 120 lm | 256 cd | 2,844 | 1,024 |
| Perun 3, Low | 30 lm | 64 cd | 711 | 256 |
Three things stand out. First, you rarely need Turbo for panel work. Medium modes of 60 to 120 lumens already land in or above the CCOHS range at 20 inches, and a Low mode can be enough at 12 inches. Second, a spotlight beam is intense at close range: the Oclip 2 Pro spotlight on Medium is estimated at about 3,500 lux at 20 inches, so the floodlight side of that light is the better fit for a panel. Olight does not publish candela for the Oclip 2 Pro floodlight, so it is not in the table. Third, more light is not always better. CCOHS lists "using adjustable local lighting with brightness controls" among its fixes for glare, which is a case for a light with several steady modes.
Tip: Start one mode lower than you think you need, then step up. Your eyes adapt to the brightest thing in view. If the panel face is much brighter than the wiring gutter, the gutter will look darker than it is.
Magnet, Clip, or Stand: Where Should an Electrician Flashlight Go?
An electrician flashlight should go on steel outside the live parts: the open panel door, the side of the enclosure or a nearby steel stud, with the beam aimed across the work from the side opposite your working hand. A magnet is fastest on steel. A clip suits door edges, cable trays and belts. A floor or tripod light suits a whole room, not the inside of a panel.
Here is how the three options compare in practice.
- Magnet on the door or enclosure. The quickest setup. Stick the light to the inside of the open door near the hinge side or to the enclosure side, then tilt the head toward the terminals. It moves if the door swings, so prop or hold the door.
- Clip on an edge. A clip that grips a door edge, a strut channel or a tray rung holds the light where there is no flat steel. The Oclip 2 Pro clip grips objects up to 14 mm thick, and Olight says it has tail and clip magnets as well.
- Stand or floor light. Good for lighting a mechanical room so you can move safely. It is too far away and too low to light the inside of a panel without shadows from your body.
A light that pivots on its mount solves the aiming problem. The Oclip 2 Pro pairs "a 115° head tilt with 360° clip rotation," according to Olight. That lets you stick the body to the door and still point the beam across the terminals. A fixed-beam light on a magnet can only point where the steel face points, which is often straight back at you. If you prefer a head that turns 90°, see the trade-offs in this guide to the right angle flashlight.
Use this five-step placement routine each time you open a panel.
- Decide which hand holds the tool. Mount the light on the other side, so your working hand casts its shadow away from the tool tip.
- Place the light 12 to 20 inches from the terminals and at least 30° off your line of sight. At 20 inches, that means about 12 inches to the side.
- Aim across the work, not into it. The beam should graze the breakers and terminals from the side.
- Choose the lowest steady mode that lets you read the smallest marking.
- Put a finger where you will work. If its shadow covers the spot, move the light, not your hand.
Warning: Magnets pick up metal shavings. The Oclip 2 user manual says "The clip is magnetic. Metal powder adhering to the surface may affect its function. Please clean it immediately." After cutting knockouts or conduit, wipe the magnet before you place the light near open equipment so filings do not fall into the enclosure.
Can You Tell Wire Colors Apart Under a Cool White Light?
You can usually tell the main wire colors apart under a cool white light, but low color rendering makes some pairs harder: brown against orange, orange against yellow and red, and white against gray. Color rendering is measured by CRI. The U.S. Department of Energy calls a CRI in the 70s acceptable, the 80s good and the 90s excellent for interior lighting.
Color is part of the job, not a nicety. O*NET, the U.S. Department of Labor's occupational database, rates visual color discrimination at 66 on its 100-point importance scale for electricians, and near vision at 75. OSHA's wiring rules require that grounded and equipment grounding conductors be "identifiable and distinguishable from all other conductors," and that where more than one voltage system exists, each ungrounded conductor of a multiwire branch circuit be "identified by phase and system" under OSHA 1910.304.
Many U.S. projects use a common color scheme, though the exact colors are set by project specs and the posted identification at each panel. The University of Georgia's Division 26 electrical standard, dated July 1, 2026, is a typical example. This table pairs that scheme with the color pairs most likely to be confused in poor light.
| Conductor | 208Y/120 V (UGA example) | 480Y/277 V (UGA example) | Pair to double-check in poor light |
|---|---|---|---|
| Phase A | Black | Brown | Brown vs black when dirty or in shadow |
| Phase B | Red | Orange | Orange vs red, orange vs brown |
| Phase C | Blue | Yellow | Yellow vs orange; blue vs black in dim light |
| Neutral | White | Gray | White vs gray, especially with aged insulation |
| Grounding and bonding | Green | Green | Green vs yellow in warm or dim light |
Red is the weak spot. The DOE LED color characteristics fact sheet explains that CRI averages eight test colors and that the strong red sample, R9, is reported separately. R9 is "not used for calculation of CRI." A light with a decent CRI can still render saturated reds and oranges poorly. The same fact sheet warns that "two light sources with the same CCT and CRI may not render colors the same way."
Be clear about what your light is. The Perun 3 user manual lists its cool white LED at CRI 70. Olight does not list a CRI for the Oclip 2 Pro, Oclip Pro S or Baton 4. Olight does publish a high-CRI version of one related headlamp, the Perun 3 Mini HCRI, rated CRI 90 at 4,000 to 5,000 K; check its availability before you plan around it. For the basics of the metric, read what is CRI.
Safety note: Color is never your only check. Before you touch a conductor, confirm it is de-energized with a voltage tester, whatever color it looks under your light.
How Do You Stop Glare Off a Metal Panel?
You stop glare off a metal panel by moving the light, not by turning it up. Place the light at least 30° away from your line of sight, aim it across the work, and drop to the lowest mode that still shows the markings. If a bright spot still hits your eyes, tilt the light until the reflection moves off the part you are reading.
CCOHS gives a quick way to find reflected glare: look at the task from your normal position and "block the light falling on it from the front or above. If details are now easier to see, reflections are a problem." On a panel, cup your hand between the light and the breaker you are reading. If the label gets easier to read, reposition the light.
This checklist covers the usual glare sources in and around an enclosure.
- Tinned bus bars and lugs. Aim across them, not straight at them.
- Glossy breaker faces and labels. Move the light higher or lower so the reflection falls below or above your eye line.
- Clear covers and inspection windows. Light from the side, never from behind your head.
- White-painted enclosure interiors. Drop one mode. The interior acts like a reflector.
- Your own headlamp. Turn it off or to its lowest mode while the mounted light is on.
The same geometry that cuts glare also keeps the work area brighter than its surroundings, which CCOHS recommends: "The immediate work area should be brighter than surrounding areas." A mounted light aimed at the terminals does that; a headlamp lights whatever you happen to look at.
What Changes When You Work Near Energized Parts?
Near exposed energized parts, the light becomes part of your approach plan. OSHA bars conductive articles such as key chains and metal headgear "if they might contact exposed energized parts," and requires insulated tools where a tool might touch live parts. Keep metal-bodied lights outside the enclosure, secure them against falling, and never let one drop into live gear.
OSHA's conductive apparel rule, 1910.333(c)(8), lists "watch bands, bracelets, rings, key chains, necklaces, metalized aprons, cloth with conductive thread, or metal headgear" and allows them only if they are "rendered nonconductive by covering, wrapping, or other insulating means." Every Olight light in this guide has an aluminum alloy body, according to Olight's spec sheets, and Olight does not list an electrical insulation rating or a hazardous-location (intrinsically safe or explosion-proof) certification for any of them. Treat them as conductive, and do not carry them into classified hazardous locations unless your employer approves the equipment for that area.
That leads to a few working rules:
- Mount outside the live zone. Stick the light on the door or enclosure exterior, never on or next to exposed terminals.
- Manage the drop path. Place the light where it cannot fall into the enclosure if the magnet slips or the door swings. Use a lanyard hole to tether it where the light has one.
- Lock it before you pocket it. Olight's Oclip 2 manual says "If the product is carried or transported, please lock it." A light that switches on in a pocket gets hot.
- Watch heat and the lens. The same manual says not to obstruct the lens, "or else the energy emitted from the light may cause the object to burn," and not to use the light "in a car or other environment where the temperature may exceed 60°C."
- Mind implanted devices. The Oclip 2 manual advises anyone with an ICD or pacemaker to "avoid close or prolonged contact with this product."
- Respect the head protection rule. OSHA 1910.335(a)(1)(iv) requires "nonconductive head protection wherever there is a danger of head injury from electric shock or burns." Mount a headlamp only in the ways your hard hat maker allows.
Warning: A flashlight is not a substitute for de-energizing, testing and lockout. Follow your employer's electrical safety program and the OSHA rules that apply to your work. The 1910 rules quoted here cover general industry; construction sites fall under OSHA's construction electrical rules in 29 CFR 1926 Subpart K.
A Panel Job Lighting Kit and When to Use Each Light
A panel job lighting kit needs one mounted light, one headlamp and one pocket light, with runtimes that last the job on medium modes. The Oclip 2 Pro floodlight runs 3 hours 45 minutes at 100 lumens. The Perun 3 runs 25 hours at 120 lumens. The Baton 4 runs 8 hours at 60 lumens. Charge the clip light at lunch on long days.
This table works through a four-hour panel change-out, a planning assumption for a residential service, using Olight's rated runtimes for the modes you would actually use.
| Light | Role in the kit | Working mode | Rated runtime | Four-hour jobs per charge | Regular price (September 2026) |
|---|---|---|---|---|---|
| Olight Oclip 2 Pro | Mounted light on the door | Floodlight Medium, 100 lm | 3 hours 45 minutes | 0.9 (top up once) | $54.99 |
| Olight Oclip Pro S | Budget mounted light | White Medium, 100 lm | 3.5 hours | 0.9 (top up once) | $39.99 |
| Olight Perun 3 | Headlamp for access and attics | Med, 120 lm | 25 hours | 6.3 | $89.99 |
| Olight Baton 4 | Pocket light for cavities and conduit | Med, 60 lm | 8 hours | 2.0 | $54.99 |
| Olight O'Pen 3 | Pen and label light | Med, 60 lm | 60 minutes | 0.25 (short checks only) | $79.99 |
Here is how each one fits the job, including where it falls short.
The Olight Oclip 2 Pro is the mounted light. The hard part of panel lighting is aiming a light that is stuck to a door, and its 115° head tilt and 360° clip rotation solve that. It offers a floodlight up to 530 lumens, a spotlight rated at 3,906 candela and 125 m, and a red light, with IP66 protection and 2.0 m impact resistance. Its limits: Turbo holds 530 lumens for about a minute before stepping down (rated 1 + 58 + 5 minutes at 530, 300 and 100 lumens), and the manual says "Do not immerse the product in water or other liquids." The manual also notes that during charging "the white light is limited to Low and Medium modes," so you can keep working on Medium while it tops up from a power bank. It works between 0°C and 10°C without Turbo, and below 0°C only on Low and Medium.
The Olight Oclip Pro S is the budget version at $39.99. Olight says you can "clip, hang, or magnet-mount it," and it offers 600 lumens maximum, 100 lumens for 3.5 hours on Medium and a 1,600 candela beam. Olight does not list a tilting head for it, so plan on it pointing where the steel or clip points. Use it clipped to a door edge or tray rung and angled by hand.
The Olight Perun 3 headlamp is the headlamp and backup work light. It has a headband, a magnetic tail and a clip, with 3,000 lumens maximum, 6,400 candela and 25 hours at 120 lumens. Its limits for this job: the cool white LED is CRI 70 per its manual, and it weighs 150 g with the battery.
The Olight Baton 4 is the pocket light. Its TIR optic gives 7,225 candela and 170 m, useful for looking down a conduit run or across a drop ceiling. Its user manual describes an Auto Shut-Off timer of 3 or 9 minutes. Leave it off for panel work so the light does not shut off mid-task.
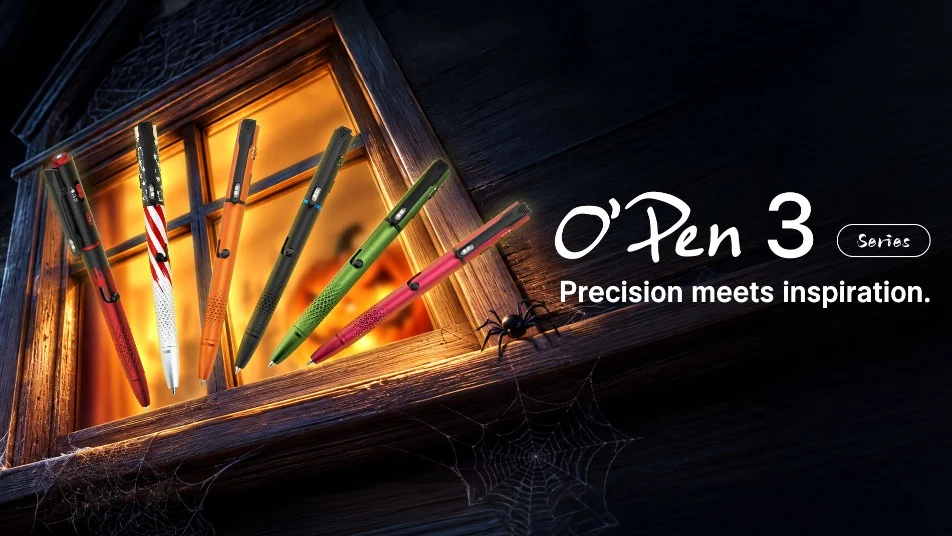
The Olight O'Pen 3 is a pen with a 120-lumen clip light and a 0.4-lumen pen tip light for writing circuit directories in the dark. Its short runtime makes it a label light, not a work light. It also has a Class 3R green laser. UC Berkeley's laser pointer safety guidelines say the beam "should never be intentionally directed toward oneself or directed toward another person" and that "Mirror-like surfaces (such as glass, metal and other highly reflective materials) should be avoided when directing the laser beam." Never aim the laser into a metal enclosure or at anyone's eyes. For more on who carries these, see this guide to the pen light.
Is a 200,000 Lumen Flashlight Legal?
A 200,000 lumen flashlight is sold openly to U.S. buyers: Imalent lists its MS32 at 200,000 lumens on its own store. Whether a given use is legal depends on where you point it, so check your state and local rules before shining any high-output light toward roads, aircraft, people or wildlife. For panel work, a light that bright is simply the wrong tool.
The numbers show why. Imalent's MS32 product page lists 200,000 lumens, 655,000 candela, 3,096 g with its battery and three cooling fans, with Turbo rated at 200,000 to 40,000 lumens for 45 seconds plus 40 minutes. Using the same lux formula as above, 655,000 candela at 20 inches (0.5 m) gives about 2.6 million lux at the center of the beam. That is more than a thousand times the top of the CCOHS range for difficult inspections.
Heat is the other issue. Olight's manuals warn that covering the lens of even a small light can let the beam's energy burn the object in front of it. In an enclosure full of insulation and labels, you want a light you can leave on Medium all afternoon, not one that needs fans. A few hundred lumens, aimed well, does the job.
What Hand Tools Do Electricians Need?
Electricians need screwdrivers, wire strippers, pliers, a conduit bender, a knife and a hacksaw, plus testing tools such as a voltage tester and multimeter. The U.S. Bureau of Labor Statistics lists "screwdrivers, wire strippers, drills, and saws" and conduit benders as common tools, and "ammeters, voltmeters, thermal scanners, and cable testers" for troubleshooting.
The BLS Occupational Outlook Handbook describes the job as reading blueprints, installing and inspecting wiring and equipment, and identifying problems "using a variety of testing devices." For work near live parts, the tool rule is stricter: OSHA 1910.335(a)(2)(i), in OSHA's electrical protective equipment standard, requires employees to "use insulated tools or handling equipment if the tools or handling equipment might make contact with such conductors or parts."
This checklist groups a panel-ready kit by task.
- Terminate: insulated screwdrivers (flat, Phillips, square), nut drivers, a torque screwdriver for lugs with a marked torque value.
- Cut and strip: wire strippers sized for your usual gauges, lineman's pliers, diagonal cutters, cable ripper, utility knife.
- Pull and form: fish tape, conduit bender, needle-nose pliers.
- Test: non-contact voltage tester, two-pole voltage tester or multimeter, outlet tester, clamp meter. A thermal camera helps find hot connections; see our guide to the best thermal imaging camera for electricians.
- See: one mounted light, one headlamp, one pocket light, as set out in the kit table above.
What Is the Best Headlamp for an Electrician?
The best headlamp for an electrician has a steady low-to-medium mode of 30 to 120 lumens with a long runtime, a head that tilts down, a strap that works with your hard hat, and a light that can come off the band to work as a handheld or magnet light. Among Olight's in-stock lights, the Perun 3 covers most of this list: 25 hours at 120 lumens, red modes and a magnetic tail.
Its strength is that it doubles as the backup mounted light. When the clip light runs down, pop the Perun 3 out of its headband and stick its magnetic tail to the door. Its limits: the cool white LED is rated CRI 70, Olight does not publish a tilt range or a hard hat mount for its headband, and at 150 g it is heavier on a hard hat than a small clip light on a strap.
What to check in any headlamp for electrical work:
- A Low or Medium mode you can run all shift. Check the rated runtime for that mode, not the maximum.
- A tilt range that lets you aim down without craning your neck.
- A red mode for moving through occupied spaces without blinding coworkers.
- A mounting method your hard hat maker allows.
- A light that can leave the band and mount on steel.
For broader rankings across use cases, see our list of the best headlamps.
Who Should Choose a Mounted Flashlight and Who Should Choose a Headlamp?
Choose a mounted flashlight as your main light if most of your work happens at one spot: panels, disconnects, control cabinets and junction boxes. Choose a headlamp first if you spend most of the day moving: service calls in attics, crawlspaces and ceilings. Most electricians should carry both and switch based on whether their hands are working or their feet are moving.
This table matches common roles with the light that should lead.
| Who you are | Main light | Second light | Why |
|---|---|---|---|
| Residential service electrician | Mounted clip light | Headlamp | Panel and device work at one spot, with access through dark spaces |
| Commercial or industrial maintenance tech | Mounted clip light | Pocket light | Long sessions at MCCs and control cabinets with shiny interiors |
| New construction installer | Headlamp | Pocket light | Moving along runs in unfinished spaces with site lighting overhead |
| Apprentice | Headlamp | Mounted clip light | Carrying and fetching, with a mounted light for supervised terminations |
| Low-voltage and data installer | Headlamp | Pen light | Ceilings and closets, reading small labels |
| Inspector | Pocket light | Headlamp | Looking into boxes and panels without touching |
Before your next panel job, run this checklist.
- Pick an electrician flashlight that mounts on steel or clips to an edge, with a head you can aim.
- Confirm a steady 60 to 120 lumen mode with at least three hours of rated runtime.
- Mount it 12 to 20 inches from the work, at least 30° off your line of sight, on the side opposite your working hand.
- Drop your headlamp to low or off once the mounted light is set.
- Check color-coded conductors with a tester, not just your eyes.
- Wipe filings off magnets and keep every metal-bodied light outside energized parts.
FAQ
Changelog
- September 23, 2026: First published.