Olight makes some of the lights discussed here. Olight specs and prices come from its product pages and user manuals as of September 2026; other facts come from the sources linked in each section.
⚡ TL;DR
An engine bay light works best as a small system, not one bright beam. Black plastic, rubber and grime soak up light, so spread a few hundred lumens of wide flood from two or three hands-free points: a magnetic clip light on the hood or fender, a headlamp aimed where you look, and a UV light for leaks.
If you have ever held a flashlight in your teeth while reaching for a 10 mm bolt, you know the problem. The light rolls off the fender, the spot you picked for the magnet turns out to be aluminum, and a single bright beam throws the shadow of your own hand right over the bolt. This guide fixes each of those problems with numbers you can check and a setup you can copy tonight.
This engine bay light kit list shows each job, the type of light that handles it, the minimum spec to look for, and an Olight example that meets it.
| Job | Recommended type | Minimum spec | Olight example |
|---|---|---|---|
| Wide light across the bay | Magnetic clip light with a flood beam and a tilting head | About 100 lm of flood for 3+ hours; magnet plus clip; splash-rated | Oclip 2 Pro: 100 lm flood for 3 h 45 min, 115° head tilt, tail and clip magnets, IP66 |
| Light where you look | Headlamp | About 120 lm for a full job; glove-friendly switch | Perun 3: 120 lm for 25 hours, large metal side button, IP68 |
| Deep cavities and a spare hand light | Flat flood flashlight | About 100 lm of flood for several hours | ArkPro: Pure Flood 100 lm for 13 hours, IPX7 |
| Leak hunting | UV light | A published UV wavelength or UV output in the 300 to 400 nm range | ArkPro: 365 nm UV; Oclip 2 Ultra: 800~300 mW UV |
| Roadside at night | Light with red and beacon modes | Long low-mode runtime | Oclip 2 Pro red light: 4 lm for 27 hours |
📋 Table of Contents
- 1. What Is the Best Engine Bay Light Setup?
- 2. Why Is Underhood Lighting Harder Than It Looks?
- 3. How Many Lumens Does an Engine Bay Light Need?
- 4. How Do You Set Up Three-Point Lighting Under the Hood?
- 5. Where Will a Magnetic Work Light Stick Under the Hood?
- 6. Do Oil and Brake Cleaner Damage a Mechanic Work Light?
- 7. How Do You Find an Engine Leak With UV Dye and a UV Light?
- 8. What Changes Under the Car and Inside the Cabin?
- 9. Which Olight Lights Fit Each Point of the Setup?
- 10. Can I Drive a Car If the Engine Light Is On?
- 11. What Usually Causes the Engine Light to Come On?
- 12. How Much Do Undercarriage Lights Cost?
- 13. Engine Bay Light Checklist Before You Open the Hood
- 14. FAQ
What Is the Best Engine Bay Light Setup?
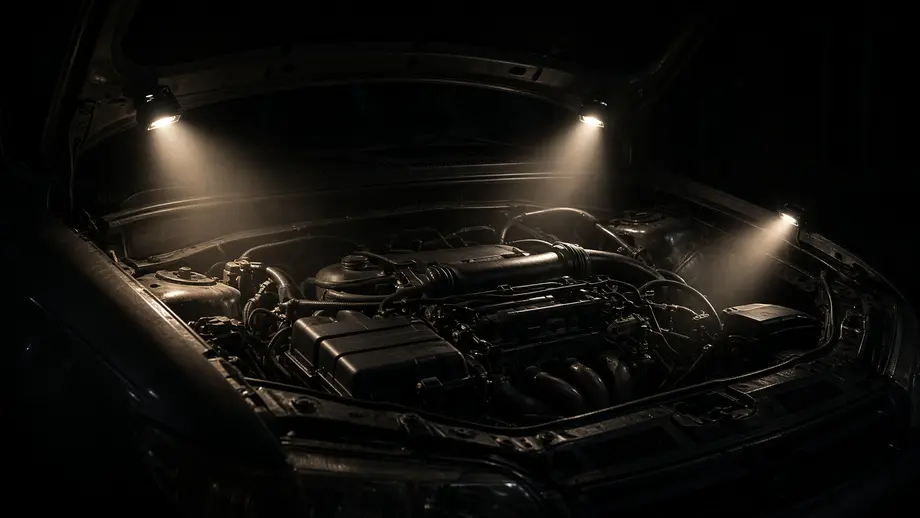
The best engine bay light setup uses two or three hands-free lights placed at different angles rather than one powerful flashlight. A flood light high on the hood or fender lights the whole work zone, a headlamp lights exactly what you look at, and a small third light fills the shadow your hands make. Together, they need only a few hundred lumens.
That answer runs against the instinct to buy the brightest light on the shelf. A single high-output beam from one direction creates one hard shadow for every hose, bracket and hand in the way, and it bounces glare off anything wet or polished. Two or three moderate lights from different angles fill each other's shadows.
Hands-free matters as much as brightness. Under the hood, you often need both hands at once: one to hold a part in place and one to turn the wrench. Olight's EDC flashlights and the clip lights in the Olight Oclip series are built around clips, magnets and tilting heads for that reason, and those mounting options decide how useful a light is in an engine bay more than its maximum lumen figure does.
The rest of this guide explains why the dark engine bay is hard to light, how many lumens you actually need, where to put each light, where a magnet will and won't hold, and how to use a UV light to find leaks.
Why Is Underhood Lighting Harder Than It Looks?
Underhood lighting is hard for three reasons. Dark surfaces absorb most of the light that hits them, deep cavities block light arriving from any single angle, and shiny parts such as polished metal, fresh oil and wet hoses reflect glare straight back at your eyes. Adding lumens makes the glare worse long before it makes the black parts easy to see.
Paint maker Diamond Vogel explains that light reflectance value (LRV) runs on a scale "from zero (absolute black, absorbing all light and heat) to 100 percent (pure white, reflecting all light)," in its guide to LRV. Much of what you look at under a hood sits near the bottom of that scale: black plastic covers, rubber hoses, and parts coated in old grime.
The Canadian Centre for Occupational Health and Safety (CCOHS) names both problems in its lighting guidance. It says the light you need depends partly on the type of surface, "does it reflect or absorb light," and it lists "Light reflected from polished, shiny or glossy surfaces" as a cause of reflected glare. It also notes that objects between the light and the work "can block the light and cast shadows," which describes an engine bay exactly.
Here is the math behind the problem. For a matte surface, the brightness your eye sees (luminance, in candela per square meter) is roughly illuminance multiplied by reflectance and divided by pi. The table below assumes 700 lux on each surface, which sits inside the CCOHS range for vehicle repair shops. The reflectance values are assumptions chosen to represent near-black, mid-tone and light surfaces.
| Surface (assumed reflectance) | Calculation at 700 lux | Luminance your eye sees |
|---|---|---|
| Black plastic engine cover (5%) | 700 × 0.05 ÷ 3.1416 | About 11 cd/m² |
| Mid-tone, grimy metal (30%) | 700 × 0.30 ÷ 3.1416 | About 67 cd/m² |
| Light-colored reservoir or label (70%) | 700 × 0.70 ÷ 3.1416 | About 156 cd/m² |
The black cover returns about one-sixth as much light as the mid-tone part under the same lamp (11 versus 67). Making it look as bright would take about six times the light, around 4,200 lux, and the shiny parts nearby would blind you first. The fix is better angles and softer, wider beams, not a bigger number on the box.
How Many Lumens Does an Engine Bay Light Need?
An engine bay light needs fewer lumens than the numbers on the box suggest. CCOHS lists 500 to 1,000 lux for tasks such as "vehicle repair shops." Lighting a 0.5 m by 0.5 m work zone to that level takes 125 to 250 lumens landing on it, which works out to about 250 to 500 lumens from the light if half its output lands where you aim.
Lux is lumens per square meter, a definition CCOHS spells out in its table notes. That makes the calculation simple: multiply the area by the target lux to get the lumens that must land on it, then allow for the light that spills onto the hood, the fenders and you. The table below assumes half the output lands on the zone. That share is an assumption; a tight beam aimed well does better, and a wide beam in a cramped bay does worse.
| Zone | Area | Target (CCOHS range) | Lumens landing | Lumens from the light at 50% |
|---|---|---|---|---|
| Whole engine bay, general view | 1.5 m × 1.0 m = 1.5 m² | 500 lux | 1.5 × 500 = 750 lm | 1,500 lm |
| Work zone around one component | 0.5 m × 0.5 m = 0.25 m² | 500 to 1,000 lux | 125 to 250 lm | 250 to 500 lm |
| Close inspection of a connector or crack | 0.2 m × 0.2 m = 0.04 m² | 1,000 to 2,000 lux ("difficult inspections") | 40 to 80 lm | 80 to 160 lm |
The practical lesson: you rarely need the whole bay at 500 lux. Light the zone you are working in, and the lumen requirement drops from about 1,500 to a few hundred, which a clip light and a headlamp on medium settings can deliver for hours.
Distance matters as much as output. A small light source follows the inverse square law, which HyperPhysics at Georgia State University describes as intensity dropping with the square of the distance in its inverse square law page. For a flashlight beam, illuminance in lux equals candela divided by distance in meters squared.
Olight lists the Perun 3 headlamp at 6,400 candela and 160 m. Those two numbers agree: 6,400 ÷ 160² = 0.25 lux at the end of the rated beam distance. At a working distance of 0.5 m, the same Turbo beam would put 6,400 ÷ 0.5² = 25,600 lux on the part, about 25 times the top of the CCOHS range for vehicle repair.
Olight publishes candela only for the maximum mode, so the next step uses an assumption: that candela scales with lumens in the same beam. On that basis, the Perun 3's 120-lumen Med mode gives about 6,400 × 120 ÷ 3,000 = 256 candela. That is 256 ÷ 0.5² = 1,024 lux at 0.5 m, 256 ÷ 0.6² = 711 lux at 0.6 m, and 256 ÷ 0.75² = 455 lux at 0.75 m. Its 30-lumen Low mode, about 64 candela, gives 64 ÷ 0.3² = 711 lux at 0.3 m, which suits close work under a dashboard. Medium, not Turbo, is the working mode.
How Do You Set Up Three-Point Lighting Under the Hood?
Borrow three-point lighting from photography and simplify it for the garage. Put a key light high and to one side, a fill light on your head or on the opposite side, and a low light aimed up from below or behind the part. The key sets the overall brightness, the fill erases your hand shadows, and the low light shows edges, drips and cracks.
Picture a serpentine belt swap at 9 p.m. in a driveway. You need to see the belt routing, reach the tensioner, and read the routing label on the radiator support. Here is how to place the lights, step by step:
- Park on level ground, set the parking brake, switch the engine off and let it cool. Then prop the hood and find a steel mounting spot on the hood's inner frame or a fender lip. Check it with a fridge magnet first.
- Mount the key light there, tilt the head about 45° down across the engine, and set it to a medium flood mode.
- Wear a headlamp on medium as the fill. It follows your eyes, so it lights the side of the part that the key light misses.
- Tuck a small third light low on a cool frame rail or the outer edge of the radiator support, well clear of the fan, aimed up at the belt path on a low setting.
- Step back and look for the darkest shadow. Move the key light before you raise any brightness.
- Turn off anything that glares straight into your eyes. Glare off a wet valve cover will hide more than it shows.
This table estimates the light on the tensioner from each point, using the zone math and the inverse square estimate from the previous section.
| Point | Placement | Light and mode | Distance | Estimated light on the part |
|---|---|---|---|---|
| Key | Hood inner frame, 45° down | Oclip 2 Pro, Medium flood 100 lm | About 0.8 m | 100 lm × 50% ÷ 0.25 m² = 200 lux across the zone |
| Fill | Your forehead | Perun 3, Med 120 lm | About 0.6 m | About 711 lux in the center of the beam |
| Low | Cool frame rail, aimed up | ArkPro, Pure Flood Low 15 lm | About 0.3 m | 15 lm × 50% ÷ 0.04 m² ≈ 188 lux on the underside |
| Total on the top face | Key plus fill | 200 + 711 = 911 lux, inside the 500 to 1,000 lux range |
The total lands inside the CCOHS range for vehicle repair without any light running above its medium setting. That is the whole point of three-point lighting: more angles, less glare, and longer runtime.
Tip: If a shadow won't go away, move the key light before adding brightness. Moving a light 15 cm sideways often clears a shadow that doubling the output would only sharpen.
Where Will a Magnetic Work Light Stick Under the Hood?
A magnetic work light holds only to steel or iron. The National High Magnetic Field Laboratory explains that only a few natural materials, iron, nickel, cobalt and gadolinium, are ferromagnetic, in its Magnet Academy tutorial. Aluminum and plastic parts won't hold a magnet, so check a spot with a fridge magnet before you trust a light upside down.
The same part can be steel on one car and aluminum or plastic on the next, so the table below is a checklist, not a promise. Use it as a map of where to test, how much heat to expect, and what to do when the magnet won't hold.
| Location | What it can be made of | Heat after driving | If the magnet won't hold |
|---|---|---|---|
| Hood inner frame and latch area | Steel or aluminum, depending on the vehicle | Warm | Clip the light to a wiper arm or strap, or hang it from a hook |
| Fender lip and inner fender edge | Steel, aluminum or plastic liners | Mild | Clip to the fender cover or use a headlamp |
| Strut tower | Steel or cast aluminum | Mild to warm | Stand the light on its tail on a flat, cool surface |
| Radiator support | Steel, aluminum or plastic composite | Hot near the radiator; the fan may start on its own | Use only the outer edge, clear of the fan, or hang the light from a hook |
| Valve cover and intake | Aluminum, magnesium alloy or plastic | Hot | Do not mount here |
| Exhaust manifold and heat shields | Steel or cast iron, but very hot | Too hot to touch | Never mount here |
Heat is the second test after the magnet, and it is where the manuals and the engine bay collide. Olight's Oclip 2 user manual lists an operating and charging temperature of 0 to 45°C (113°F) and says, "Do not place, charge, or use this light in a car or other environment where the temperature may exceed 60°C." The ArkPro lists 0 to 45°C with the same 60°C car warning, and the Perun 3 manual lists a working temperature of 0 to 40°C (104°F).
An engine that has just been driven is far hotter than any of those ratings. HP Academy, a motorsport engineering school, gives a typically safe coolant range of "between 195-220°F (90-105°C)" in its coolant temperature guide, so the block, heads, hoses and radiator sit at roughly twice the Oclip 2's 45°C limit, and the exhaust runs hotter still. No Olight light in this guide is rated to sit on those parts. Mount lights only on the hood, fender edges or other sheet metal away from the engine, and only after the engine has cooled. As a rough rule, if you can't keep your bare hand on a spot comfortably, it is above the 40 to 45°C range these lights are built for.
Honda's owner's manual for the 2024 Accord, in its maintenance safety section, backs the same order of work from the vehicle side: "Make sure to let the engine and exhaust system cool thoroughly before touching vehicle parts." It also warns that "the radiator fan may operate even when the power mode is in VEHICLE OFF," so keep lights, cables and magnets clear of the fan shroud, where a fan that starts on its own can grab them. Your own owner's manual has the equivalent warnings for your car.
The Oclip 2 manual adds three points that matter in a garage. It says "The clip is magnetic. Metal powder adhering to the surface may affect its function. Please clean it immediately," which matters around brake dust and grinding. It warns that the switch "is a magnetically sensitive component, and proximity to strong magnets may affect its functionality," so keep the light off a magnetic parts tray. It also says: "If you have an ICD or pacemaker, avoid close or prolonged contact with this product to prevent possible interference."
If you are shopping for a light built around the magnet, this roundup of the best magnetic flashlight options covers tail magnets and mounting in more detail.
Safety note: Keep a metal-bodied light clear of the battery's positive terminal and any exposed wiring when you set it down, because a light that slips off a magnet can bridge a terminal to ground and throw a spark. Honda's manual says to "keep cigarettes, sparks, and flames away from the battery and all fuel related parts."
Do Oil and Brake Cleaner Damage a Mechanic Work Light?
They can damage plastic parts. CRC's label for its non-chlorinated Brakleen brake parts cleaner says "DO NOT use on polycarbonate plastics such as LEXAN" and warns that it "MAY ALSO BE HARMFUL TO OTHER PLASTICS." A mechanic work light has plastic or coated parts, so keep solvent overspray off the lens, switch and clip, and wipe oil off with a dry cloth instead.
The same CRC Brakleen label tells users to "Protect all rubber brake parts, plastic and painted surfaces from product and overspray," and it lists the product as "EXTREMELY FLAMMABLE" with the instruction "Do not use near open flame or other sources of ignition." A work light isn't an open flame, but its surface can run hot on Turbo, so keep it well away from a freshly sprayed, dripping part.
There is a second heat issue. The Oclip 2 manual says "Do not obstruct the lens, or else the energy emitted from the light may cause the object to burn." In an engine bay, that means never draping a shop rag or a fender cover over a light that is switched on. Honda's manual gives the vehicle-side version of the same rule: "Never leave rags, towels, or other flammable objects under the hood. Heat from the engine and exhaust can ignite them, causing a fire." Count your rags and lights before you close the hood.
Use this cleaning routine after each job:
- Switch the light off and let it cool before cleaning.
- Wipe oil and coolant off with a dry, lint-free cloth. Use a cloth barely dampened with water for dried grime.
- Keep brake cleaner, carb cleaner and other solvents away from the lens and switch. Spray them onto the rag and away from the light, never at the light.
- Pick metal filings and brake dust off the magnet and clip before they scratch the body or affect the switch.
- Check the charging port cover. The Oclip 2 manual says to keep the dust cover closed when the port isn't in use.
Water ratings help with coolant splashes and rain on a roadside job. Olight lists the Perun 3 at IP68, the Oclip 2 Pro and Oclip 2 Ultra at IP66, and the ArkPro at IPX7. A water rating tells you about water. It says nothing about solvents, so the routine above applies to every light.
How Do You Find an Engine Leak With UV Dye and a UV Light?
Add a fluorescent dye made for the leaking fluid, run the system so the dye circulates, then scan with a UV light in a dark bay. Leak-dye maker Spectroline explains that the dye "will escape and accumulate at all leak sites" and that leaks "will fluoresce green or yellow" under the lamp, with the best response between 300 and 400 nanometers.
Spectroline's explanation of fluorescent leak detection also shows its dye results under 400 nm light viewed through amber glasses. The glasses cut the visible violet glow from the lamp, so the yellow-green dye stands out.
Follow this sequence for a clean result:
- Degrease the suspect area first, so an old stain doesn't read as a new leak.
- Add the dye to the correct system following the dye maker's dose and instructions. A/C, engine oil, coolant and transmission fluid each need a dye made for that fluid.
- Run the engine or system long enough for the dye to circulate and reach the leak.
- Switch off the white lights. Keep a red or very low white mode for moving around.
- Put on amber or yellow UV glasses, then scan slowly from the top of the engine down, because fluid runs downhill and the highest glowing point is often closest to the source.
- Mark the source with a paint pen, then switch the white flood back on to see which seal, hose or fitting sits there.
The Olight ArkPro is the stronger UV choice of the two lights here because Olight publishes its wavelength: 365 nm, inside Spectroline's best-response range. Its UV runs at 1,200~580 mW for 5 + 300 minutes on High and 360 mW for 8 hours on Low. A 20-minute scan on Low uses about 20 ÷ 480 = 4% of that runtime. The Olight Oclip 2 Ultra adds UV at 800~300 mW (3 + 135 minutes) on High and 300 mW (140 minutes) on Low to a magnetic clip light, but its product page does not list a UV wavelength. The same 20-minute scan on Low uses 20 ÷ 140 = about 14% of its UV runtime.
For the difference between 365 nm and 395 nm and what each reveals, see this guide to choosing a UV flashlight.
Warning: Never look into a UV emitter or shine it at anyone's eyes or skin. The ArkPro manual warns, "Do not look directly at the light source or shine it into your eyes, as this may cause temporary blindness or permanent damage to your eyes." The ArkPro also has a Class 3R green laser, which you don't need under a hood; keep it pointed away from people and reflective surfaces.
What Changes Under the Car and Inside the Cabin?
Each place you work around a car changes the light you need. Under the car, you lie close to parts that drip, so a headlamp and a low flat light beat a hood-mounted flood. Under the dashboard, distances shrink to about 30 cm and low modes are enough. On a roadside at night, being seen matters as much as seeing the engine.
This table sets out how the requirements change for each sub-scenario.
| Sub-scenario | Light you need on the work | Runtime to plan | Water and dirt | Mounting that works |
|---|---|---|---|---|
| Engine bay in a driveway | 250 to 500 lm total across 2 or 3 lights | 2 to 3 hours on medium | Coolant and rain splashes | Magnet or clip high, headlamp, one low light |
| Under the car on a creeper | 100 to 120 lm from a headlamp, plus a low fill | 1 to 2 hours | Oil drips onto the lens | Headlamp tilted up, flat light on the ground |
| Under the dash and in footwells | 15 to 100 lm at about 30 cm | 30 to 60 minutes | Dry | Headlamp on Low, clip light on a seat rail |
| Roadside breakdown at night | Flood on the engine plus a red or beacon mode behind the car | As long as the wait for help | Rain and road spray | Magnet on a steel panel, beacon on the rear |
Under the car, a headlamp does most of the work because there is nowhere high to mount a key light. Tilt the beam up toward the pan or exhaust, keep the lens out of the drip line, and set a flat light on the ground to light the other side of the part. The flat ArkPro, at 16 mm thick, slides under things a round flashlight can't.
Under the dash, a Low mode is plenty. The inverse square estimate showed about 711 lux at 30 cm from 30 lumens. Wiring behind a kick panel is similar work to tracing circuits in a breaker box, and the trade-offs in this electrician flashlight comparison apply here too.
On a roadside, AAA advises drivers waiting for help to "raise your hood, put down flares or reflectors, and break out your emergency kit as needed" in its summer overheating advice. A red or beacon mode on the rear of the car adds to those reflectors. The same idea of being seen from behind shapes bike light laws, and it matters just as much for a stranded driver.
If the problem is heat rather than a visible leak, a thermal camera shows hot spots a flashlight can't. This guide to the best thermal imaging camera for mechanics covers what one can and can't diagnose.
Which Olight Lights Fit Each Point of the Setup?
Three Olight lights cover the three points of the setup: the Oclip 2 Pro as the key light, the Perun 3 as the headlamp fill, and the ArkPro as the low light and UV tool. The Oclip 2 Ultra combines a clip light with UV. One high-output Olight light, the Marauder Mini, is the wrong tool for this job, and the reasons are below.
This table lists every white-light tier Olight publishes for each light, so you can plan runtime at the mode you will actually use. Prices are regular prices, September 2026.
| Light | Wide or flood modes (output and runtime) | Hands-free mounting | Water rating | Weight | Price |
|---|---|---|---|---|---|
| Oclip 2 Pro | Floodlight Turbo 530~300~100 lm (1+58+5 min); High 300~100 lm (60+5 min); Medium 100 lm (3 h 45 min); Low 10 lm (25 h); Moon 1 lm (144 h) | 115° head tilt, 360° clip (14 mm), tail and clip magnets | IP66 | 75.5 g | $54.99 |
| Oclip 2 Ultra | Floodlight Turbo 580~300~100 lm (1+57+5 min); High 300~100 lm (60+5 min); Medium 100 lm (3 h 30 min); Low 10 lm (25 h); Moon 1 lm (144 h); UV 800~300 mW | Same as Oclip 2 Pro | IP66 | 79.5 g | $94.99 (Premium bundle listed) |
| Perun 3 | Turbo 3,000~800~600 lm (2+180+30 min); High 600~120 lm (300+30 min); Med 120 lm (25 h); Low 30 lm (89 h); Moon 5 lm (20 days); Red 60 lm (14 h) and 15 lm (70 h) | Headband, magnetic tail, clip | IP68 | 150 g | $89.99 |
| ArkPro | Pure Flood Turbo 1,500~520 lm (4+140 min); High 520~100 lm (155+10 min); Med 100 lm (13 h); Low 15 lm (72 h); Moon 1 lm (14 days); 365 nm UV | Pocket carry; no magnet listed | IPX7 | 115 g | $99.99 |
| Marauder Mini | Floodlight Level 1 100 lm (35.5 h); Level 2 200 lm (21 h); Level 3 400~180~90 lm (10 h 30 min + 10 + 10 min); up to 7,000 lm | Holster; no magnet listed | IPX8 | 462 g | $199.99 |
Key light: Olight Oclip 2 Pro. The hard part of a key light is aiming it from an awkward mount. Olight pairs a 115° head tilt with 360° clip rotation and says "Set the angle once and it holds." Tail and clip magnets grab steel, and the clip takes straps and edges up to 14 mm. Its limit is battery size: 600 mAh, so Medium flood lasts 3 hours 45 minutes, and a two-hour job uses 120 ÷ 225 = 53% of it. The Premium version adds a 1,000 mAh charging dock that Olight says gives "twice the total runtime."
Fill light: Olight Perun 3. A fill light has to follow your eyes, and a headlamp does. The Perun 3's Med mode runs 120 lumens for 25 hours, so the same two-hour job uses 2 ÷ 25 = 8%. The runtimes are consistent with the battery sizes: the Perun 3 manual lists an 18 Wh battery, and 120 lm × 25 h ÷ 18 Wh ≈ 167 lumen-hours per watt-hour; the Oclip 2 manual lists 2.22 Wh, and 100 lm × 3.75 h ÷ 2.22 Wh ≈ 169. Its limits: the headlamp bracket is metal, and Olight warns it "is expected to scratch the body of the torch if taken in / out repeatedly." Its manual also describes a proximity sensor that drops Turbo to High if the lens is covered, which can trigger when you lean into a tight bay. Olight's best headlamps roundup compares it with lighter options.
Low light and UV: Olight ArkPro. A low light needs to fit into gaps, and the ArkPro is a flat 124 × 27 × 16 mm. Pure Flood Low runs 15 lumens for 72 hours, and its 365 nm UV doubles as the leak finder. Its limits: Olight lists no magnet, so you need a flat, cool spot to set it on, and the manual notes the switch "is magnetically sensitive; its function may be affected by strong magnets nearby."
Not a good fit: Olight Marauder Mini. It is a search light: 7,000 lumens, 90,000 candela and 600 m of throw, weighing 462 g with no magnet listed. Under a hood, its strength becomes a liability. Its lowest floodlight level, 100 lm for 35.5 hours, is usable, but you would be carrying $199.99 and nearly half a kilogram to do a clip light's job. Keep it for spotting a deer on the road shoulder, not for reading a belt diagram.
Note: Olight's Light Stand ($27.99 regular price) has a 1/4-inch nut, and its listed compatible products are lanterns and work lights such as the Swivel Pro, not the clip lights and flashlights above. Check that compatibility list before you buy it as a third hand.
Can I Drive a Car If the Engine Light Is On?
A steady check engine light means get the car serviced soon; a flashing one means ease off right away and get it checked before driving further. North Carolina's Department of Environmental Quality says most manufacturers advise service "as soon as conveniently possible," while Oregon's DEQ says that if the light is flashing, "vehicle operation is discouraged until the malfunction is repaired."
Consumer Reports explains the urgency of a flashing light in its guide to the check engine light: "a blinking light usually indicates an engine misfire so severe that unburned fuel is being dumped into the exhaust system, where it can quickly damage the catalytic converter." It also advises checking the dashboard for low oil pressure or overheating, which mean "you should pull over and shut off the engine as soon as you can find a safe place to do so."
This table puts the agency guidance into steps for a night-time stop.
| What you see | What the source says | What to do tonight |
|---|---|---|
| Steady check engine light | NC DEQ: most manufacturers advise service "as soon as conveniently possible" | Drive gently, check the gas cap, book a code scan |
| Flashing check engine light | Oregon DEQ: operation "is discouraged until the malfunction is repaired" | Reduce speed and load, stop somewhere safe, arrange service |
| Light plus low oil pressure or overheating | Consumer Reports: pull over and shut off the engine | Stop, let it cool, look for leaks with a flood light |
| Light on at an emissions test | Oregon DEQ: the vehicle "will not pass the emissions test" | Repair and clear the fault before the test |
| Steam or overheating | AAA: "Never remove a hot radiator cap" | Wait at least 15 minutes before adding coolant |
This is where a good flood light earns its place. With the hood up and a flood light on, you can check for a disconnected hose, a wet spot under the engine, or a loose gas cap before you decide whether to drive on or call a tow.
What Usually Causes the Engine Light to Come On?
The engine light comes on when the car's on-board diagnostics (OBD) system finds a fault that could raise emissions. Oregon DEQ names monitored systems such as evaporative controls, oxygen sensors and exhaust gas recirculation, and it says "A broken gas cap, or a gas cap not completely tightened, can cause a check engine light." Only a scan tool reading the stored code tells you which fault it is.
Oregon's OBD FAQ explains that "Most OBD vehicles complete a series of manufacturer defined diagnostic checks for evaporative gas leaks," which is why a cap that isn't clicked shut can set the light. It adds that the system can turn the light off by itself "if the fault condition no longer exists after several 'trips.'" North Carolina's emissions FAQ says that "most cases retightening will solve the problem" when the cap is the cause, and Consumer Reports adds that "it may take several trips before the light resets."
With a flood light and five minutes, you can check the causes you can see:
- The gas cap: reseat it until it clicks.
- Vacuum and intake hoses: look for one that is split, collapsed or slipped off its fitting.
- Connectors you touched recently: an unplugged sensor after a repair is easy to miss in the dark.
- Oil or coolant where it shouldn't be: around spark plug wells, hoses and the oil filter.
If nothing is visible, the stored code is the next step. A parts store or repair shop can read it, and the code narrows the search to one system.
How Much Do Undercarriage Lights Cost?
Undercarriage lights, also called underglow or underbody kits, cost about $180 to $260 at list price from one maker before installation. OPT7 lists its AURA Flexible LED Underglow Lighting Strip Kit at $179.99 and its AURA PRO LED Aluminum Underglow Lighting Kit with Bluetooth at $259.99. They are decorative and don't help with repairs.
OPT7's product pages for the AURA flexible strip kit and the AURA PRO aluminum kit showed those list prices, with lower sale prices, when checked in September 2026. Installation and wiring add to the cost, and rules on colored lights visible from outside a vehicle vary by state, so check your state's vehicle code before you wire a kit for road use.
If you want light under the car to work on it, the cost is lower and the light is more useful. This table compares the options.
| Option | Price (September 2026) | What it does |
|---|---|---|
| OPT7 AURA Flexible LED Underglow Strip Kit | $179.99 list | Decorative color glow under the body; fixed to the car |
| OPT7 AURA PRO Aluminum Underglow Kit with Bluetooth | $259.99 list | Decorative, app-controlled glow; fixed to the car |
| Olight Oclip 2 Pro | $54.99 regular | Magnetic clip flood light for engine bay and under-car work |
| Olight Perun 3 | $89.99 regular | Headlamp for creeper work and roadside repairs |
Engine Bay Light Checklist Before You Open the Hood
Use this checklist to set up an engine bay light kit in under two minutes. It covers mounting, modes, heat and safety in the order you will meet them, so you can get both hands on the job with the light already where you need it. Print it or keep it on your phone in the glove box.
- Charge the lights before the job. The Perun 3 manual lists under 4 hours for a full charge, and the Oclip 2 manual says it can't charge above 45°C, so don't plan on topping up under a hot hood.
- Park on level ground, set the parking brake, let a hot engine cool, and never open a hot radiator cap.
- Wait for the radiator fan to stop, and keep lights and cables clear of it; it can start with the car off.
- Find two steel mounting spots with a fridge magnet: one high for the key light and one low for the fill or back light.
- Start every light on Medium. Raise brightness only after you have tried moving the light.
- Aim the key light about 45° across the work, not straight down, to cut glare off wet or polished parts.
- Keep lights off anything hotter than warm (these lights are rated to 40 or 45°C), battery terminals and magnetic parts trays.
- Keep brake cleaner and other solvents away from the lens and switch, and take every rag out before you close the hood.
- For leaks, clean first, add the right dye, darken the bay and scan with UV and amber glasses.
- If a check engine light started the job, check the gas cap and visible hoses, then read the code.
- On a roadside, raise the hood, set reflectors, and put a red or beacon light on the rear of the car.
FAQ
Changelog
- September 23, 2026: First published.