Olight makes some of the lights discussed here. Olight specs and prices come from its US product pages as of September 2026. Brightness and runtime figures below are arithmetic from those published ratings, not field measurements.
⚡ TL;DR
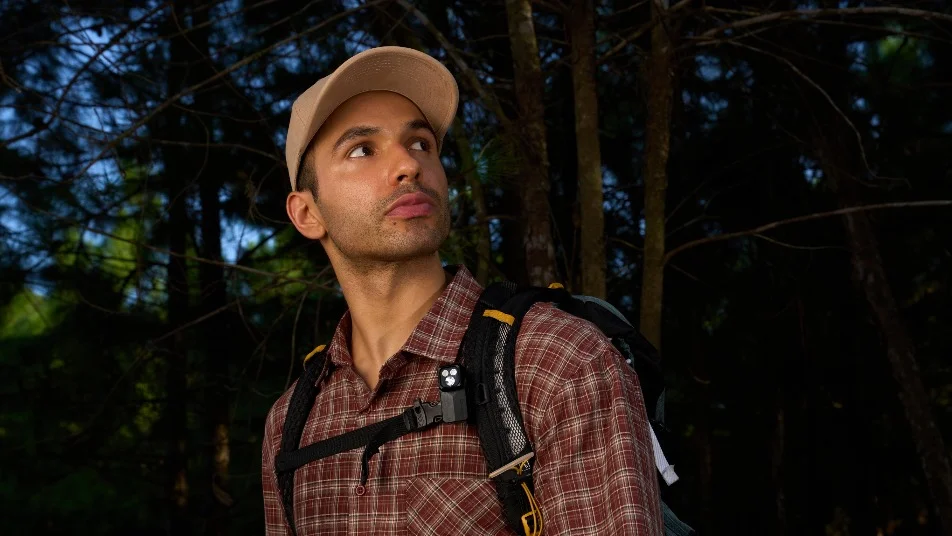
The best field dressing light is two lights, not one: a hunting headlamp run at 30 to 120 lumens for wherever you look, plus a magnetic or clip-on light set 2 to 3 feet away at an angle. The second light fills the shadow your knife hand throws into the cavity and cuts the glare that bounces off wet tissue.
If you have ever knelt over a deer after dark with a single headlamp, you know the problem. Your hand, wrist and knife sit exactly between the light and the cut, so the spot you need to see is the spot in shadow. Turn the headlamp up and the wet membranes throw the beam straight back into your eyes. Then your gloves are bloody and you still need to adjust the light.
This table is a field dressing light gear list: what each light does, the type that works, the minimum specs worth paying for and the Olight model that fits.
| Job | Recommended type | Minimum specs | Olight example |
|---|---|---|---|
| Main light where you look | Headlamp that also works handheld | 30 to 120 lumen modes, a glove-friendly button, IPX7 or better | Olight Perun 3 (IP68) |
| Fill light at an angle | Clip or magnetic light with a tilting head | Clip or magnet, a 100-lumen mode that lasts past 1 hour, IPX6 or better | Olight Oclip 2 Pro (IP66, 115° head tilt) |
| Budget fill light | Small clip light with a magnet | 100-lumen mode, IPX6 | Olight Oclip Pro S (IPX6) |
| Truck or camp work area | Large area light with a wide flood | Several hours at 150 to 300 lumens | Olight Marauder Mini 2 (IPX8) |
| Walking in and out | Dim red mode on the headlamp | 15 to 60 lumens of red | Red modes on Perun 3 or Oclip 2 Pro |
📋 Table of Contents
- 1. What Is the Best Field Dressing Light Setup?
- 2. Why Does One Headlamp Leave the Cut in Shadow?
- 3. How Bright Should a Field Dressing Light Be?
- 4. Where Should You Hang the Second Light?
- 5. Does Color Rendering Matter When Field Dressing?
- 6. Red Light for Field Dressing: Where It Helps and Where It Fails
- 7. What Color Light Is Hardest for Deer to See?
- 8. When Should You Field Dress a Deer?
- 9. How Long Will Your Lights Last Through Recovery and Dressing?
- 10. How Do You Clean Blood and Fat Off Your Lights?
- 11. What Are Common Mistakes in Field Dressing?
- 12. A Reusable Two-Light Kit for Processing Game at Night
- 13. FAQ
What Is the Best Field Dressing Light Setup?
The best field dressing light setup is a headlamp on low or medium plus one fill light placed off to the side and slightly ahead of your cut. The headlamp follows your eyes. The fill light stays put, comes in from a different angle and lights the underside of your hand, the pelvic canal and the back of the chest cavity, where a single headlamp leaves shadow.
Think of it as a key light and a fill light, the same idea a photographer uses. The headlamp is your key light because it goes wherever you turn your head. The fill light is fixed, so it keeps lighting the cavity when you lean in, look down at your knife or turn to grab a game bag.
The setup is small. A headlamp weighs a few ounces, and a clip light fits in a jacket pocket. You do not need a big lantern at the kill site, though one helps at the truck or at camp when you skin and quarter. Olight groups its hunting-oriented handhelds and spotlights on its hunting lights page, and its full headlamp range sits under headlamps.
Use this two-light rule of thumb at the kill site:
- Headlamp: low (about 30 lumens) for the cut itself, medium (about 120 lumens) for moving around the carcass.
- Fill light: 2 to 3 feet from the cavity, 30 to 60 degrees off your line of sight, on the side away from your knife hand.
- Neither light on turbo. Up close, turbo mostly adds glare.
Why Does One Headlamp Leave the Cut in Shadow?
A headlamp sits a few inches above your eyes, so its beam travels almost the same path as your line of sight. Anything between your eyes and the cut, such as your knife hand, forearm or the deer's rib edge, casts its shadow onto the area just behind it. When your hand is inside the cavity, that shadow falls right where the blade tip is working.
The same geometry causes glare. Wet tissue, fat and blood are shiny, and a shiny surface reflects light back at an angle equal to the angle it came in. A light mounted next to your eyes sends its reflection straight back into them. That is why a headlamp that looks fine on a trail can feel blinding over an open chest cavity.
A second light fixes both problems at once:
- It comes from a different direction, so it lights the areas your hand shades from the headlamp.
- Its reflections leave the tissue at an angle away from your eyes, so shiny surfaces stop flashing.
- It adds side shadows to texture, which helps you see where a membrane ends and the gut wall begins.
This framework is why brightness alone does not solve the problem. A 3,000-lumen headlamp on turbo still shades the same spot under your hand. It only makes the glare worse.
Tip: Before you glove up, switch the headlamp to low and set its tilt so the center of the beam lands about a foot in front of your knees when you kneel. You then adjust by moving your head, not by touching the lamp with bloody gloves.
How Bright Should a Field Dressing Light Be?
For close work at arm's length, a headlamp in the 30 to 120 lumen range is usually enough. Using the Olight Perun 3's published 6,400 candela at 3,000 lumens, its 30-lumen Low mode works out to about 256 lux at 20 inches, a little under OSHA's 30 foot-candle level for first aid stations. Its 120-lumen Medium gives roughly four times that.
The math is simple. Illuminance in lux equals intensity in candela divided by the distance in meters squared. To estimate candela at lower modes, this guide scales the published peak candela by the lumen ratio, which assumes the beam shape stays the same. That is a planning estimate, not a spec. Distance matters most: halving the gap between a light and the cut quadruples the light on it.
For a yardstick, OSHA's construction illumination rule sets 10 foot-candles for general shops and 30 foot-candles for first aid stations, infirmaries and offices. One foot-candle is about 10.76 lux, so 30 foot-candles is about 323 lux. OSHA does not regulate hunters; the table only borrows its numbers as a reference for detailed hand work.
This table estimates the light on a field dressing cut from two lights at typical working distances, based on Olight's published ratings.
| Light and mode | Output | Estimated candela | Distance | Estimated illuminance | Foot-candles |
|---|---|---|---|---|---|
| Perun 3 Moon | 5 lm | 11 cd | 20 in (0.5 m) | 43 lux | 4 |
| Perun 3 Low | 30 lm | 64 cd | 20 in (0.5 m) | 256 lux | 24 |
| Perun 3 Med | 120 lm | 256 cd | 20 in (0.5 m) | 1,024 lux | 95 |
| Perun 3 High | 600 lm | 1,280 cd | 20 in (0.5 m) | 5,120 lux | 476 |
| Oclip 2 Pro spotlight Low | 9 lm | 88 cd | 30 in (0.75 m) | 156 lux | 15 |
| Oclip 2 Pro spotlight Medium | 90 lm | 879 cd | 30 in (0.75 m) | 1,562 lux | 145 |
Two things stand out. First, Perun 3 Low and Oclip 2 Pro Low together put roughly 400 lux on the cut, well above the 30 foot-candle yardstick, and each mode is rated for 25 hours or more. Second, the High and Turbo modes are far beyond what the task needs at arm's length, and they drain the battery faster. The Oclip 2 Pro floodlight has no published candela figure, so it is left out of the table. It spreads its lumens wider than the spotlight, which puts less light on the center of the cut and more on the whole carcass.
Where Should You Hang the Second Light?
Hang the second light 2 to 3 feet from the cavity, slightly ahead of where you are cutting, on the side opposite your knife hand, and aim it down into the cut at 30 to 60 degrees. For a right-handed hunter, that means front left. On that side, your knife hand throws its shadow back toward you instead of over the blade tip.
What you hang it on depends on where the deer fell. Here are the mounting points that work in practice, with what each one needs from the light:
- Tree trunk or sapling: A clip that grips a belt, strap or cord wrapped around the trunk. The Oclip 2 Pro clip grips objects up to 14 mm thick, according to Olight.
- Truck bed, tailgate or trailer: A magnet. Steel body panels hold a magnetic tail light at almost any angle.
- Game cart or drag handle: A clip on the frame or strap. Point the head down with the tilt joint.
- Backpack frame or shoulder strap: Clip the light to the pack, then stand the pack upright beside the deer.
- Your own chest strap or collar: A last resort. It moves with you, so it works like a second headlamp, not a true fill light. The Oclip 2 user manual adds a caution for anyone with an implanted heart device: "If you have an ICD or pacemaker, avoid close or prolonged contact with this product to prevent possible interference."
The tilt joint is what makes a clip light useful here. Olight lists a 115° head tilt and 360° clip rotation on the Oclip 2 Pro, which lets you clip it to a vertical trunk and still point the beam down into a carcass on the ground. A fixed-head clip light on a trunk points sideways into the woods.
Note: If you field dress in the dark on public land, place the fill light so it shines down onto the carcass and the ground, not out across a field. A light that looks like a spotlight sweeping a field can draw attention from other hunters and wardens.
Does Color Rendering Matter When Field Dressing?
Yes, color rendering matters when you have to judge the color of tissue. You are sorting dark red bloodshot meat from clean muscle, spotting green or brown gut contents on the carcass and checking blood clots at the wound. A light with a higher Color Rendering Index (CRI) shows those reds and greens closer to how they look in daylight.
The U.S. Department of Energy's LED color fact sheet says a CRI in the 70s is considered acceptable for interior applications, the 80s good and the 90s excellent. It also notes that saturated red, reported separately as R9, is "particularly important" for how skin tones look. Blood and red meat live in that same saturated-red range, so R9 is worth checking if a maker lists it. For a primer on the scale itself, read our guide to what is CRI.
Why this matters for food safety: University of Florida IFAS Extension's wild game field guide tells hunters to trim off any meat that has touched feces, milk or digestive tract contents, and to discard the area of the wound and any blood clots. You can only trim what you can see, and a cool, low-CRI beam makes those color differences harder to spot.
Olight's Perun 3 Mini shows what a high-CRI spec looks like. Olight lists a Neutral White version at CRI 90 and 4,000 to 5,000 K, against CRI 70 for the Cool White version. Use it as a reference for the numbers to look for on any headlamp you consider. The Perun 3 lists a Cool White LED at 5,700 to 6,700 K and no CRI figure.
The DOE fact sheet adds a caveat worth keeping: "there is no substitute for visual evaluation." If you doubt a patch of meat under any headlamp, set it aside and check it again in daylight before you trim.
Red Light for Field Dressing: Where It Helps and Where It Fails
Red light helps before and after field dressing, not during it. A dim red mode keeps your night vision while you walk in, find your pack or check the ground around the carcass. During the cut itself, a red LED shows everything as shades of red, so blood, meat, fat and gut contents lose the color differences you need to see.
The night vision benefit is real. The National Park Service explains that the rhodopsin your eyes need for night vision takes 20 to 40 minutes to start working, that a few seconds of bright light breaks it down, and that "deep red lights do not trigger the neutralization of the rhodopsin." The same article notes that even bright red light can reduce it, and that "a dim red light is best."
That gives you a simple sequence for the whole recovery:
- Walk to the blood trail start on dim red to keep your eyes adjusted.
- Track on white, because red flattens the contrast between blood and leaf litter.
- Dress on low white from both lights.
- Switch back to red for packing up, so the walk out does not start with dazzled eyes.
The Perun 3 lists Red Light (High) at 60 lumens for 14 hours and Red Light (Low) at 15 lumens for 70 hours. The Oclip 2 Pro lists red at 40 lumens for 4 hours and 4 lumens for 27 hours.
What Color Light Is Hardest for Deer to See?
Red and other long-wavelength light is hardest for deer to see. A 1994 study in the Journal of Comparative Physiology A found that white-tailed deer have two cone types, peaking near 450 to 460 nm and about 537 nm. Red LEDs emit well above those peaks, so deer are far less sensitive to them. Less sensitive is not blind, though.
The same study measured a rod pigment peaking at about 497 nm, the blue-green range deer rely on in low light. For comparison, Olight lists the Oclip Pro S red LED at 615 to 630 nm, which is roughly 80 to 90 nm longer than the white-tailed deer's middle-wavelength cone peak. That gap is why a dim red light is the least noticeable choice. A bright red light can still be seen, and deer notice movement and noise whatever the color.
At the kill site, this matters less than hunters think. The deer you are dressing is already down. It matters on the walk in before legal light, when other deer are near the carcass, and on the walk out. In those moments, use dim red and keep the beam low.
The light you use after the shot also has a legal side. These examples show how state rules touch field dressing after dark. Check your own state's current regulations before you go.
| Rule | Example source | What it means for your lights |
|---|---|---|
| No shining wild animals while hunting or holding a firearm, bow or crossbow | Wisconsin DNR shining rules | Aim lights at the carcass and ground. Do not sweep fields or tree lines. |
| No shining 10 p.m. to 7 a.m., Sept. 15 to Dec. 31, even without a weapon | Wisconsin DNR (same page) | Late-night recovery lighting should stay pointed at your work, not at wildlife. |
| No hunting with artificial light that illuminates a game animal | Texas Parks and Wildlife means and methods | Lights are for recovery and dressing, never for locating or taking live game. |
| Validate the license before the deer is moved from the site of kill | Minnesota Rules 6232.0300 | Keep a light on the tag and pen or phone before you drag. |
State rules on lights vary widely. Our overview of hunting with a light laws compares how spotlighting rules differ from state to state.
When Should You Field Dress a Deer?
Field dress a deer as soon as possible once you confirm it is dead and have tagged or validated it as your state requires. North Dakota State University Extension says the animal should be dressed out "as soon as possible after it is killed to ensure rapid loss of body heat." University of Florida IFAS adds that meat should get below 40°F as quickly as possible.
The reason is temperature. NDSU Extension notes that heat stays in the body longer when a carcass is left on the ground, and it recommends propping the chest cavity open with a stick so air can move through it. It also warns against tarps and canvas bags, which hold in heat. UF IFAS explains that the longer meat stays above 40°F, the faster bacteria such as Salmonella and E. coli O157:H7 can grow.
That timing is why a field dressing light belongs in your pack, not in the truck. An evening shot often means dressing in full dark, and the job cannot wait until morning on a warm night. UF IFAS also describes a gutless method: when you cannot get the carcass into a walk-in cooler, air temperature is above 40°F or you plan to grind all the meat, you can skin and bone the meat out without removing the organs.
How Long Will Your Lights Last Through Recovery and Dressing?
A typical evening recovery uses about a quarter of a Perun 3's rated runtime and a fifth of an Oclip 2 Pro's, based on the scenario below. The biggest drain is not dressing; it is tracking on higher modes. Deep cold near 0°F can cut usable battery capacity roughly in half, so charge before every hunt and carry a spare light.
This scenario assumes a 60-minute blood trail, a 45-minute field dressing job and a 90-minute drag. Each share is the time used divided by Olight's rated runtime for that mode. Adding shares across modes is an approximation, because rated runtimes are measured from a full charge.
| Phase | Light and mode | Time | Rated runtime (Olight) | Share of battery |
|---|---|---|---|---|
| Blood trail | Perun 3 High, 600 lumens | 60 min | 300 + 30 minutes (600~120 lumens) | About 20% |
| Field dressing | Perun 3 Low, 30 lumens | 45 min | 89 hours | About 1% |
| Field dressing | Oclip 2 Pro floodlight Medium, 100 lumens | 45 min | 3 hours 45 minutes | 20% |
| Drag out | Perun 3 Med, 120 lumens | 90 min | 25 hours | 6% |
| Perun 3 total | 3 h 15 min | About 27% |
Cold is the variable to plan for. Battery University reports that a battery that gives 100 percent capacity at 80°F will typically deliver only about 50 percent at 0°F. On a late-season night, the Perun 3 total above could use more than half the charge, and the Oclip 2 Pro could use about 40 percent. Keep the fill light in an inside pocket until you need it.
Different recovery situations call for different specs. This table sets out lumens, runtime and water resistance for each one.
| Situation | Lumens that work | Runtime to plan for | Water resistance |
|---|---|---|---|
| Kneeling over a deer in the woods | Headlamp 30 to 120; fill 10 to 100 | 1 to 2 hours on both lights | IPX6 minimum; rain and rinse water |
| Long blood trail before dressing | Headlamp 300 to 600 | 1 to 3 hours at that level | IPX7 or better; wet brush and creek crossings |
| Tailgate or truck bed processing | Area light 150 to 300 on a wide beam | 2 to 4 hours | IPX4 minimum for dew and rinse spray |
| Hanging and skinning at camp | Area light 300 or more, plus headlamp | Several hours | IPX4 minimum |
| Walking in and out in the dark | Red 15 to 60 | Several hours | IPX7 or better |
How Do You Clean Blood and Fat Off Your Lights?
Wipe blood and fat off your lights while they are still wet, then rinse and wash with warm soapy water once you are home. Dried blood and cold fat are harder to remove, especially from knurling, switch edges and charging contacts. How much water a light can take depends on its IP rating, so check that before you rinse it.
The IP rating tells you how far you can go. In the IEC's IP rating system, the second numeral grades protection against liquids on a scale from 0 to 9. Intertek's IEC 60529 testing summary lists level 6 as protection against powerful water jets, level 7 as temporary immersion and level 8 as continuous immersion. That means the Oclip 2 Pro (IP66) can take a strong rinse, while the Perun 3 (IP68) and Marauder Mini 2 (IPX8) are rated for immersion. The IEC reserves level 9 for high-pressure hot water, so none of these lights is rated for that, and no IP level covers solvents or a dishwasher.
A cleaning routine for after the hunt:
- At the carcass: wipe the lens and switch with a clean paper towel before blood dries.
- At the truck: rinse under a water bottle, lens facing down, then dry.
- At home: wash with warm water and mild dish soap and a soft brush, then rinse with clean water.
- Headband: remove it and hand-wash it like a sweaty cap, then air-dry it away from heat.
- Charging contacts: wipe the magnetic charging port and cable end dry and clean before you charge. Fat on the contacts can stop a magnetic cable from seating.
- Check the lens under a bright light. A film of fat scatters the beam and looks like a dim light.
Warning: Treat blood on your lights as you would blood on your hands. UF IFAS recommends glasses plus latex, nitrile or rubber gloves while gutting, and not touching your face or eyes until you have washed your hands. Adjust your headlamp with a clean wrist or forearm, not a bloody glove.
What Are Common Mistakes in Field Dressing?
The most common field dressing mistakes are waiting too long to start, cutting into the gut or bladder, letting contaminated meat go untrimmed and leaving the carcass to cool on the ground or under a tarp. Poor lighting makes the middle two much more likely, because a puncture you cannot see is a puncture you cannot trim.
This checklist pairs each mistake with the lighting habit that prevents it, based on the extension guidance above:
- Starting late: Carry both lights in your pack on every evening hunt, not in the truck. Dressing should start soon after recovery.
- Puncturing the gut or bladder: UF IFAS advises pointing the knife blade outward and taking special care when removing the anus and intestine. Put the fill light on the pelvic area for that step.
- Missing contamination: Scan the whole cavity under white light before you close up. UF IFAS says to trim meat that touched digestive tract contents or feces.
- Leaving it on the ground: NDSU says heat stays in the carcass longer on the ground. Use your light to find a limb or fork where you can prop the cavity open.
- Working with no gloves: South Dakota Game, Fish and Parks advises hunters to wear gloves, bone out the meat and "minimize handling of the brain and spinal cord tissues" in its chronic wasting disease FAQ.
- Skipping the CWD check: The CDC's chronic wasting disease guidance tells hunters to wear latex or rubber gloves when field dressing, avoid handling internal organs, especially the brain or spine, and check state wildlife agency advice on testing. If your deer tests positive, the CDC says not to eat its meat.
- Running turbo up close: It adds glare and drains the battery. Low from two directions beats high from one.
- Using red for the cut: Red light hides color differences. Save it for walking.
- Touching the light with bloody gloves: Set the modes first, then glove up.
Safety note: Cut away from your body and your other hand, and stop to reposition the fill light instead of reaching across the blade. A knife slip in the dark is the most likely injury at the kill site.
A Reusable Two-Light Kit for Processing Game at Night
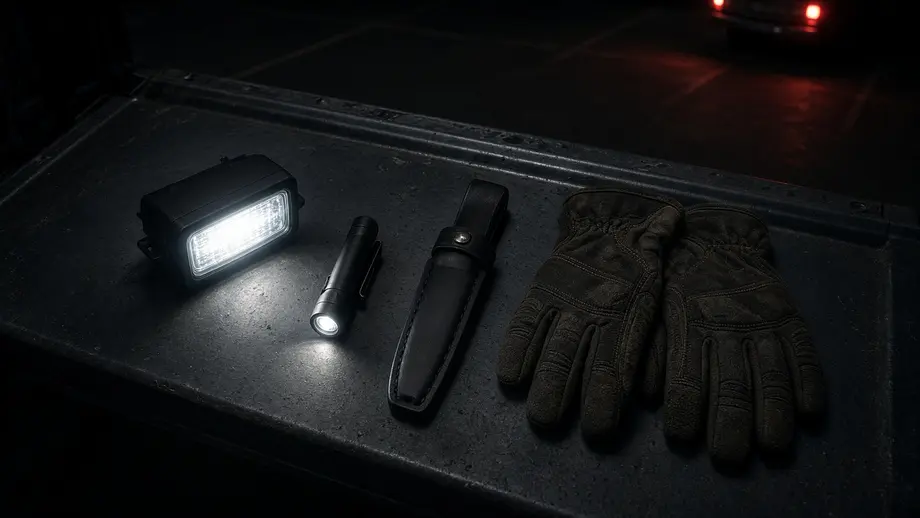
A kit for processing game at night that works season after season is one headlamp you already trust for walking, one clip-on fill light with a tilting head and a magnet, and, for truck or camp processing, one area light. Here is how Olight's current lights fit those roles, including where each one falls short.
The headlamp. The problem is a light that stays on your head at a comfortable level for hours, then comes off for a handheld search. The Olight Perun 3 headlamp (3,000 lumens, 6,400 candela, IP68, $89.99 regular price, September 2026) lists 120 lumens for 25 hours and 30 lumens for 89 hours, plus 60 and 15 lumen red modes. Olight describes its large metal side button as enabling "simple, glove-friendly operation." It also comes off the headband to work as a handheld light with a magnetic tail. The limits: it weighs 5.29 oz (150 g), Olight lists no CRI figure, and 3,000-lumen Turbo is overkill for close work. If you want a lighter first headlamp, our best headlamps guide compares ten rechargeable models.
The fill light. The problem is aiming a light down into a carcass from a trunk, strap or tailgate. The Olight Oclip 2 Pro clip light (530-lumen floodlight, 125 m spotlight, IP66, $54.99 regular price, September 2026) pairs a 115° head tilt with a clip that rotates 360°, grips up to 14 mm and has magnets in the tail and clip. Its floodlight runs 100 lumens for 3 hours 45 minutes, and it adds a red mode. The limit: IP66 covers powerful water jets but not immersion, so rinse it and never soak it.
The budget fill light. The Olight Oclip Pro S (600 lumens, IPX6, $39.99 regular price, September 2026) clips, hangs or holds by magnet and weighs 1.76 oz (53 g). Its 100-lumen Medium lasts 3.5 hours. Olight lists no head tilt for it, so plan to aim it by where you place it: on a magnet or a horizontal strap. It also has a 365 nm UV light, so never look into the UV emitter or shine it at anyone's eyes.
The truck and camp light. The Olight Marauder Mini 2 flashlight (10,000 lumens, 750 m, IPX8, $219.99 regular price, September 2026) lights a whole tailgate. Its floodlight runs 300~150 lumens for 13 + 3 hours, and it has a separate side light and red light. The limits: it weighs 16.38 oz (465 g) with the battery, which is a lot to carry on a drag, and Olight lists a working temperature of 0~40 ℃ (32 to 104°F), so below freezing it is outside its rated range. It is a truck light, not a pack light.
Before your next evening hunt, run through this list:
- Charge the headlamp and fill light, and pack them in the same pouch as your knife and gloves.
- Set the headlamp's tilt at home, kneeling, so the beam lands a foot in front of your knees.
- Practice clipping the fill light to a tree strap and a steel surface in your yard, in the dark.
- Add a short strap or cord to your kit for trunks too thick for a clip.
- Pack gloves, glasses, paper towels, a water bottle and a zip bag for a dirty light.
- Walk in on dim red, track on white, dress on low white from two directions and walk out on red.
For the rest of your preseason list, work through our hunting season gear check a few weeks before opener. A field dressing light setup built this way uses less battery, throws less glare and helps you get clean meat into the cooler faster.
FAQ
Changelog
- September 23, 2026: First published.