⚡ TL;DR
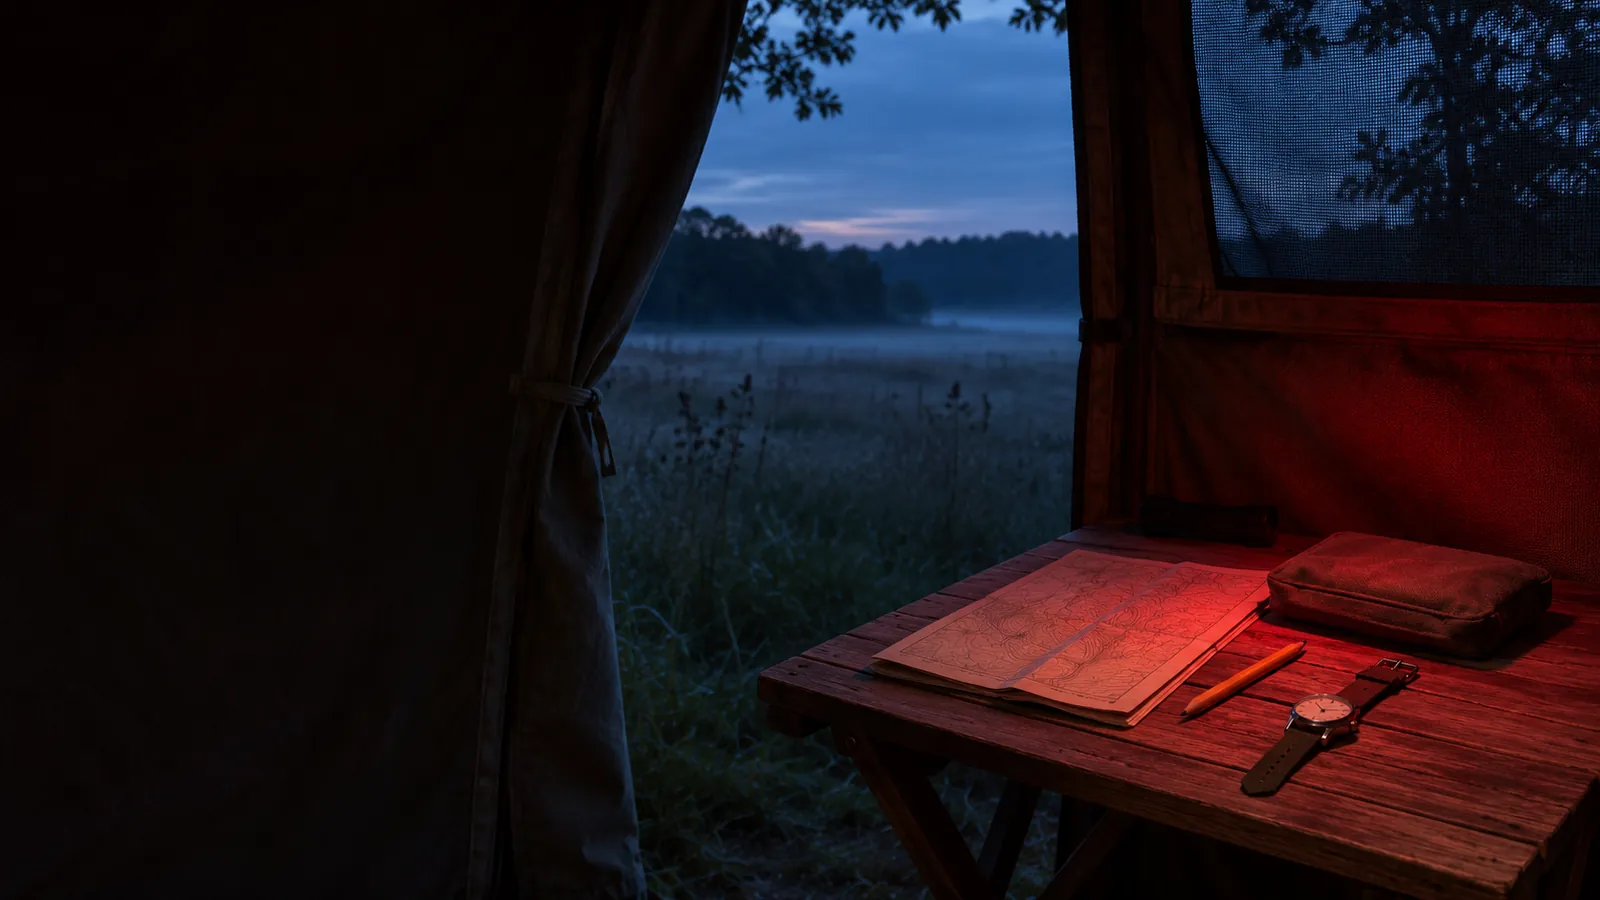
Red light for hunting is most useful when it makes a small preparation task readable, such as finding a pouch, checking a note or organizing equipment at a stationary table. Choose the light's position and output for that job, and keep suitable white light available for color-dependent checks and the route. Red illumination does not establish what an animal can detect.
📋 Table of Contents
- 1. Give Red Light a Specific Preparation Task
- 2. Arrange the Blind Table Around the Work
- 3. Keep Calling-Equipment Preparation Organized
- 4. Use White Light for Color-Dependent Checks
- 5. Match the Light's Format to Your Hands and Viewing Position
- 6. Perun 3 Provides a Defined Red-Low Starting Point
- 7. Oclip 2 Pro Adds Directional Adjustment to a Small Task Light
- 8. Identify the Original Marauder Mini Before Using Its RGB Features
- 9. Keep Red-Light Performance Separate From White-Beam Ratings
- 10. Plan Power Around the Red Mode You Will Use
- 11. A Red Beam Does Not Establish Wildlife Invisibility
- 12. Make the Transition From Near Work to Route Lighting Deliberate
- 13. FAQ
Give Red Light a Specific Preparation Task
Start with the object you need to see. A watch face, a zipper pull and a printed map create different demands, even when they sit on the same table. Decide what a successful check looks like before choosing a color. Define success as reading the correct label or finding the right pocket. That gives you a clearer requirement than the color of the whole space.
We recommend separating stationary preparation from moving around outside. Inside an occupied work area, you can arrange the light and objects around a known surface. On a route, your view must include the ground, changes in level and the space you are entering. A setting that makes a notebook legible does not establish that the route is adequately illuminated.
Our hunting lighting collection is a starting point for comparing formats. Choose among those formats after listing the ordinary tasks you expect to complete. A headlamp can leave hands available, a clip light can hold an angle, and a handheld can be moved between individual objects. Their usefulness depends on the whole arrangement, including where the light will go when the task ends.
| Preparation task | A useful red-light role | When to change the arrangement |
|---|---|---|
| Find a pouch or a familiar fastening | Illuminate the known work area | The item remains hidden or the fastening is unclear |
| Read a plain note or watch face | Provide enough local light for the actual print | Small details cannot be read confidently |
| Organize inactive calling equipment | Locate the case, cable and written reference | A connector or label needs a clearer view |
| Check a map legend or colored label | Begin with the actual information being checked | Color distinctions need suitable white light |
| Sort gloves, straps or other personal items | Keep both the object and its return place visible | The beam moves away whenever you move |
| Prepare to leave the table | Finish the near task and put equipment away | Route lighting requires a separate choice |
Arrange the Blind Table Around the Work
A practical table arrangement begins before the light is switched on. Put the frequently used pouch, notebook and other ordinary items where you can identify them. Keep the space needed for opening a bag clear. If several people share the area, agree which part is a common work surface and which belongings stay with their owner. That avoids using more illumination to solve an organization problem.
For a printed note, position the page so you can read its full line rather than a bright patch in the middle. Check the actual print size, paper finish and viewing position. If you keep tilting the page to recover a missing word, change the light's position or use a more suitable lighting arrangement. Do not treat difficulty reading as a reason to guess what a note says.
For a watch or small display, inspect the information you actually need. A visible outline of the case does not mean the hands, digits or status symbol are clear. A page that looks readable to one person may be awkward for another. Let the person doing the check decide whether the necessary detail is visible, rather than assuming that a shared red setting works for everyone.
Keep the light clear of objects that may cover its outlet. Our manuals warn about direct viewing and the heat produced at the light outlet. A cloth pouch, glove or folded jacket should not become a cover for a running lamp. Use the documented placement or carrying arrangement for the exact product, and keep the ordinary work surface free of items that might move across it.
Keep Calling-Equipment Preparation Organized
At a calling setup, the lighting question can be as ordinary as finding the correct closed case or reading the model name on a cable bag. Keep the equipment inactive while sorting its separate accessories. Match each item to its own instructions and case, so a similar-looking connector or loose accessory does not become an assumption about compatibility.
A short written inventory is useful here. Record the device, its identified power arrangement and the accessories that must remain with it. The light helps you read that information and locate the items. Product operation still belongs to the instructions for that equipment. There is no benefit in changing several unrelated controls while also discovering how the flashlight behaves.
If a label uses colors to distinguish a connection, battery condition or accessory type, read the complete label under suitable white light. Keep any printed words or symbols with the color cue. After the check, return the parts to their known places. This gives the next person a complete arrangement instead of a pile of objects whose identity depends on the color they appeared under red illumination.
Use White Light for Color-Dependent Checks
Red illumination changes how colored information appears. The Federal Aviation Administration's vision guidance explains that red lighting can distort chart colors and that white lighting must remain available for reading when needed. The relevant point for an ordinary map or equipment label is the need to recover the information, rather than preserve a preferred lighting color at all costs.
Before relying on a map, read its legend in ordinary suitable lighting and identify the symbols you will need. At the table, use sufficient white light if a colored line, marking or shaded area becomes ambiguous. Preserve the location and meaning of the feature instead of guessing from a shape that happens to remain visible. A familiar map can still contain unfamiliar details.
The same approach applies to personal equipment. A colored strap, a handwritten mark and the original printed label are different clues. Read the words and inspect the actual item where possible. If two pieces look alike under red, separate them and complete the identification with appropriate lighting. Changing the display or lamp color does not itself confirm which item you have.
Do not use red light as a stain-identification tool. A colored mark on a material does not establish what caused it, and red illumination is a poor basis for deciding its normal color. For an ordinary equipment or clothing check, use appropriate white light and the relevant care or assessment process. This guide's light choices do not provide a blood-tracking method or a conclusion about an unknown material.
Match the Light's Format to Your Hands and Viewing Position
Compare our headlamp options when the task needs both hands and the beam can follow the work. A notebook held in front of you is different from a surface beside another person. Check where the beam goes when you look away, bend down or turn toward a companion. A hands-free light still needs its direction managed around the people sharing the space.
Choose a clip light when a suitable, documented attachment can keep the beam on a stable work area. The attachment point matters as much as the lamp's adjustment range. A soft edge that moves as you handle a bag may keep changing the angle. If the actual arrangement does not stay useful, choose a different approved placement or another light format.
Choose a handheld when you need to move illumination between separate objects. It also needs a planned return place. Set it down only as its instructions and the surface allow, and switch it off before putting it into its carrying arrangement. Compare the complete carrying arrangements for a handheld with its appropriate holster, a headlamp with its headband, and the selected clip-light package.
| Olight model | Relevant published feature | Useful choice to make |
|---|---|---|
| Perun 3 | White and red lighting, supplied headband, red Low and High | Choose a head-worn or handheld arrangement for the task |
| Oclip 2 Pro | Flood, spot and red choices, 115° head tilt and 360° clip rotation | Choose a suitable attachment and aim at the work |
| Original Marauder Mini | Separate white and RGB selections, spot/flood design | Check the exact model and its color indicator before use |
Perun 3 Provides a Defined Red-Low Starting Point
Our Perun 3 combines white and red lighting in a right-angle format with a supplied headband. Its published red outputs are 15 lumens on Low and 60 lumens on High. These are output specifications for those modes. They do not specify illumination on your paper, a reading distance or whether a particular person's small print will be clear.
The manual gives the red controls their own sequence. With the unlocked flashlight off, double-press the side button to access red Low. While the light is in red mode, double-press that button to choose between Low and High. A single press of the side button turns the red light off. Holding the button in red mode has a different documented purpose. It switches between normal and SOS mode.
That distinction is worth learning during ordinary preparation. Someone who assumes that holding the button always changes brightness may choose a different function than intended. Read the red-mode instructions as a complete set, including the starting state. Our flashlight modes guide explains why mode names, access methods and ordinary output choices are separate questions.
For a stationary note check, begin with the lowest suitable documented setting and assess whether the task is readable. Change the position before surrounding the workspace with additional lamps. If the information still needs white light or another viewing arrangement, use that arrangement. Perun 3's red mode is one useful choice within a preparation plan, rather than a requirement to complete every job under red.
Oclip 2 Pro Adds Directional Adjustment to a Small Task Light
Our Oclip 2 Pro has distinct flood, spot and red selections. Its current US information specifies a 115° head tilt and a 360° rotating clip. Those adjustments help you direct a supported attachment toward the page or object, without requiring the person's head to remain pointed at the work.
The Pro's published red Low is 4 lumens and red High is 40 lumens. Comparing those figures with Perun 3's ratings tells you that the documented modes differ. It does not calculate which lamp will produce a particular brightness on a table. Beam distribution, position and the actual viewing arrangement remain part of the choice.
Check the exact model name before following the manual's columns. The Oclip 2 Series manual separates Pro and Ultra configurations. Read the functions in the column for your model. We describe Oclip 2 Pro here by its own white and red features. Package differences also matter when deciding which accessories you will carry, so compare the selected package with the work you intend to do.
An adjustable clip light is especially useful when the task stays in a repeatable position, such as the same notebook area or the same part of an equipment bag. If the work keeps moving beyond that area, a head-worn or handheld option may be easier to manage. Choose for the actual motion of the task, rather than buying adjustment range without a place to use it.
Identify the Original Marauder Mini Before Using Its RGB Features
Our current original Marauder Mini page describes its separate red, green and blue (RGB) LEDs alongside a white spot/flood arrangement. Its manual shows white, red, green and blue color selections and a light-color indicator. Confirm the selected color using the instructions for that exact device, rather than treating any illuminated indicator as proof that red mode is active.
Keep the original Marauder Mini separate from Marauder Mini 2. Their shared name does not make their control layouts, lighting choices or accessories interchangeable. The current Mini 2 listing identifies flood, spot, combined spot-and-flood, red and side-light configurations. That is a different published description from the original model's RGB arrangement.
Use the exact manual when preparing the original Mini's controls and carrying state. Do not copy a sequence from a different Marauder model or rely on the outside color of the housing. Check the selected light setting independently of the housing finish. That distinction is useful whenever several similarly named lights share an equipment shelf.
Keep Red-Light Performance Separate From White-Beam Ratings
A headline maximum output or beam-distance figure belongs to the configuration that produced it. A white spotlight rating is not a red-light range claim. Look for the named mode and its conditions before carrying a number into another comparison. Our throw-versus-flood guide explains the different questions answered by beam distance and nearby coverage.
For your preparation tasks, compare the information available to the person doing the work. Can they read the required line, identify the fastening and put the object back? These checks concern the actual arrangement. They are more useful than assigning every red light a fixed “inside the blind” distance or assuming that a smaller published lumen number automatically fits every nearby task.
Treat a broader observation as a separate job. A visible patch, outline or reflected point does not establish the identity of an animal or the condition of an entire area. Red task illumination cannot turn a partial view into a reliable answer. Stop at what the view actually supports and use the appropriate permitted observation or assistance process when more information is needed.
Plan Power Around the Red Mode You Will Use
Read the runtime for the selected light source and level. Perun 3's published 20-day Moonlight figure belongs to its white-light Moonlight mode. Its red ratings are 70 hours on Low and 14 hours on High. Oclip 2 Pro separately lists 27 hours for red Low and four hours for red High. Those are the individual models' published figures, not a measured comparison of your work surface or a guarantee for an outing.
Use them to distinguish choices within the actual product. A maximum-runtime headline may describe a different source and level from the red setting you intend to use. Keep the mode name attached to the figure when writing an equipment list. Do not borrow the longest number from the listing and apply it to every selection, or turn a runtime rating into a promise that the output remains unchanged throughout it.
Oclip 2 Pro also makes the package decision part of power planning. The current standard package lists the light, a USB-C charging cable and a user manual. The Premium version includes a 1,000 mAh charging dock. Its manual identifies the MCC charging cable as an optional accessory. Support for a charging method does not establish that its cable comes with every package.
Keep the light's red Low and High ratings separate from the additional reserve in the dock. The 27-hour and four-hour entries name the light's red settings. They do not describe one continuous session with automatic access to all stored dock energy. If you choose Premium, plan where the dock will stay between uses and follow its charging instructions. If you choose the standard package, organize its supplied USB-C cable around an appropriate charging opportunity. This is a choice about the complete power arrangement you will carry.
Then plan for the way the equipment will be used. One person reading occasional notes and several people repeatedly sharing a work light create different demands. Decide which lamp serves the stationary workspace and which remains available for the route. Identify the person responsible for preparing each unit. An assumed spare in someone else's bag is less useful than an agreed, accessible light with its correct accessories.
Before packing, follow each model's charging and carrying instructions. Keep the matching cable or other required accessory with the appropriate equipment, and check the selected package before assuming an optional item is included. Avoid making an improvised charging arrangement part of the outing. If a product's condition or power arrangement is uncertain, resolve that during preparation or choose suitable equipment that is ready.
A Red Beam Does Not Establish Wildlife Invisibility
Research on white-tailed deer does not support treating red illumination as invisible. A review of deer color vision by U.S. Department of Agriculture (USDA) researchers reports that deer possess the basis for color vision and can distinguish longer wavelengths under some conditions. Its discussion separates daylight and low-light vision. A color label on a consumer flashlight cannot turn that research into a promise about an animal's response to your presence.
Keep the choice of a preparation light separate from assumptions about wildlife. The useful reason to select a red setting is the ordinary task it can support, with its documented controls and a manageable position. Avoid using a lighting color as permission to approach an animal, disturb it or ignore the rules for the location. Check the current requirements from the relevant wildlife authority and land manager before the outing.
Human night-vision guidance answers another question. Zion National Park's stargazing preparation advice recommends red light because it has less impact on night vision than white light in that setting. This supports giving red a role in a dark-adapted activity. It does not establish that every red output, direction or exposure has the same effect, or provide a wildlife-detection result for an Olight model.
Make the Transition From Near Work to Route Lighting Deliberate
Finish the table task before changing the job. Close the pouch, put away the note and identify what still needs to be carried. Then choose the lighting arrangement for leaving the stationary area. A red pool on the table can leave the route outside that pool poorly described. Choose the next task's illumination deliberately.
Check the route information and the ordinary equipment needed for it before departure. Keep the light you intend to retrieve accessible in its documented carrying arrangement. A lamp buried under the items you just packed is unavailable at the moment you need it. When someone else is providing shared lighting, agree who has it and how each person will manage their own needs.
If the ground or surroundings are unclear, stop and change the plan or illumination. Moving the beam repeatedly does not compensate for an unsuitable route or missing information. Keep ordinary lighting for gates, changes in level and items you must handle. The useful outcome is completing the permitted route and preparation tasks, rather than staying with one color throughout the outing.
At the end, switch the equipment off and follow its charging and carrying instructions. Record practical changes for next time, such as clearer labels, a better place for a pouch or a light format that suits the work. Those are specific improvements you can make before buying another lamp for a job already covered.
FAQ
Changelog
- November 5, 2026: Product information and buying guidance reviewed.