Olight makes some of the lights discussed here. Olight specs and regular prices come from its US product pages and manuals as of September 2026; other makers' specs come from their own pages, and OSHA rules are quoted from the eCFR. All shadow, coverage, lumen and tip-over figures are calculations, not measurements.
⚡ TL;DR
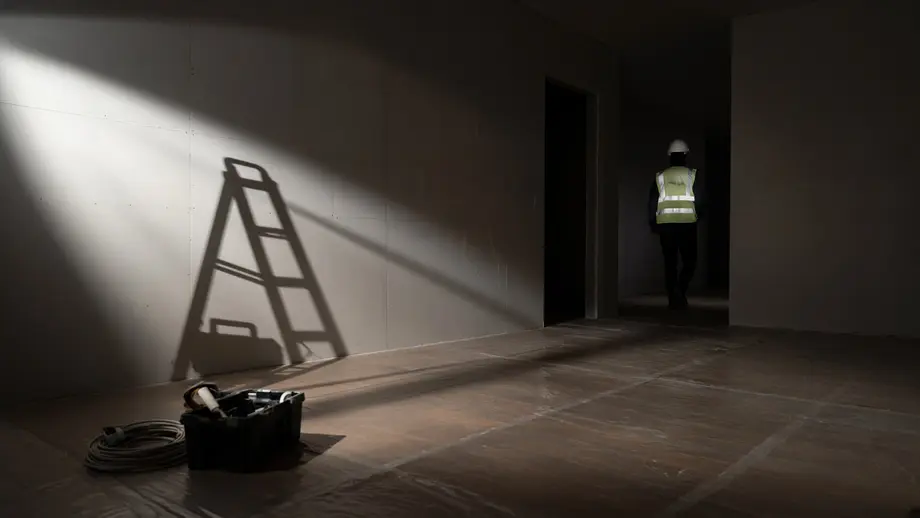
A work light stand should hold the light head about 7 ft up, above head height, set off to one side of the work and aimed down across it, with its legs fully spread and its cord out of walkways. Height mainly shortens floor shadows. The shadow your body throws on the wall you face needs a side angle or a task light.
You set the tripod light in the doorway. Ten minutes later someone catches the cord and the stand goes over. Or it stays up, and your own shadow sits on the drywall you are taping while the corners stay dim. This guide works through height, tip-over and beam spread with numbers you can check.
This equipment table lists each lighting job in a renovation room, the work light stand or task light type that suits it, the minimum spec to look for and an example.
| Job | Recommended type | Minimum spec | Example (maker's ratings) |
|---|---|---|---|
| Light a whole room | Tripod or tower work light | Head extends to about 7 ft; rated lumens above the room's lumen floor | Milwaukee M18 ROCKET LED Tower Light 2130-20: head 4 to 7 ft, 2,000 / 1,300 / 850 lm |
| Light several walls at once | Multi-head tower light | Heads you can aim separately | Milwaukee M18 ROCKET Tower Light/Charger 2136-20: three pivoting heads, 6,000 lm, IP54 |
| Task light at a box, stud or panel | Magnetic clip light | Tilting head, magnets, flood beam | Olight Oclip 2 Pro: up to 530 lm flood, 115° head tilt, tail and clip magnets ($54.99) |
| Fill your own shadow; closets and ladders | Headlamp | A steady mode that lasts the workday | Olight Perun 3: Med 120 lm for 25 hours ($89.99) |
| Walk-throughs and punch lists | Handheld with a long beam | Steady mode of 10+ hours | Olight Warrior Ultra: Med 200 lm for 13 hours, 320 m ($139.99) |
| Low fill light on a bench or floor | Short stand plus a light listed as compatible | 1/4 inch screw mount | Olight Prowess ($139.99) on the Olight Light Stand: 200/312 mm ±5 mm ($27.99) |
📋 Table of Contents
- 1. Quick Answer: What a Good Work Light Stand Setup Looks Like
- 2. How High Should a Work Light Stand Be?
- 3. Is a Tripod Work Light Better Than a Clamp Light?
- 4. Why Do Work Light Stands Get Knocked Over?
- 5. How Do You Keep a Tripod Work Light From Tipping Over?
- 6. Beam Spread: How Far Back Should a Work Light Tripod Sit?
- 7. How Many Lumens Does a Job Site Room Need?
- 8. Sub-Scene Settings: Rooms, Hallways and Exterior Work
- 9. Common Mistake: The Higher the Light, the Better
- 10. Job Site Temporary Lighting Rules: What OSHA's Text Says
- 11. Where Olight Lights Fit on a Job Site, and Where They Don't
- 12. Work Light Stand Setup Checklist
- 13. FAQ
Quick Answer: What a Good Work Light Stand Setup Looks Like
A good work light stand setup uses two layers. The stand light, raised to about 7 ft, lights the room. A magnetic, clip or head-worn task light fills the shadow your own body throws on the wall. Set the stand to one side of the work, not straight behind you, spread its legs fully and keep its cord where nobody walks.
The two layers match how the Canadian Centre for Occupational Health and Safety describes lighting in its lighting ergonomics guide: "General lighting provides fairly uniform lighting," while "Local (or task) lighting increases light levels over the work and immediate surroundings." The same guide warns that "Direct lighting tends to create shadows."
Olight's US store lists no tripod work light. Its flashlights cover the task layer, and its Light Stand is a 312 mm tabletop riser that holds the Prowess, covered with its limits further down.
How High Should a Work Light Stand Be?
Raise the head to the top of the mast, about 7 ft on common tripod lights, so it sits above everyone's head and aims down. Height shortens floor shadows and keeps the light source above eye level. It barely moves the shadow your body throws on a wall you face: from 10 ft back, a 7-ft head still leaves your shadow about 5.4 ft up the wall.
Milwaukee says the head of its M18 ROCKET LED Tower Light "can be extended from 4-7’ to light overhead work or minimize shadows when casting light downward." DeWalt's 20V MAX Cordless Tripod Light page lists: "Telescoping pole extends light head to 7 feet to reduce shadows and glare."
What 7 ft cannot do is lift the light far above you. The CDC's body measurements page gives the measured average height of US men 20 and older as 68.9 inches, or 5.74 ft. A 7-ft head is only 7 − 5.74 = 1.26 ft above that.
The shadow on the wall: a worked example
Picture yourself 2 ft from the wall, facing it, with the stand behind you. A line from the light over your head hits the wall at y = p + (p − H) × s ÷ (D − s), where p is your height (5.74 ft), H the light height, s your distance from the wall (2 ft) and D the stand's distance from the wall. Your shadow covers the wall up to y.
This table applies that formula to three stand heights and two stand positions, based on CDC average height and simple geometry, not measured.
| Stand head height | Stand 10 ft from the wall | Stand 6 ft from the wall |
|---|---|---|
| 4 ft (1.22 m) | 5.74 + 1.74 × 2 ÷ 8 = 6.2 ft (1.88 m) | 5.74 + 1.74 × 2 ÷ 4 = 6.6 ft (2.01 m) |
| 5.5 ft (1.68 m) | 5.8 ft (1.77 m) | 5.9 ft (1.79 m) |
| 7 ft (2.13 m) | 5.74 − 1.26 × 2 ÷ 8 = 5.4 ft (1.65 m) | 5.74 − 1.26 × 2 ÷ 4 = 5.1 ft (1.56 m) |
Going from 4 ft to 7 ft lowers the top of your shadow by less than a foot at 10 ft back and 1.5 ft at 6 ft back. Either way, the wall stays in shadow to 5 ft or more. Two fixes follow: move the stand sideways so the light passes beside you, not over you, or add a task light on your side of your body.
To aim, tilt the head until the beam center lands at mid-wall. To put it 4 ft up a wall 10 ft away from a 7-ft head, the drop is 3 ft over 10 ft, so the tilt is the arctangent of 3 ÷ 10, about 17° below level.
Is a Tripod Work Light Better Than a Clamp Light?
For lighting a whole room, yes: a tripod work light puts its head above everyone at about 7 ft and stands anywhere, while a clamp light lights one area from wherever it can grip. For one fixed task, such as a panel, a box or the top of a ladder, a clamp or magnetic light close to the work puts more light where you look.
This comparison table sets tripod, clamp, magnetic, floor and head-worn lights side by side, with the OSHA text that applies to each.
| Type | Typical height | What it lights | Weak spot | OSHA text that applies |
|---|---|---|---|---|
| Work light on a tripod stand | Up to about 7 ft (Milwaukee, DeWalt) | A room or a wall | Footprint, cord, less stable at full height | 1926.416(b)(2) cords in walkways; 1926.404(b)(1) if it plugs in |
| Corded clamp light | Wherever it can clamp | One area | Exposed lamp and cord | 1926.405(a)(2)(ii)(E) lamp protection; (F) no hanging by the cord |
| Magnetic or clip light | On steel or an edge near the task | One task | Needs steel or a thin edge; short runtime at high output | None specific to battery task lights |
| Floor light or short stand | 0.2 to 0.3 m (Olight Light Stand) | Low work | Throws shadows upward | 1926.416(b)(2) if corded |
| Headlamp | Your head | Where you look | Glare off shiny surfaces | None specific |
For panel work, our electrician flashlight guide explains why a light fixed near the enclosure beats a headlamp.
Why Do Work Light Stands Get Knocked Over?
A tripod work light goes over when something pushes or pulls it above its base: a snagged cord, a shoulder, a ladder, or legs that were never fully spread. A tripod tips when the push times its height is greater than the stand's weight times the distance from its center to the nearest tipping edge.
The push needed is F = W × d ÷ h, where W is the total weight, d the distance from the center to the edge it tips over and h the height of the push. Milwaukee's 2130-20 page, linked above, lists a "Compact 26” footprint with low center of gravity." Reading 26 inches as the circle through the three feet, the radius is 13 in. With three evenly spaced feet, the nearest tipping edge sits at half the radius, d = 6.5 in.
This table shows the push that starts a tip as a share of the stand's total weight, based on Milwaukee's rated 26-inch footprint, not measured.
| Where the push or pull acts | Height h | d | Push needed, share of total weight |
|---|---|---|---|
| Push at the head, fully raised | 84 in (7 ft) | 6.5 in | 6.5 ÷ 84 = 7.7% |
| Push at the head, lowered | 48 in (4 ft) | 6.5 in | 6.5 ÷ 48 = 13.5% |
| Push at the head toward a foot | 84 in | 13 in | 13 ÷ 84 = 15.5% |
| Legs half spread, push at the head | 84 in | 3.25 in | 3.25 ÷ 84 = 3.9% |
| Cord snag pulling at 12 in off the floor | 12 in | 6.5 in | 6.5 ÷ 12 = 54% |
Raising the head from 4 ft to 7 ft cuts the push needed by 1 − 48 ÷ 84 = 43%. Half-spread legs halve it again. And the same cord that tips the stand at 7.7% of its weight when it pulls from the head needs 7 times the force (84 ÷ 12) when it pulls from 12 inches up.
Uneven ground works the same way. A stand tips on a slope steeper than the arctangent of d divided by the height of its center of gravity. Makers do not publish that height, so take three assumed values: 24, 36 and 48 in give tipping slopes of 15.2°, 10.2° and 7.7° with legs fully spread, and 7.7°, 5.2° and 3.9° with legs half spread.
How Do You Keep a Tripod Work Light From Tipping Over?
The tip-over math points to three levers: a wide base, a low point where any cord can pull, and weight. OSHA's construction rules do not set a stability test for light stands, so set the stand up the way its maker specifies, legs fully spread. OSHA's text covers the cords and debris that cause snags.
These are the paragraphs, quoted in full from the eCFR:
- 29 CFR 1926.416(b)(2)(2)): "Working spaces, walkways, and similar locations shall be kept clear of cords so as not to create a hazard to employees."
- 29 CFR 1926.25(a)): "During the course of construction, alteration, or repairs, form and scrap lumber with protruding nails, and all other debris, shall be kept cleared from work areas, passageways, and stairs, in and around buildings or other structures."
- 1926.416(e)(2)(2)): "Extension cords shall not be fastened with staples, hung from nails, or suspended by wire."
- 1926.405(a)(2)(ii)(F)(2)(ii)(F)): "Temporary lights shall not be suspended by their electric cords unless cords and lights are designed for this means of suspension."
A snag near the head needs the least force, and a battery stand light has no cord to snag.
Warning: The tip-over percentages in this guide are geometry, not a stability rating. Follow the stand maker's setup instructions and your employer's site rules.
Beam Spread: How Far Back Should a Work Light Tripod Sit?
Set the stand far enough back that the beam covers the wall: setback equals wall width divided by twice the tangent of half the beam angle. In a 13 × 16 ft room, a 60° beam cannot cover the 16-ft wall from inside the room, and even a perfectly even beam leaves the corners with about half the light of the wall's center.
Milwaukee and DeWalt do not list beam angles on the product pages checked, so this table uses three illustrative beam angles to show the setback each needs, from geometry, not a rating.
| Beam angle (illustrative) | Setback to cover a 13-ft wall | Setback to cover a 16-ft wall |
|---|---|---|
| 60° | 13 ÷ (2 × tan 30°) = 11.3 ft | 16 ÷ 1.155 = 13.9 ft |
| 90° | 13 ÷ (2 × tan 45°) = 6.5 ft | 8.0 ft |
| 120° | 13 ÷ (2 × tan 60°) = 3.8 ft | 4.6 ft |
On a wall facing the light, light falls off with the cube of the cosine of the angle off the beam center, even if the beam sends the same candela in every direction. From 10 ft back, the corner of a 16-ft wall is √(10² + 8²) = 12.8 ft away at 38.7° off center: cos 38.7° = 0.781, and 0.781³ = 0.48. The corners get 48% of the center's light. Pull the stand in to 6.5 ft and the corner sits 10.3 ft away at 50.9°, where it gets 25%.
That is why multi-head lights exist. Milwaukee says its M18 ROCKET Tower Light/Charger lets you "orient the three independently pivoting light heads to cast light in several directions." Aiming one head at each far corner lifts the corners instead of over-lighting the center. For the difference between a wide beam and a long one, see our guide to flashlight throw vs flood.
How Many Lumens Does a Job Site Room Need?
OSHA's Table D-3 sets 5 foot-candles for general construction area lighting, and a foot-candle is one lumen per square foot. A 13 × 16 ft room (208 sq ft) therefore needs at least 208 × 5 = 1,040 lumens landing on the floor on average. A stand light rated below that cannot meet it, and one rated just above it needs almost all its output to land there.
29 CFR 1926.56(a)) reads: "Construction areas, ramps, runways, corridors, offices, shops, and storage areas shall be lighted to not less than the minimum illumination intensities listed in Table D-3 while any work is in progress". NIST's SI conversion factors convert both the footcandle and the lumen per square foot to lux by the same factor, 10.763 91, so the two units are equal.
This table shows what share of each light's rated output must land on the floor of a 208 sq ft room to average 5 or 10 foot-candles, based on makers' rated lumens, not measured.
| Light and mode (maker's rating) | Rated lumens | Share needed for 5 fc (1,040 lm) | Share needed for 10 fc (2,080 lm) |
|---|---|---|---|
| Milwaukee 2130-20, Low | 850 | 122%: not possible | Not possible |
| Milwaukee 2130-20, Medium | 1,300 | 1,040 ÷ 1,300 = 80% | Not possible |
| Milwaukee 2130-20, High | 2,000 | 52% | 104%: not possible |
| DeWalt DCL079, maximum | 4,000 | 26% | 52% |
| Milwaukee 2136-20, maximum | 6,000 | 17% | 35% |
| Olight Prowess, High (first 150 min) | 1,200 | 1,040 ÷ 1,200 = 87% | Not possible |
| Olight Warrior Ultra, Med | 200 | Not possible | Not possible |
| Olight Oclip 2 Pro, floodlight Turbo | 530 | Not possible | Not possible |
Table D-3 sets minimums, and an average of 5 fc can still leave dim corners, as the beam-spread math shows. And much of any light's output lands on walls and ceiling. Treat the lumen floor as a first filter, then check the dimmest spot with a light meter. Our lumens to lux chart covers the unit math in more depth.
Sub-Scene Settings: Rooms, Hallways and Exterior Work
Parts of a renovation site fall under different Table D-3 rows, so the lumen floor and stand setup change with them. A room under renovation reads most closely as general construction area lighting at 5 foot-candles, hallways and exitways are also 5, and accessways and excavation areas are 3. Confirm the row with your site safety lead.
This scene table lists each sub-scene, its Table D-3 row, the lumen floor for 208 sq ft of floor, the stand setup and the task layer.
| Sub-scene | Table D-3 row (OSHA wording) | Lumen floor per 208 sq ft | Stand setup | Task layer |
|---|---|---|---|---|
| Drywall, tape and paint prep | "General construction area lighting," 5 fc | 1,040 lm | Head at full height, off to one side of the wall | Headlamp for your own shadow |
| Rough-in and framing | "General construction area lighting," 5 fc | 1,040 lm | Head high, beam toward the ceiling bays you work in | Magnetic light on a steel box or stud |
| Hallways, stairs and exits | "Indoors: warehouses, corridors, hallways, and exitways," 5 fc; "accessways," 3 fc | 1,040 or 624 lm | Stand at the end of the corridor, cord clear of the path | Handheld |
| Exterior work after dark | "General construction areas, concrete placement, excavation and waste areas...," 3 fc | 624 lm | Water-rated light: IP54 (Milwaukee 2136-20) or IP-55 (DeWalt DCL079) | Handheld with a long beam |
Drywall, tape and paint prep
Your own shadow is the problem: a 7-ft head behind you leaves the wall dark to about 5.4 ft, so set the stand to one side and add a headlamp.
Rough-in and framing
A 7-ft head helps most here, closest to the ceiling bays; a magnetic light on a steel box lights the cavity.
Hallways, stairs and exits
A stand in a corridor is an obstacle, and its cord crosses the path 1926.416(b)(2) says to keep clear. A battery light at the corridor's end keeps it open.
Exterior work after dark
Table D-3's 3-foot-candle row names general construction areas, excavation and waste areas; confirm which row your exterior work falls under. On sloping ground, check the tipping slopes above.
Common Mistake: The Higher the Light, the Better
Raising the head helps, but only up to a point, and it costs stability. On a 7-ft stand the light sits just 1.26 ft above an average man's head, so the shadow on the wall in front of you drops by less than a foot. Meanwhile the push needed to tip the stand falls 43%, and wall coverage depends on beam angle and setback, not height. Place the stand first, then raise it, and fill any dark band with a task light.
Job Site Temporary Lighting Rules: What OSHA's Text Says
OSHA's construction rules set a minimum light level, require either GFCIs or an assured equipment grounding conductor program, and govern temporary lights and their cords. They say nothing about the height or stability of a light stand. The table below quotes each paragraph so you can work from the text rather than a summary.
This rules table lists the OSHA construction paragraphs that apply to a stand light, the text and what each means for the stand.
| 29 CFR paragraph | Text (quoted) | What it means for a stand light |
|---|---|---|
| 1926.404(b)(1)(i)(1)(i)) | "The employer shall use either ground fault circuit interrupters as specified in paragraph (b)(1)(ii) of this section or an assured equipment grounding conductor program as specified in paragraph (b)(1)(iii) of this section to protect employees on construction sites." | Ask which of the two methods your site uses |
| 1926.404(b)(1)(ii) | "All 120-volt, single-phase, 15- and 20-ampere receptacle outlets on construction sites, which are not a part of the permanent wiring of the building or structure and which are in use by employees, shall have approved ground-fault circuit interrupters for personnel protection." | Under the GFCI method, temporary receptacles you plug into need GFCIs |
| 1926.405(a)(2)(ii)(E)(2)(ii)(E)) | "All lamps for general illumination shall be protected from accidental contact or breakage." | Lamps on stands need protection |
| 1926.405(a)(2)(ii)(I)(2)(ii)(I)) | "Flexible cords and cables shall be protected from damage." | Protect cords at doorways, pinch points and sharp edges |
| 1926.405(a)(2)(ii)(J)(2)(ii)(J)) | "Flexible cords used with temporary and portable lights shall be designed for hard or extra-hard usage." | Check the cord rating |
| 1926.416(e)(1)(1)) | "Worn or frayed electric cords or cables shall not be used." | Retire damaged cords |
For utility work after storms, where ground lights must stay out of the work zone, our lineman flashlight guide covers the power line rules.
Where Olight Lights Fit on a Job Site, and Where They Don't
Olight lights fit the task layer under a stand light: a magnetic clip light at the work, a headlamp for your own shadow and a handheld for walk-throughs. Olight's US store lists no tripod work light; its Light Stand is a 200 to 312 mm riser for the Prowess and lanterns. Olight lists no hazardous-location rating for these lights.
Olight Light Stand: a riser, not a tripod
The Olight Light Stand ($27.99, regular price, September 2026) is an aluminum alloy and silicone stand with a 1/4 inch nut and a circular base. Olight lists it at 365 g ±10 g and 180 × 200 mm, with "Height Adjustable: 200/312mm±5mm," about 7.9 or 12.3 in. Its highlights also describe a silicone ring for "stepless height customization," so the page gives both two set heights and stepless adjustment. Olight lists seven compatible products. The Prowess is on that list; the other lights in this guide are not.
Olight Prowess: the light that fits the stand
The Olight Prowess flashlight ($139.99, regular price, September 2026) is the Light Stand pairing Olight lists. Its cool white forward light runs Turbo 5,000~1,200 lumens for 3 + 140 minutes, High 1,200~300 lumens for 150 + 30 minutes, Med 300 lumens for 10 hours and Low 50 lumens for 50 hours, rated at 15,010 candela, 245 m, IPX7 and 269 g. Flip the toggle and a "Warm White 360° Reverse Light" gives up to 800 lumens with stepless dimming, a bench or floor area light.
Limits: High clears the 1,040-lumen floor of a 208 sq ft room only if 87% of its output lands on the floor, and only for 150 minutes. At 12.3 in off the floor it lights from below, so shadows fall upward, like any floor light. The manual lists CRI 70 for both lights and a 0-40°C working range, so judge paint color in daylight.
Olight Oclip 2 Pro: the task light at the wall
The job is lighting the box or cavity your hands are in, from your side of the body. The Olight Oclip 2 Pro clip light ($54.99, regular price, September 2026) pairs "a 115° head tilt with 360° clip rotation," and Olight says "Tail and clip magnets turn it into a magnetic work light."
Floodlight modes include Turbo 530~300~100 lumens for 1 + 58 + 5 minutes and Medium 100 lumens for 3 hours 45 minutes. It is rated IP66 with 2.0 m impact resistance, weighs 75.5 g and fully charges in 1 h 30 min over USB-C, per the manual. Limits: at 530 lumens it cannot light a room, and Medium lasts under 4 hours.
The Oclip 2 manual warnings apply on site. "Do not immerse the product in water or other liquids, as it will damage the product." "In environments below 0°C (32°F), the white light is limited to Low and Medium modes," and "In 0°C to 10°C conditions, the white light Turbo will be unavailable." "Do not obstruct the lens, or else the energy emitted from the light may cause the object to burn," so do not lay it face-down on plastic sheeting. Do not leave it on a truck dash: "Do not place, charge, or use this light in a car or other environment where the temperature may exceed 60°C."
Safety note: If you clip the Oclip 2 Pro to a shirt pocket or chest strap, follow its manual: "If you have an ICD or pacemaker, avoid close or prolonged contact with this product to prevent possible interference." The manual also warns not to look into the light, as this "may cause temporary blindness or permanent damage to your eyes."
Olight Perun 3: filling your own shadow
A headlamp lights wherever you look, so it fills the shadow the stand light leaves in front of you. The Olight Perun 3 headlamp ($89.99, regular price, September 2026) runs High 600~120 lumens for 300 + 30 minutes and Med 120 lumens for 25 hours, with a 3,000-lumen Turbo. It weighs 150 g, is rated IP68, and its magnetic tail lets you "attach it to any iron surface." Limits: 150 g sits on your head all day, the manual lists a 0-40°C working range, and it cautions, "Do not stare at operating light source."
Olight Warrior Ultra: walk-throughs and dark corners
A punch-list walk needs a beam that reaches ceiling corners and attic hatches. The Olight Warrior Ultra flashlight ($139.99, regular price, September 2026) is rated at 2,500 lumens, 26,000 candela and 320 m, IPX8, 178 g. Modes include High 800~250 lumens for 168 + 39 minutes and Med 200 lumens for 13 hours.
Its manual says that in High, Turbo or Strobe, "if an obstruction is detected near the lens, the brightness will automatically decrease to prevent overheating and protect the objects and the lens." Limits: it is a throw light, so it does not replace the stand, and its tail switch should stay in factory Configuration 1, because Configuration 2 puts Strobe on a firm press and hold. The manual cautions, "Do not stare at operating light source," and lists a 0-40°C working range.
Tip: Lock lights before they go in a tool bag. The Oclip 2 manual says, "If the product is carried or transported, please lock it," and "Do not put a hot light into any type of fabric bag or fusible plastic container." The Warrior Ultra, Perun 3 and Prowess lock with a hold of about 2 seconds from off.
Work Light Stand Setup Checklist
A work light stand setup takes eight checks before work starts: lumen floor, placement, setback, legs, height and aim, cords and power, task lights and a light meter reading. Our printable camping checklist adds a job site lighting list for four trades.
- Work out the lumen floor: floor area in square feet times 5 for general construction area lighting. Pick a stand light rated well above it.
- Place the stand to one side of the wall you will work on, not behind you.
- Set the setback from the beam angle: wall width divided by twice the tangent of half the angle.
- Spread the legs fully, as the stand maker specifies, before raising the head.
- Raise the head until the beam clears eye level, then tilt it to mid-wall.
- Keep cords out of walkways under 1926.416(b)(2), plug in only under your site's 1926.404(b)(1) method (GFCI or assured grounding program), and don't hang a light by its cord unless its maker designed it for that.
- Add the task layer: a magnetic light at the work and a headlamp for your own shadow.
- Check the dimmest spot with a light meter while work is in progress.
FAQ
Changelog
- September 25, 2026: First published.