Olight makes some of the optics discussed here. Olight specs and prices come from its product pages as of September 2026; ballistic and safety figures come from the published sources linked in each section, and the click math is our own worked arithmetic.
⚡ TL;DR
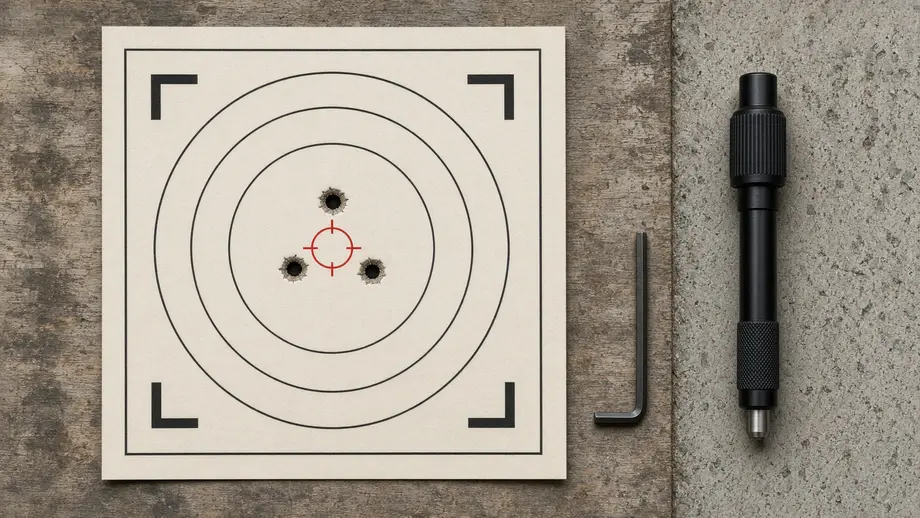
Here is how to zero a red dot on a pistol: rest the gun, fire three-shot groups at 10 yards, and move the dot by the center of each group, never by a single shot. At 1 MOA per click, each click moves impact about 0.1 inch at 10 yards. The most common reason a zero won't hold is a loose mount, so torque the screws first.
Use this table to match what you see on the target to its most likely cause and the first thing to do about it.
| Symptom on the target | Most likely cause | What to do first |
|---|---|---|
| Zero shifts between range trips, or groups drift during a session | Loose mounting screws or no threadlocker | Unload, torque to the maker's spec with blue threadlocker, then re-zero |
| Shots scattered with no clear group | Unstable hold, jerked trigger, or too bright a dot | Shoot from a rest, lower the brightness, use the smallest reticle |
| Group moved the wrong way after an adjustment | Adjuster turned the wrong direction | Undo the same number of clicks, reread the arrows, turn the other way |
| Group moved far more or less than planned | Miscounted clicks, wrong click value, or wrong distance | Recount, confirm the click value in the manual, measure the distance |
| Centered at 10 yards, a little high at 25 | Normal bullet arc with a 10-yard zero | Pick your final distance and refine there |
| Low at 5 yards | Dot sits above the bore (mechanical offset) | Leave the zero alone; hold slightly high up close |
| Adjuster runs out before the group is centered | Mount, plate, or slide-cut problem | Stop adjusting; check the footprint and plate |
| Zero changes when you switch ammo | Different bullet weight or velocity | Zero with the load you carry |
Most first-time red dot owners hit the same wall. They fire one shot, turn a screw, fire again, and chase the dot around the paper until the box of ammo is empty. The other common problem is not knowing how many clicks to turn, or which way. The sequence below fixes both: a set distance, a set group size, and a click table you can read at the bench.
📋 Table of Contents
- 1. How to Zero a Red Dot: The Short Answer
- 2. Before You Start: Torque, Threadlocker and a Tight Mount
- 3. Step 1: Align the Dot Before You Fire
- 4. Step 2: Why Shouldn't You Adjust After Every Shot?
- 5. Step 3: How Many Clicks Do You Need at Each Distance?
- 6. Step 4: Confirm at 25 Yards and Check at 5 Yards
- 7. Common Zeroing Mistakes and How to Fix Them
- 8. How Far Away Should You Zero a Red Dot?
- 9. How Hard Is It to Zero a Red Dot?
- 10. Do Red Dots Need to Be Zeroed?
- 11. When Should You Send the Optic In Instead of Adjusting It?
- 12. Which Osight Fits Your Pistol for Zeroing?
- 13. Your Range-Day Zeroing Checklist
- 14. FAQ
How to Zero a Red Dot: The Short Answer
To zero a red dot on a pistol, do a rough zero at 10 yards, refine it at 25 yards, and check it at 5 yards. From a stable rest, fire three-shot groups, measure from your aim point to the center of each group, and convert inches to clicks. With a 1 MOA optic, most shooters can finish in roughly 15 to 20 rounds.
Zeroing means adjusting the optic so the dot and the bullet meet at a chosen distance. The women's shooting league A Girl & A Gun describes it as adjusting the optic "so your point of aim (the dot) aligns with your point of impact (where the bullet lands) at a specific distance" in its guide to choosing the right zero distance for a red dot pistol.
Ten yards is a good place to start because group centers are easy to see and one click is small enough to fine-tune. It is a poor place to finish if you ever shoot farther, because small errors grow with distance. That is why the sequence ends with a longer check.
The whole process fits on one sheet of paper:
- Mount and torque the optic, then do a dry alignment with an unloaded gun.
- Fire a three-shot group at 10 yards from a rest.
- Measure the group center, convert to clicks, and adjust.
- Repeat until a three-shot group centers on the aim point.
- Move to 25 yards, fire five shots, and fine-tune.
- Walk up to 5 yards and fire two shots to see your close-range offset.
Safety note: Follow the NRA's fundamental rules for safe gun handling and the range officer's commands at all times. Keep the muzzle pointed downrange, keep your finger off the trigger until you are ready to shoot, and wear eye and ear protection. Handle the adjustment tool only with the gun unloaded or benched with the action open, as your range allows.
Before You Start: Torque, Threadlocker and a Tight Mount
Before you fire a shot, make sure the optic cannot move. Apply blue (medium, non-permanent) threadlocker to the mounting screws and torque them to the maker's value. Olight lists 15 to 17 in-lbs for the Osight SE and 17 in-lbs per screw for the Osight 3 MOA; for the SE MOS and XE AMRS, the user manual points you to the installation card in the box. A loose mount makes every later click meaningless.
Olight's Osight SE page says the optic "MUST be mounted properly by applying non-permanent (medium/blue) threadlocker to the included screws" and torqued "to 15-17 in-lbs." Its Osight X page adds that "both over-torquing and under-torquing the hardware may cause the Osight X to lose zero," and that you should follow the plate maker's instructions if you use an adapter plate. For the full mounting sequence, see Olight's guide on how to mount your Osight.
Competition shooter and instructor Frank Proctor gives the same first step in his tips for zeroing a red dot on a pistol: "Check all of your mounting screws prior to zeroing to make sure they are tight, I recommend blue Loctite for these."
This table lists what to bring so you are not stuck at the bench without the one tool you need.
| Item | Why you need it | Notes |
|---|---|---|
| Inch-pound torque driver with the right bit | Hits the maker's torque value instead of guessing | A standard screwdriver cannot tell you 15 from 25 in-lbs |
| Blue (medium) threadlocker | Keeps screws from backing out under recoil | Let it cure as its maker directs before you shoot |
| Paint pen | Witness marks across each screw head and the optic | A moved line tells you a screw turned |
| Adjustment tool from the optic's box | Turns the windage and elevation adjusters | Some adjusters need a specific tool |
| The optic's user manual | Click value and adjustment direction | Keep it in the range bag |
| Paper targets with 1-inch aiming dots | A small, clear aim point | Bring at least six |
| Sandbag, rest, or range bag | Takes your wobble out of the group | Rest the hands or frame, not the slide |
| 50 rounds of your carry or practice load | Zero with the ammo you will actually shoot | Most zeros use 15 to 20 of them |
| Tape measure or rangefinder | Confirms the 10- and 25-yard lines | Many indoor lanes mark distance |
| Small ruler and a pen | Measures group offset and records clicks | A logbook page per optic works well |
| Eye and ear protection | Required at nearly every range | NRA lists both for shooters and spectators |
Tip: After you torque the screws, draw a thin paint-pen line from each screw head onto the optic body. If a line breaks later, a screw moved, and you know why your zero shifted before you touch the adjusters.
Step 1: Align the Dot Before You Fire
Start with a dry alignment so your first live group lands on paper. With the gun unloaded and resting, point it at the center of a target 10 yards away. If your iron sights are visible through the window, set the dot on top of the front sight. If not, use a laser bore sighter or simply start with a large target.
Meprolight's guide on how to zero a red dot sight recommends a laser bore sight to "reduce the amount of ammo needed," and adds that you "should always confirm your zero by shooting live rounds at a fixed target at a known distance." Treat any dry alignment as a starting point only.
Set the gun up so you can repeat the same hold every time:
- Clear the pistol. Lock the slide back, remove the magazine, and look into the chamber.
- Rest the gun or your hands on a bag so the muzzle points at the target without effort.
- Turn the dot on and set the brightness to the lowest level you can see clearly against the target.
- If you use irons, line them up on the aim point, then read where the dot sits relative to the front sight.
- Move the dot toward the top of the front sight with the adjusters, counting clicks as you go.
- Write down the click count so you can undo the change if needed.
Proctor recommends adjusting the dot "so that it is visible but small and clean," because a dim, crisp dot gives "a much more precise point of aim than having the dot adjusted for full sunlight." On a multi-reticle optic, switch to the smallest dot-only setting for zeroing, then switch back afterward.
Step 2: Why Shouldn't You Adjust After Every Shot?
You should not adjust a red dot after every shot because one shot tells you where that shot went, not where the gun is pointed. Grip, trigger press, and ammo all add scatter. The center of a three-shot group averages out much of that scatter, so you adjust once per group and stop chasing a dot that was never wrong.
A little statistics shows why. If each shot scatters randomly around the true point of impact, the center of a group scatters less than any single shot by a factor of the square root of the number of shots. For three shots, that factor is about 0.58, so the group center wanders about 42 percent less than one shot. Five shots cut it by about 55 percent.
A Girl & A Gun gives the same working advice: "fire 3- to 5-round groups, adjusting windage and elevation accordingly." At 10 yards, three shots are enough for the first rough moves, because the corrections are often several clicks. Save five-shot groups for 25 yards, where each click matters more.
Follow this routine for each group:
- Fire three slow, deliberate shots at the same aim point, resting the gun or your hands.
- Ignore one clear flyer only if you called it as it broke. Otherwise, count it.
- Mark the center of the three holes. Eyeball the middle of the triangle they form.
- Measure how far the center is from the aim point, up or down and left or right, in inches.
- Tape or mark the holes so the next group is easy to read.
Tip: If your three shots spread wider than about 2 inches at 10 yards, fix the hold before you touch the optic. Steady the rest, slow the trigger press, and fire another group.
Step 3: How Many Clicks Do You Need at Each Distance?
At 10 yards, one click on a 1 MOA optic moves impact about 0.105 inch, so you need about 9.5 clicks per inch. One minute of angle (MOA) covers about 1.047 inches at 100 yards and shrinks in step with distance. Divide the inches you need to move by the inches per click at your distance, then round to the nearest click.
The NSSF's guide to minute of angle explains that "1 MOA spreads about 1″ per 100 yards. (actually 1.047″)," and gives the working formula: divide the distance in yards by 100 to get inches per MOA, then divide your correction by that number. Olight lists "1 MOA per Click" on the product pages for the Osight 3 MOA and the Osight SE, and the Olight user manuals for the Osight 3 MOA, Osight SE MOS, and Osight XE AMRS all give "1 MOA per click" for both windage and elevation.
This table converts clicks to inches at the distances you are most likely to use, for 1 MOA and 0.5 MOA click values. The values come from 1.047 inches per MOA at 100 yards.
| Distance | 1 MOA equals | Inches per click (1 MOA click) | Clicks to move 1 inch (1 MOA click) | Inches per click (0.5 MOA click) | Clicks to move 1 inch (0.5 MOA click) |
|---|---|---|---|---|---|
| 5 yards | 0.052 in | 0.052 | About 19 | 0.026 | About 38 |
| 10 yards | 0.105 in | 0.105 | About 9.5 | 0.052 | About 19 |
| 15 yards | 0.157 in | 0.157 | About 6.4 | 0.079 | About 12.7 |
| 25 yards | 0.262 in | 0.262 | About 3.8 | 0.131 | About 7.6 |
| 50 yards | 0.524 in | 0.524 | About 1.9 | 0.262 | About 3.8 |
Here is a worked example at 10 yards with a 1 MOA optic. Your three-shot group centers 0.8 inch low and 0.5 inch left of the aim point. Elevation: 0.8 ÷ 0.105 = 7.6, so turn 8 clicks up. Windage: 0.5 ÷ 0.105 = 4.8, so turn 5 clicks right. Fire another group to confirm.
The direction matters as much as the count. Think in terms of where the bullets need to go: if the group is low and left, the correction is up and right. Meprolight's example works the same way: impacts low and left call for "1 MOA up, and 2 MOA right." For the Osight 3 MOA, Osight SE MOS, and Osight XE AMRS, the Olight user manual says "Rotate to adjust elevation or windage" with the included tool and that "Windage (left/right) or elevation (up/down) adjustment is 1 MOA per click." It does not say which way to turn (clockwise or counterclockwise) for up or right, so follow the direction markings next to each adjuster on your optic.
Two habits keep you from turning the wrong way. First, make your first correction a small, known test: turn 5 clicks, fire a group, and confirm the group moved the way you intended before you make big moves. Second, do not judge direction by watching the dot. When you move the point of impact up, the dot moves down relative to where the gun is pointed, which is why "up" can look backward through the window.
Note: If your next group moves the wrong way, you turned the adjuster backward. Undo the same number of clicks to get back to where you were, then turn the same number in the other direction.
The adjustment range also tells you something useful. Olight lists W&E travel of ± 45 MOA on the Osight 3 MOA and ± 35 MOA on the Osight SE. At 10 yards that is about 4.7 inches and 3.7 inches of movement from center, or 45 and 35 clicks each way. If your first group is farther off than that, the problem is the mount, not the dot. Neither the product pages nor the user manuals for the Osight SE MOS and Osight XE AMRS state a travel range, so on those two, use the smaller ± 35 MOA figure as a conservative yardstick: a group more than about 3.7 inches off at 10 yards is a reason to recheck the mount before you spend clicks.
Step 4: Confirm at 25 Yards and Check at 5 Yards
Once a three-shot group centers at 10 yards, move to 25 yards and fire five shots. Any small error left from 10 yards now shows up 2.5 times larger. Adjust in single clicks, each worth about a quarter inch, until the group centers. Then walk up to 5 yards and fire two shots to see how far low they land.
The reason for the 25-yard check is simple angle math. A group center you misread by 0.3 inch at 10 yards is an error of about 2.9 MOA. At 25 yards, that becomes about 0.75 inch; at 50 yards, about 1.5 inches. The 10-yard target hides errors that a 25-yard target shows clearly.
The 5-yard check teaches you about sight height. Your dot sits above the bore, so the bullet starts below your line of sight, rises to meet it, and then falls back. Up close, shots land low even with a good zero. That is not a zero error, and A Girl & A Gun's own rule of thumb is: "Friends don't let friends zero under 10 yards."
This table shows how far above or below the dot a bullet lands with three common zero distances. It is our arithmetic, using Federal's published velocities for its American Eagle 9mm 115-grain FMJ load (1180 fps muzzle velocity from a 4-inch test barrel) and Federal's own reference of sights 0.9 inch above the bore line.
| Distance | 10-yard zero | 15-yard zero | 25-yard zero |
|---|---|---|---|
| 3 yards | 0.6 in low | 0.7 in low | 0.7 in low |
| 5 yards | 0.4 in low | 0.5 in low | 0.6 in low |
| 7 yards | 0.2 in low | 0.4 in low | 0.5 in low |
| 10 yards | On | 0.2 in low | 0.3 in low |
| 15 yards | 0.3 in high | On | 0.2 in low |
| 25 yards | 0.8 in high | 0.3 in high | On |
| 50 yards | 0.7 in high | 0.5 in low | 1.0 in low |
As a check on the method, the same calculation puts a 25-yard zero about 1.0 inch low at 50 yards, close to the 0.9 inch Federal publishes for that load. A red dot usually sits higher than iron sights. If your dot sits an assumed 1.2 inches above the bore, a 10-yard zero lands about 1.3 inches high at 25 yards and 0.6 inch low at 5 yards. Your gun, height, and ammo will shift these numbers, so treat them as a guide and confirm on paper.
Common Zeroing Mistakes and How to Fix Them
The most common zeroing mistakes are adjusting after single shots, turning the adjuster the wrong way, switching ammo midway, changing your grip between groups, and skipping the torque step. Each one wastes ammo because it moves the group for a reason the optic cannot fix. Most can be corrected at the bench in a minute.
This list pairs each mistake with a symptom you can see on paper and the fix.
- Wrong direction. Symptom: the group moves away from the aim point after an adjustment. Fix: undo the clicks, reread the arrows, and turn the other way.
- Mixed ammo. Symptom: groups shift when you open a new box. Fix: zero with one load, ideally the one you carry, as A Girl & A Gun advises: "use the same grain/type you regularly shoot."
- Inconsistent grip. Symptom: groups string left or right, or open up as you tire. Fix: rest your hands on the bag and take a short break between groups.
- Loose screws. Symptom: the zero drifts during the session or between trips. Fix: stop shooting, unload, re-torque with threadlocker, and start over.
- Bright, blooming dot. Symptom: you cannot tell where the dot's center is. Fix: turn the brightness down until the dot is small and crisp.
- Shooting too fast. Symptom: a vertical string of shots. Fix: slow down to one deliberate shot every few seconds.
- Wrong distance. Symptom: the click math never quite works. Fix: measure the line. A 7-yard lane is not a 10-yard lane.
- Resting the slide. Symptom: malfunctions or odd flyers. Fix: rest your hands, the frame, or a mounted light on the bag, never the slide.
Proctor adds one trick for a steadier rest: a weapon light on the pistol gives the bag another point of contact and "keeps the slide and muzzle well away from the bag." If you already run a light from Olight's PL series weapon lights, zero with it mounted, the same way you carry.
Warning: Never clear a malfunction by pointing the muzzle anywhere but downrange. If a round does not fire, keep the gun pointed at the backstop and follow your range's procedure. The NSSF's 10 rules of firearms safety call keeping the muzzle in a safe direction "the most basic safety rule."
How Far Away Should You Zero a Red Dot?
Most pistol red dots are zeroed at 10, 15, or 25 yards. A 10-yard zero is quick and forgiving for new shooters and close-range practice. A 15-yard zero is a middle ground for carry. A 25-yard zero puts shots dead on at 25 and about an inch low at 50. Doing a rough zero at 10 yards and finishing at 25 gets you the benefits of both.
A Girl & A Gun's guide lays out the tradeoff. A 10-yard zero is "especially useful for new shooters or those who primarily train at close range," but "beyond 15 yards, expect deviations." The 25-yard zero is "considered the gold standard for experienced shooters," covering "5 yards to 50," though "it requires a steady hand and consistent shooting fundamentals."
Frank Proctor splits the difference: "I typically zero the pistols at 15 yards because I find it easier to see point of impact," and says a 15-yard zero lets him "easily hit 6” plates at 50 yards." Meprolight's guide suggests "a 25 yard zero is practical for several applications" on pistols. If your pistol is a carry gun, match the zero to the distances you train for; our comparison of red dot vs iron sights for concealed carry covers the draw and practice side of that choice.
Use this table to choose where you finish your zero.
| Your main use | Suggested final zero | Why |
|---|---|---|
| New to red dots, practice mostly at 3 to 10 yards | 10 yards | Easy to see, easy to repeat, small offsets up close |
| Concealed carry and home defense practice | 15 yards | Within about half an inch from 5 to 25 yards in the table above |
| Competition, duty, or shots past 25 yards | 25 yards | Dead on at 25 and about 1 inch low at 50 in the table above |
| Only one range trip before carrying | Rough at 10, finish at 15 or 25 | Uses the fewest rounds and still checks at distance |
How Hard Is It to Zero a Red Dot?
Zeroing a pistol red dot is not hard if you work from a stable rest and adjust by groups. The math is one division, and most 1 MOA optics need only a few adjustments. The hard part is shooting consistent groups. With a steady rest and a tight mount, most people finish in one range session and about 15 to 20 rounds.
The round count below is a plan, not a promise. It assumes a mounted optic that starts within a few inches of center and a shooter who can hold three-shot groups under about 2 inches at 10 yards.
| Stage | Distance | Rounds | What you are looking for |
|---|---|---|---|
| Dry alignment | 10 yards | 0 | Dot near the front sight or the aim point |
| First group | 10 yards | 3 | Where the gun actually shoots |
| Correction group | 10 yards | 3 | Group moved the right way by about the right amount |
| Confirmation group | 10 yards | 3 | Group centered on the aim point |
| Refine | 25 yards | 5 | Center within about a quarter inch per click |
| Close-range check | 5 yards | 2 | How far low you hit up close |
| Total | 16 | Budget a 50-round box for extra groups |
If you are past 30 rounds and still not centered, stop. Something besides the dot is moving. Check the screws, the rest, and your grip, and look at the next section before you keep turning adjusters.
Tip: Write each group in a logbook: distance, measured offset, clicks turned, and direction. When the next group lands, you can see at once whether the optic moved the amount you expected.
Do Red Dots Need to Be Zeroed?
Yes, a pistol red dot needs to be zeroed after you mount it. The optic sits on the slide, and small differences between the slide cut, the plate, and the barrel mean the dot rarely lines up with the bullet out of the box. You should also confirm your zero after remounting the optic, after a hard knock, and on a regular schedule.
Meprolight puts it plainly: "A red dot that isn't properly zeroed won't hit where you're aiming, no matter how good your fundamentals are." A Girl & A Gun adds that "Red dots can shift with recoil, holstering, or wear over time," and recommends reconfirming your zero as part of regular maintenance.
Use this table to decide when a zero check is due.
| Event | Re-zero or confirm? | What to do |
|---|---|---|
| New optic mounted | Full zero | The full sequence in this guide |
| Optic removed and remounted | Full zero | Torque, threadlocker, then zero |
| Battery change on a side- or top-loading optic | Confirm | One group at your zero distance |
| Battery change that requires removing the optic | Full zero | Remount to spec, then zero |
| New ammo load | Confirm | One group at your zero distance with the new load |
| Gun dropped or optic struck | Confirm, and inspect | Look for cracks or moved witness marks first |
| Routine carry gun check | Confirm | One group at the start of a practice session |
Olight says its side-loading battery design allows battery replacement "without removing the optic," which "ensures hassle-free re-zeroing." That saves ammo, but a quick confirmation group is still a good habit on a carry gun.
When Should You Send the Optic In Instead of Adjusting It?
Send the optic back or see a gunsmith when adjusting cannot fix the problem: the adjuster runs out of travel, the zero moves even with properly torqued screws, the dot flickers or has a broken shape, or the housing or lens is damaged. Adjusting a damaged optic only wastes ammo. Clicks can fix aim, not hardware.
The NRA's safety rules say that "if there is any question concerning a gun's ability to function, a knowledgeable gunsmith should look at it." The same logic applies to the optic mounted on it. This table separates problems you can fix at the bench from ones that need the maker or a gunsmith.
| Situation | Fix it yourself | Send it in or see a gunsmith |
|---|---|---|
| Group off by a few inches at 10 yards | Yes, adjust | No |
| Zero drifts and screws are loose | Yes, re-torque with threadlocker | No, unless screws keep backing out |
| Zero drifts and screws stay tight with intact witness marks | No | Yes, contact the optic maker |
| Adjuster reaches its end before the group centers | Check the footprint and plate first | Yes, if the plate and cut are correct |
| Adjuster clicks but the group does not move | No | Yes, contact the optic maker |
| Dot flickers, cuts out, or looks broken apart | Try a fresh battery and lower brightness | Yes, if the problem stays |
| Cracked lens or dented housing | No | Yes, contact the optic maker |
| Stripped screw or damaged slide cut | No | Yes, see a gunsmith |
For Olight optics, the product pages list customer support at cs.us@olight.com. Have the model, the purchase date, and a photo of the target and the witness marks ready.
Which Osight Fits Your Pistol for Zeroing?
The right Osight depends on your pistol's optic cut. The Osight 3 MOA and Osight XE AMRS use the common Ruggedized Miniature Reflex (RMR) footprint, which Olight lists as 407c/507c on the Osight 3 MOA page. The Osight SE MOS mounts directly on compatible full-size Glock MOS slides without a plate. All three adjust 1 MOA per click, so the click table in Step 3 applies to each. Browse the full line of Osight red dot sights if you need a different footprint.
This table collects what Olight's product pages and user manuals list for the three optics, checked on September 24, 2026. Rows marked "user manual" come from the Olight user manual for that model.
| Spec (Olight) | Osight 3 MOA | Osight SE MOS | Osight XE AMRS |
|---|---|---|---|
| Emitter design | Not listed as enclosed | Enclosed | Enclosed |
| Footprint | RMR (407c/507c) | Direct MOS mount | RMR |
| Reticle | 3 MOA Dot | 2 MOA dot and 32 MOA circle | 2 or 6 MOA dot, with or without 32 MOA circle |
| Click value | 1 MOA per click (product page and user manual) | 1 MOA per click (user manual) | 1 MOA per click (user manual) |
| At 10 yards, one click moves impact | About 0.105 in | About 0.105 in | About 0.105 in |
| W&E travel | ± 45 MOA | Not stated on the product page or in the user manual | Not stated on the product page or in the user manual |
| Mounting torque | 17 in-lbs Per Screw | Per the installation card in the box (user manual) | Per the installation card in the box (user manual) |
| Battery-compartment screw | No compartment (built-in battery) | Torque ≤ 5 in-lbs (user manual) | Torque ≤ 5 in-lbs (user manual) |
| Waterproof | IPX6 | IPX7 (user manual) | IPX7 (user manual) |
| Power | Built-in 170mAh rechargeable battery, magnetic charging | Side-loading CR1632 | Side-loading CR1632 |
| Price (September 2026) | $229.99 regular price | $249.99 | $249.99 |
Osight 3 MOA for easy click math. The hard part of zeroing is knowing what one click does. The Olight Osight 3 MOA lists 1 MOA per click, ± 45 MOA of travel, and a 17 in-lbs screw torque, so the table above applies directly. Its 0.94 x 0.85-inch window makes the dot easier to find. Olight also says that after "a rigorous 10,000-round field test, Osight maintains zero calibration." The limits: Olight does not list it as enclosed, its optic is rated IPX6 against IPX7 for the two enclosed models, and three of its four color options were sold out on September 24, 2026. If rain and lint worry you, look at the two enclosed models.
Osight SE MOS for Glock MOS owners. Every plate adds screws that can loosen and shift a zero. The Olight Osight SE MOS is, in Olight's words, engineered with "a direct MOS footprint, eliminating the need for adapter plates on compatible full-size GLOCK® MOS slides." Its 2 MOA dot-only mode covers about 0.2 inch at 10 yards, which gives you a fine aim point, and its user manual lists 1 MOA per click, so the Step 3 table applies. The limits: it fits only compatible Glock MOS slides, Olight does not publish its travel range, and the mounting torque is on the installation card in the box rather than on the product page, so keep that card with the manual.
Osight XE AMRS for a backup sight. A dead battery takes the dot away. The Olight Osight XE AMRS adds a collapsible backup rear sight that Olight says serves "as a reliable alternative in case the optic is powered off," plus a reticle system you can switch to a 2 MOA dot for zeroing. Its user manual lists 1 MOA per click. The limits: Olight does not publish its travel range, the mounting torque is on the installation card in the box, and Olight states compatibility for full-size and compact pistols, so confirm fit before you buy it for a slimline carry gun.
If you are not sure which footprint your slide takes, check the pistol maker's documentation before you order. A wrong footprint is the most common reason a new optic will not mount or hold zero.
Your Range-Day Zeroing Checklist
Bring this checklist to the range and work down it in order. It covers the torque check, the three distances, the click math, and the logbook entry, so you finish with a confirmed zero and a record of how you got there. If any step fails twice, stop and troubleshoot before you fire more rounds.
- At home: mount the optic, apply blue threadlocker, torque to spec, and draw witness marks.
- Pack the tool list above, including the manual and one box of your carry or practice load.
- At the bench: clear the pistol, set a rest, and set the dot to its lowest clear brightness.
- Dry-align the dot at 10 yards with the gun unloaded.
- Fire three-shot groups at 10 yards and correct by about 9.5 clicks per inch with a 1 MOA optic.
- Move to 25 yards, fire five shots, and correct by about 3.8 clicks per inch.
- Fire two shots at 5 yards and note how far low they land.
- Log the final click counts, the load, the distance, and the date.
- Confirm with one group after a battery change, a remount, or a new load.
FAQ
Changelog
- September 22, 2026: First published. Olight specs and prices checked September 24, 2026.